# Generate Dynamic OG Images in Astro with Orshot
> Skip Satori JSX. Design OG templates visually in Orshot Studio and render dynamic social images from Astro Content Collections via one API call.
- **Author**: Rishi Raj Jain
- **Published**: 2026-05-21
- **Tags**: Astro, OG Images, Content Collections, Tutorials
- **Read time**: 8 min read
- **URL**: https://orshot.com/blog/astro-dynamic-og-images
---
If you run a blog or documentation site with Astro, you're probably adding a `title` and `description` to the frontmatter for every post. Ideally, your social previews (OG images) come from this same data.
In reality, most teams either use a single static `og.jpg` across the whole site, get stuck manually designing OG cards in Figma and exporting new PNGs by hand for every content change, or struggle writing code-first Satori JSX with time spent on learning how to load custom fonts and wrangle limited CSS just to match the design given to them in Figma.
The approaches above work, and there are solid tutorials and integrations for it but it also means every layout tweak is a pull request, every new font is more boilerplate, and you are debugging flexbox in a constrained runtime instead of moving type on a canvas. Marketing or DevRel team cannot adjust the card without asking an engineer to touch code and re-deploy.
In this guide, you'll separate and save your OG image template layers in Orshot, allowing anyone to make updates visually in Orshot Studio without ever needing to change the site code again after setup. Design a single OG template in [Orshot Studio](https://orshot.com/features/orshot-studio), mark text or image fields (such as `title`, `description`, and `tag`) as parameters, and then use an Astro route to call the [Orshot Image Generation API](https://orshot.com/docs/image-generation), passing in values from your Content Collection entry.
This workflow also applies to [Starlight](https://starlight.astro.build/ "target=_blank rel=nofollow") docs, where each guide has its own frontmatter. You can generate OG images on demand at request time from the server, or prefetch them during the build process.
## What you'll build
By the end of this guide, every blog post on your Astro site will automatically get a unique OG image rendered from your Content Collection frontmatter — no manual exports, no Satori JSX.
## Prerequisites
- Node.js and npm installed. The demo app in this tutorial uses version 22 of Node.js.
- An [Orshot](https://orshot.com/) account
## Why the code-only OG Image path gets old fast
Satori expects you to express the whole design as JSX with a limited CSS subset. That is fine for a minimal title-on-gradient card.
It gets tiring when you want brand rules, multi-line titles that shrink gracefully, author avatars, category pills, and background images that marketing refreshes every quarter. Each change means editing code, running the dev server, opening a preview URL, and comparing output in Discord or Twitter Card Validator until it looks right.
The deeper issue is ownership. OG images are marketing surface area. Locking them inside `OgImage.tsx` turns every headline experiment into an engineering task.
Orshot does not remove the need for a template, but it moves the template into a visual editor where parameterized layers map cleanly to the same `modifications` object you would have built by hand in code.
## Design the OG template in Orshot Studio
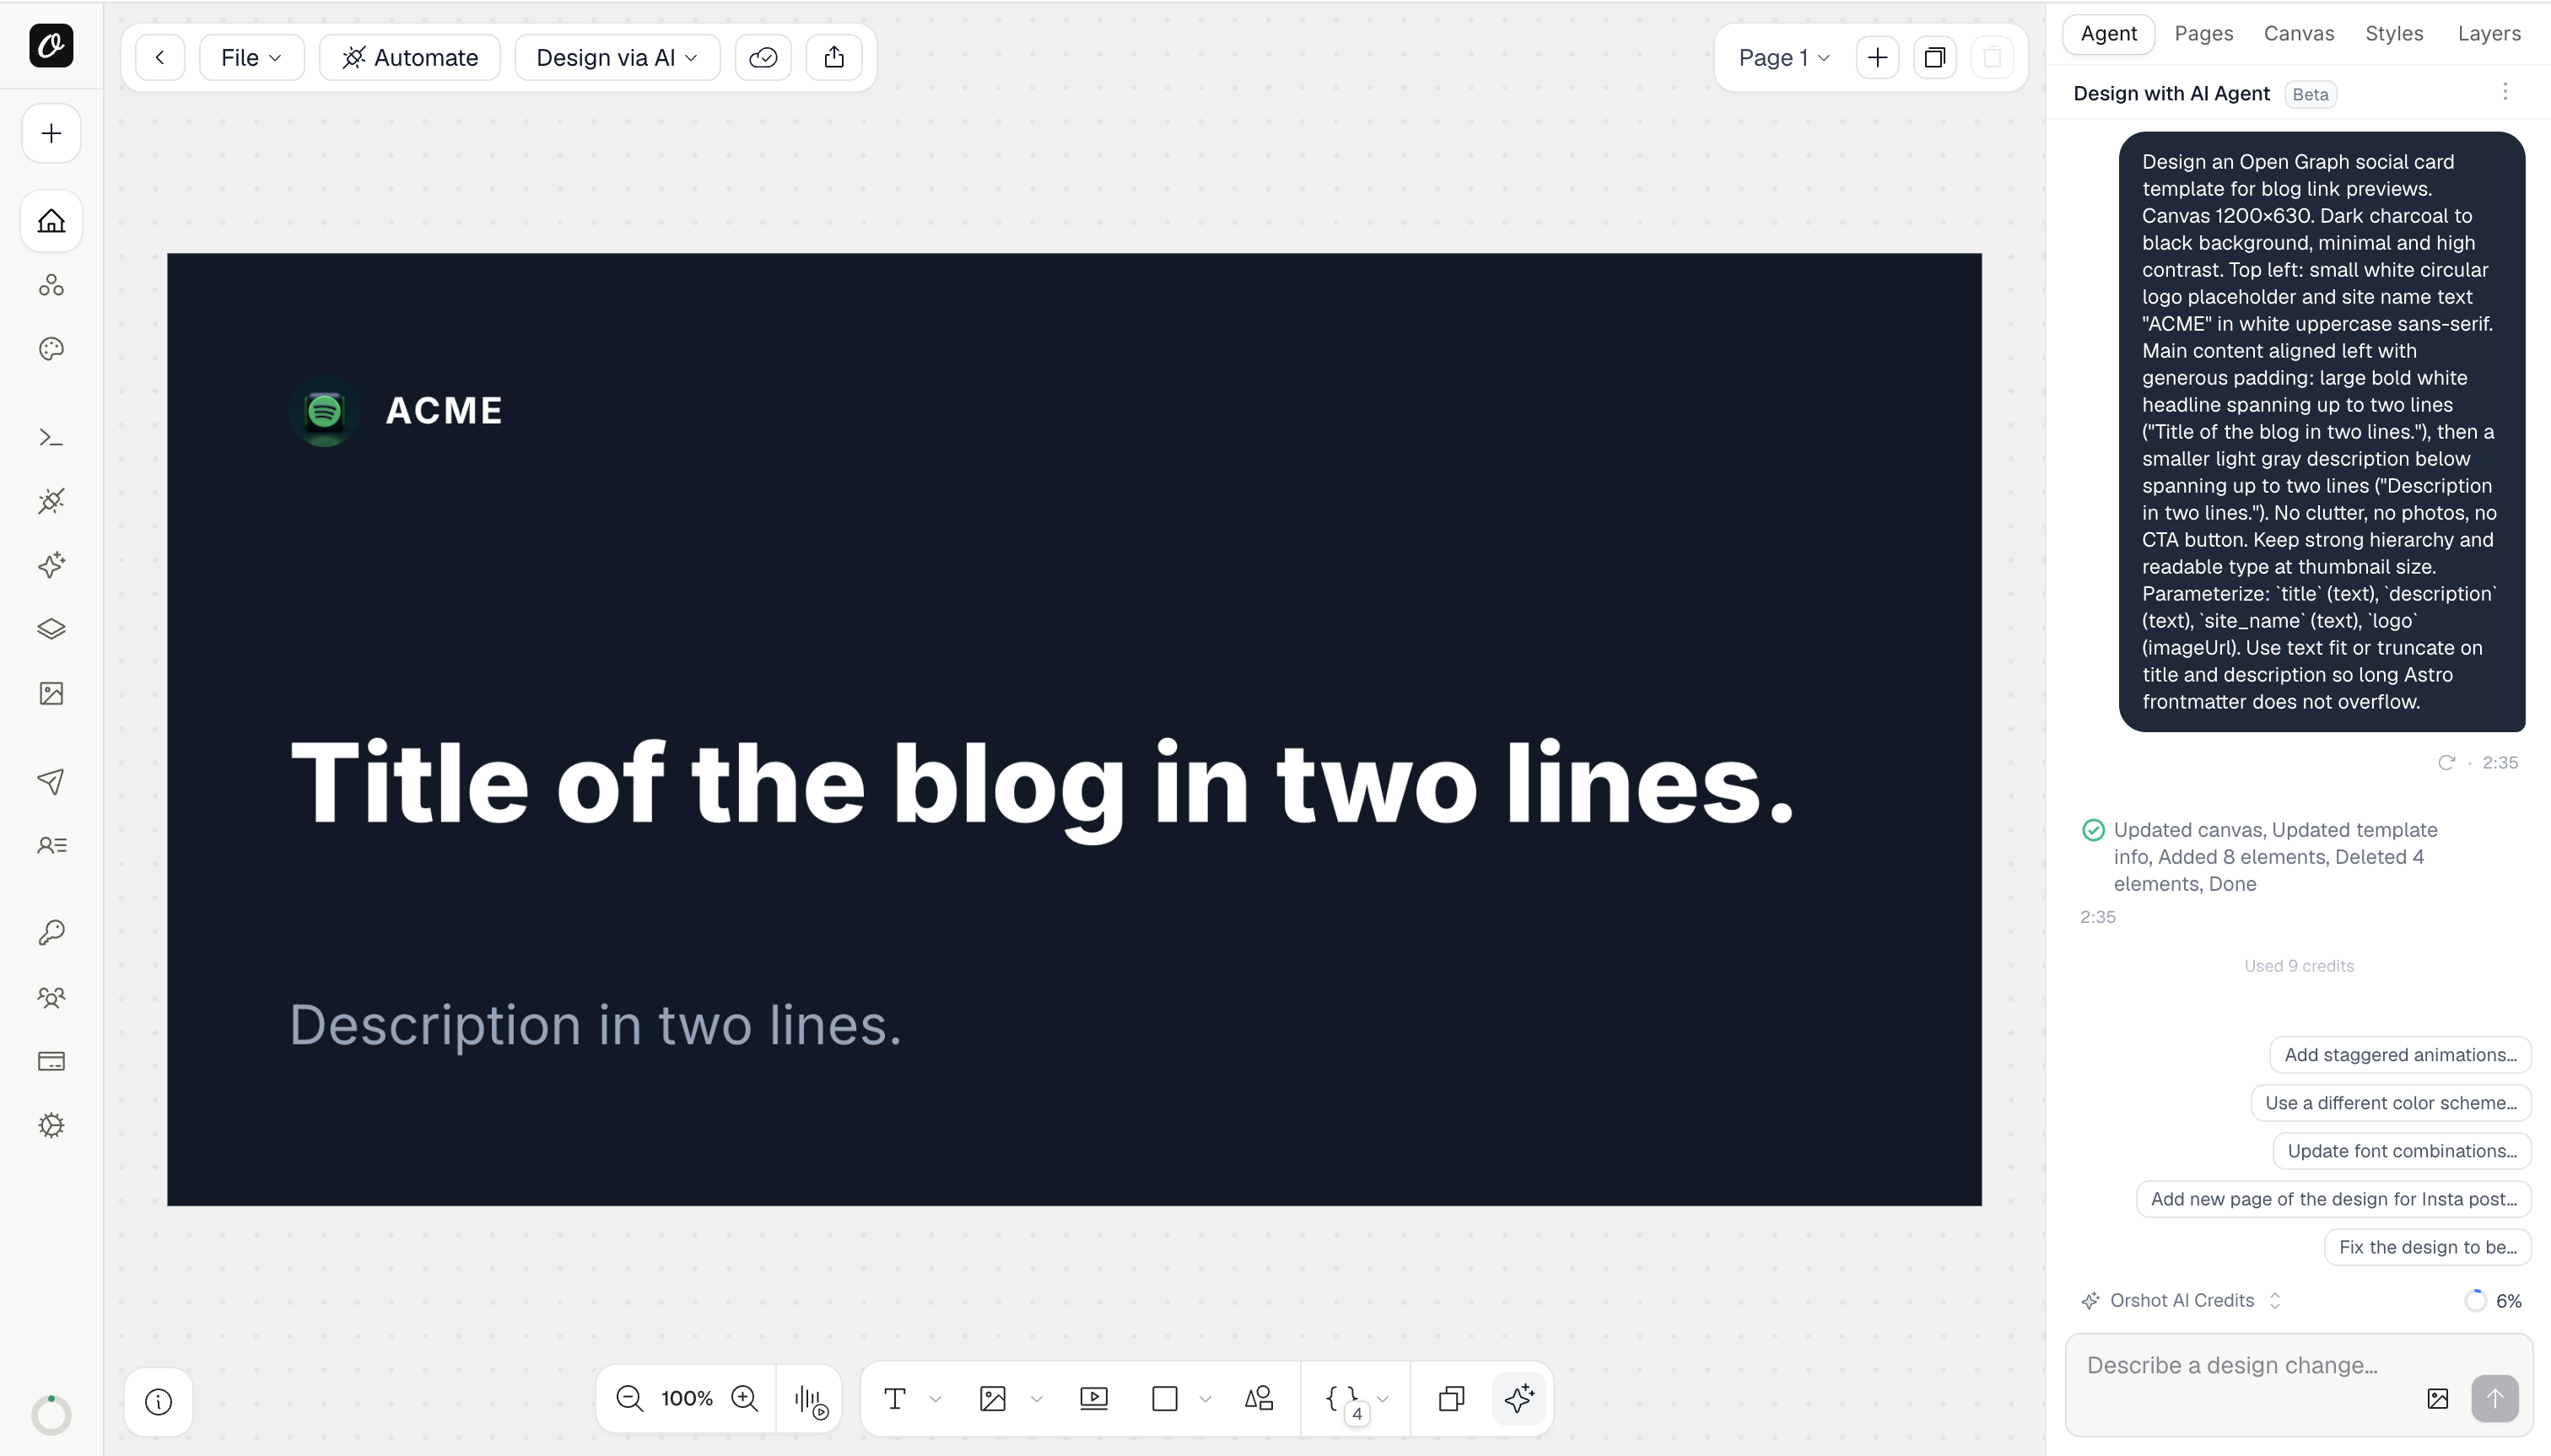
You can design the OG card in [Orshot Studio](https://orshot.com/studio) the same way you would any other template. I kept the first version simple i.e. a logo and site name at the top left, a large bold headline in the middle, and a lighter description underneath. No photos, no clutter, just strong hierarchy that stays readable at thumbnail size.
Here's a prompt that works:
> Design an Open Graph social card template for blog link previews. Canvas 1200×630. Dark charcoal to black background, minimal and high contrast. Top left: small white circular logo placeholder and site name text "ACME" in white uppercase sans-serif. Main content aligned left with generous padding: large bold white headline spanning up to two lines ("Title of the blog in two lines."), then a smaller light gray description below spanning up to two lines ("Description in two lines."). No clutter, no photos, no CTA button. Keep strong hierarchy and readable type at thumbnail size. Parameterize: `title` (text), `description` (text), `site_name` (text), `logo` (imageUrl). Use text fit or truncate on title and description so long Astro frontmatter does not overflow.
Before integrating with Astro, use the preview or Automate panel in Orshot Studio to generate a sample image with mock content. If you notice issues with how the title wraps or scales, take this opportunity to adjust width constraints or text fit settings directly within Studio, rather than waiting until after you've connected the endpoint.
Finally, make a note of your template's ID and double-check the names of all modification keys. These identifiers are visible in the template playground or within the API documentation, and must exactly match the keys you will send from Astro, including letter casing and any underscores.
## Build the Astro application
We will scaffold a minimal Astro app, add a blog Content Collection, expose `/og/[slug].png` as an API route, and point the layout meta tags at that URL.
### Step 1. Scaffold a new Astro project
From an empty directory, create a minimal TypeScript project and start the dev server to confirm the baseline works.```bash
npm create astro@latest og-orshot-demo
cd og-orshot-demo
npm run dev
```Open `http://localhost:4321` once. Stop the server before the next step.
Set your production site origin in `astro.config.mjs`. Crawlers require absolute URLs in `og:image`.```javascript title="astro.config.mjs"
import { defineConfig } from "astro/config";
export default defineConfig({
site: "https://example.com",
});
```### Step 2. Install dependencies for on-demand OG routes
On-demand OG Image routes need server output in production, so add the Node adapter and switch to hybrid mode so static pages stay static while `/og/*` renders at request time.```bash
npx astro add node --yes
npm install zod
```Then, add secrets for local development. Copy your values from [Orshot **Workspace → API Keys**](https://orshot.com/docs/quick-start/get-api-key) and from the template ID from the Studio.```bash title=".env"
ORSHOT_API_KEY="your_api_key_here"
ORSHOT_OG_TEMPLATE_ID="12345"
```Finally, reference them in `src/env.d.ts` so TypeScript knows about `import.meta.env`:```typescript title="src/env.d.ts"
///
interface ImportMetaEnv {
readonly ORSHOT_API_KEY: string;
readonly ORSHOT_OG_TEMPLATE_ID: string;
}
interface ImportMeta {
readonly env: ImportMetaEnv;
}
```### Step 3. Create a sample blog Content Collection
First, define the collection schema in `src/content.config.ts`.```typescript title="src/content.config.ts"
import { z } from "astro/zod";
import { glob, file } from "astro/loaders";
import { defineCollection } from "astro:content";
const blog = defineCollection({
loader: glob({ base: "./src/content/blog", pattern: "**/*.{md,mdx}" }),
schema: z.object({
title: z.string(),
description: z.string(),
pubDate: z.coerce.date(),
}),
});
export const collections = { blog };
```Then, add a sample post at `src/content/blog/hello-orshot.md` as follows:```markdown title="src/content/blog/hello-orshot.md"
---
title: "Hello Orshot OG images"
description: "Dynamic social previews from Content Collections without Satori JSX."
pubDate: 2026-05-19
---
This post exists so we have frontmatter to feed into the Orshot template.
```Next, create a blog page at `src/pages/blog/[slug].astro` that renders the entry body.```astro title="src/pages/blog/[slug].astro"
---
import { getCollection, getEntry, render } from "astro:content";
export async function getStaticPaths() {
const posts = await getCollection("blog");
return posts.map((post) => ({ params: { slug: post.data.slug } }));
}
const { slug } = Astro.params;
const entry = await getEntry("blog", slug!);
if (!entry) return Astro.redirect("/404");
const { Content } = await render(entry);
---
{entry.data.title}
{entry.data.title}
```Run the dev server again and confirm `http://localhost:4321/blog/hello-orshot` loads. Stop the server before the next step.
### Step 4. Configure the OG image API endpoint
Add `src/pages/og/[slug].png.ts` with the following code (social crawlers request this URL with `GET`). The handler loads the blog entry, posts to Orshot, and returns PNG bytes from your domain.```typescript title="src/pages/og/[slug].png.ts"
import type { APIRoute } from "astro";
import { getEntry } from "astro:content";
export const prerender = false;
export const GET: APIRoute = async ({ params }) => {
const slug = params.slug as string;
const entry = await getEntry("blog", slug);
if (!entry) {
return new Response("Not found", { status: 404 });
}
const orshotRes = await fetch("https://api.orshot.com/v1/studio/render", {
method: "POST",
headers: {
"Content-Type": "application/json",
Authorization: `Bearer ${import.meta.env.ORSHOT_API_KEY}`,
},
body: JSON.stringify({
templateId: import.meta.env.ORSHOT_OG_TEMPLATE_ID,
modifications: {
title: entry.data.title,
description: entry.data.description,
},
response: {
format: "png",
type: "base64",
},
}),
});
if (!orshotRes.ok) {
const errorText = await orshotRes.text();
console.error("Orshot render failed", orshotRes.status, errorText);
return new Response("Render failed", { status: 502 });
}
const json = await orshotRes.json();
const raw = String(json.data.content).replace(/^data:image\/png;base64,/, "");
const bytes = Buffer.from(raw, "base64");
return new Response(bytes, {
status: 200,
headers: {
"Content-Type": "image/png",
"Cache-Control": "public, max-age=86400",
},
});
};
```Test the endpoint directly in the browser by visiting `http://localhost:4321/og/hello-orshot.png` directly (or with a curl) once the dev server is running.
> If you prefer not to proxy bytes through Astro, set `response.type` to `"url"` in the Orshot payload and return `Response.redirect(json.data.content, 302)` instead. Most teams keep the `/og/...` path on their own domain for stable crawler behavior.
### Step 5. Use the OG URL in SEO meta tags
Extract a small layout component so every blog page exposes consistent Open Graph and Twitter tags. Create `src/components/Seo.astro` with the following code:```astro title="src/components/Seo.astro"
---
interface Props {
title: string;
description: string;
slug: string;
}
const { title, description, slug } = Astro.props;
const canonical = new URL(Astro.url.pathname, Astro.site);
const ogImage = new URL(`/og/${slug}.png`, Astro.site);
---
```Finally, import it in `src/pages/blog/[slug].astro` inside ``.```astro title="src/pages/blog/[slug].astro"
---
import Seo from "../../components/Seo.astro";
// ...existing frontmatter
---
```Now, view page source of `http://localhost:4321/blog/hello-orshot` and confirm `og:image` resolves to `https://example.com/og/hello-orshot.png`. Paste that OG URL into a social debugger or Slack to verify the preview matches your Orshot template.
## Conclusion
Astro Content Collections already give you structured metadata per page. Orshot gives you a visual, parameterized template that non-engineers can evolve. The glue between them is one API call in a dynamic route, which is smaller than maintaining a parallel Satori layout in JSX for every brand refresh.
If you are starting from a single shared `og.jpg`, this is a reasonable next step before you invest in a full programmatic layout in code.
If you already have Satori working, compare how often you change design versus copy. When design changes are frequent, moving the canvas to Studio and keeping Astro for data usually saves time.
## Resources
- [GitHub Repository](https://github.com/rishi-raj-jain/og-orshot-astro "target=_blank rel=nofollow")