# Partner Dashboard
> Manage workspaces, track usage, and hand off to clients
- **URL**: https://orshot.com/docs/partner-program/partner-dashboard
---
The Partner Dashboard is your central hub for managing client work. Access it from the sidebar by clicking **Partner Dashboard**.
## Dashboard Overview
At the top, you'll see key metrics:
- **Sandbox Renders (This Month)** — Renders used across all sandbox workspaces
- **Active Clients** — Clients with paid subscriptions you referred
- **Total Clients** — All clients you've referred, including inactive
Your current tier and monthly render limit are shown based on your active client count.
## Sandbox Workspaces
Sandbox workspaces are for building, testing, and demoing templates before client handoff.
### Key Features
- **Use partner renders** — Sandbox workspaces consume your partner quota, not a subscription
- **Watermarked output** — Images from sandbox workspaces have a small Orshot watermark
- **Unlimited workspaces** — Create as many sandboxes as you need
- **Full feature access** — All Orshot features work the same as regular workspaces
### Creating a Sandbox
1. From the Partner Dashboard, click **Create Workspace**
2. Toggle **Sandbox Workspace** on
3. Enter a name and slug
4. Click **Create Sandbox Workspace**
## Watermarking
Images rendered from sandbox workspaces include a small watermark. This indicates the workspace is in sandbox mode.
Once you hand off the workspace to a client and they subscribe, the watermark is automatically removed for future renders.
## Client Handoff
 When your client is ready to take ownership of their workspace:
1. **Prepare the workspace** — Ensure all templates and assets are set up
2. **Transfer ownership** — Use the workspace transfer feature
3. **Client subscribes** — After accepting, the client chooses their plan
4. **You get credit** — The client counts toward your active client count
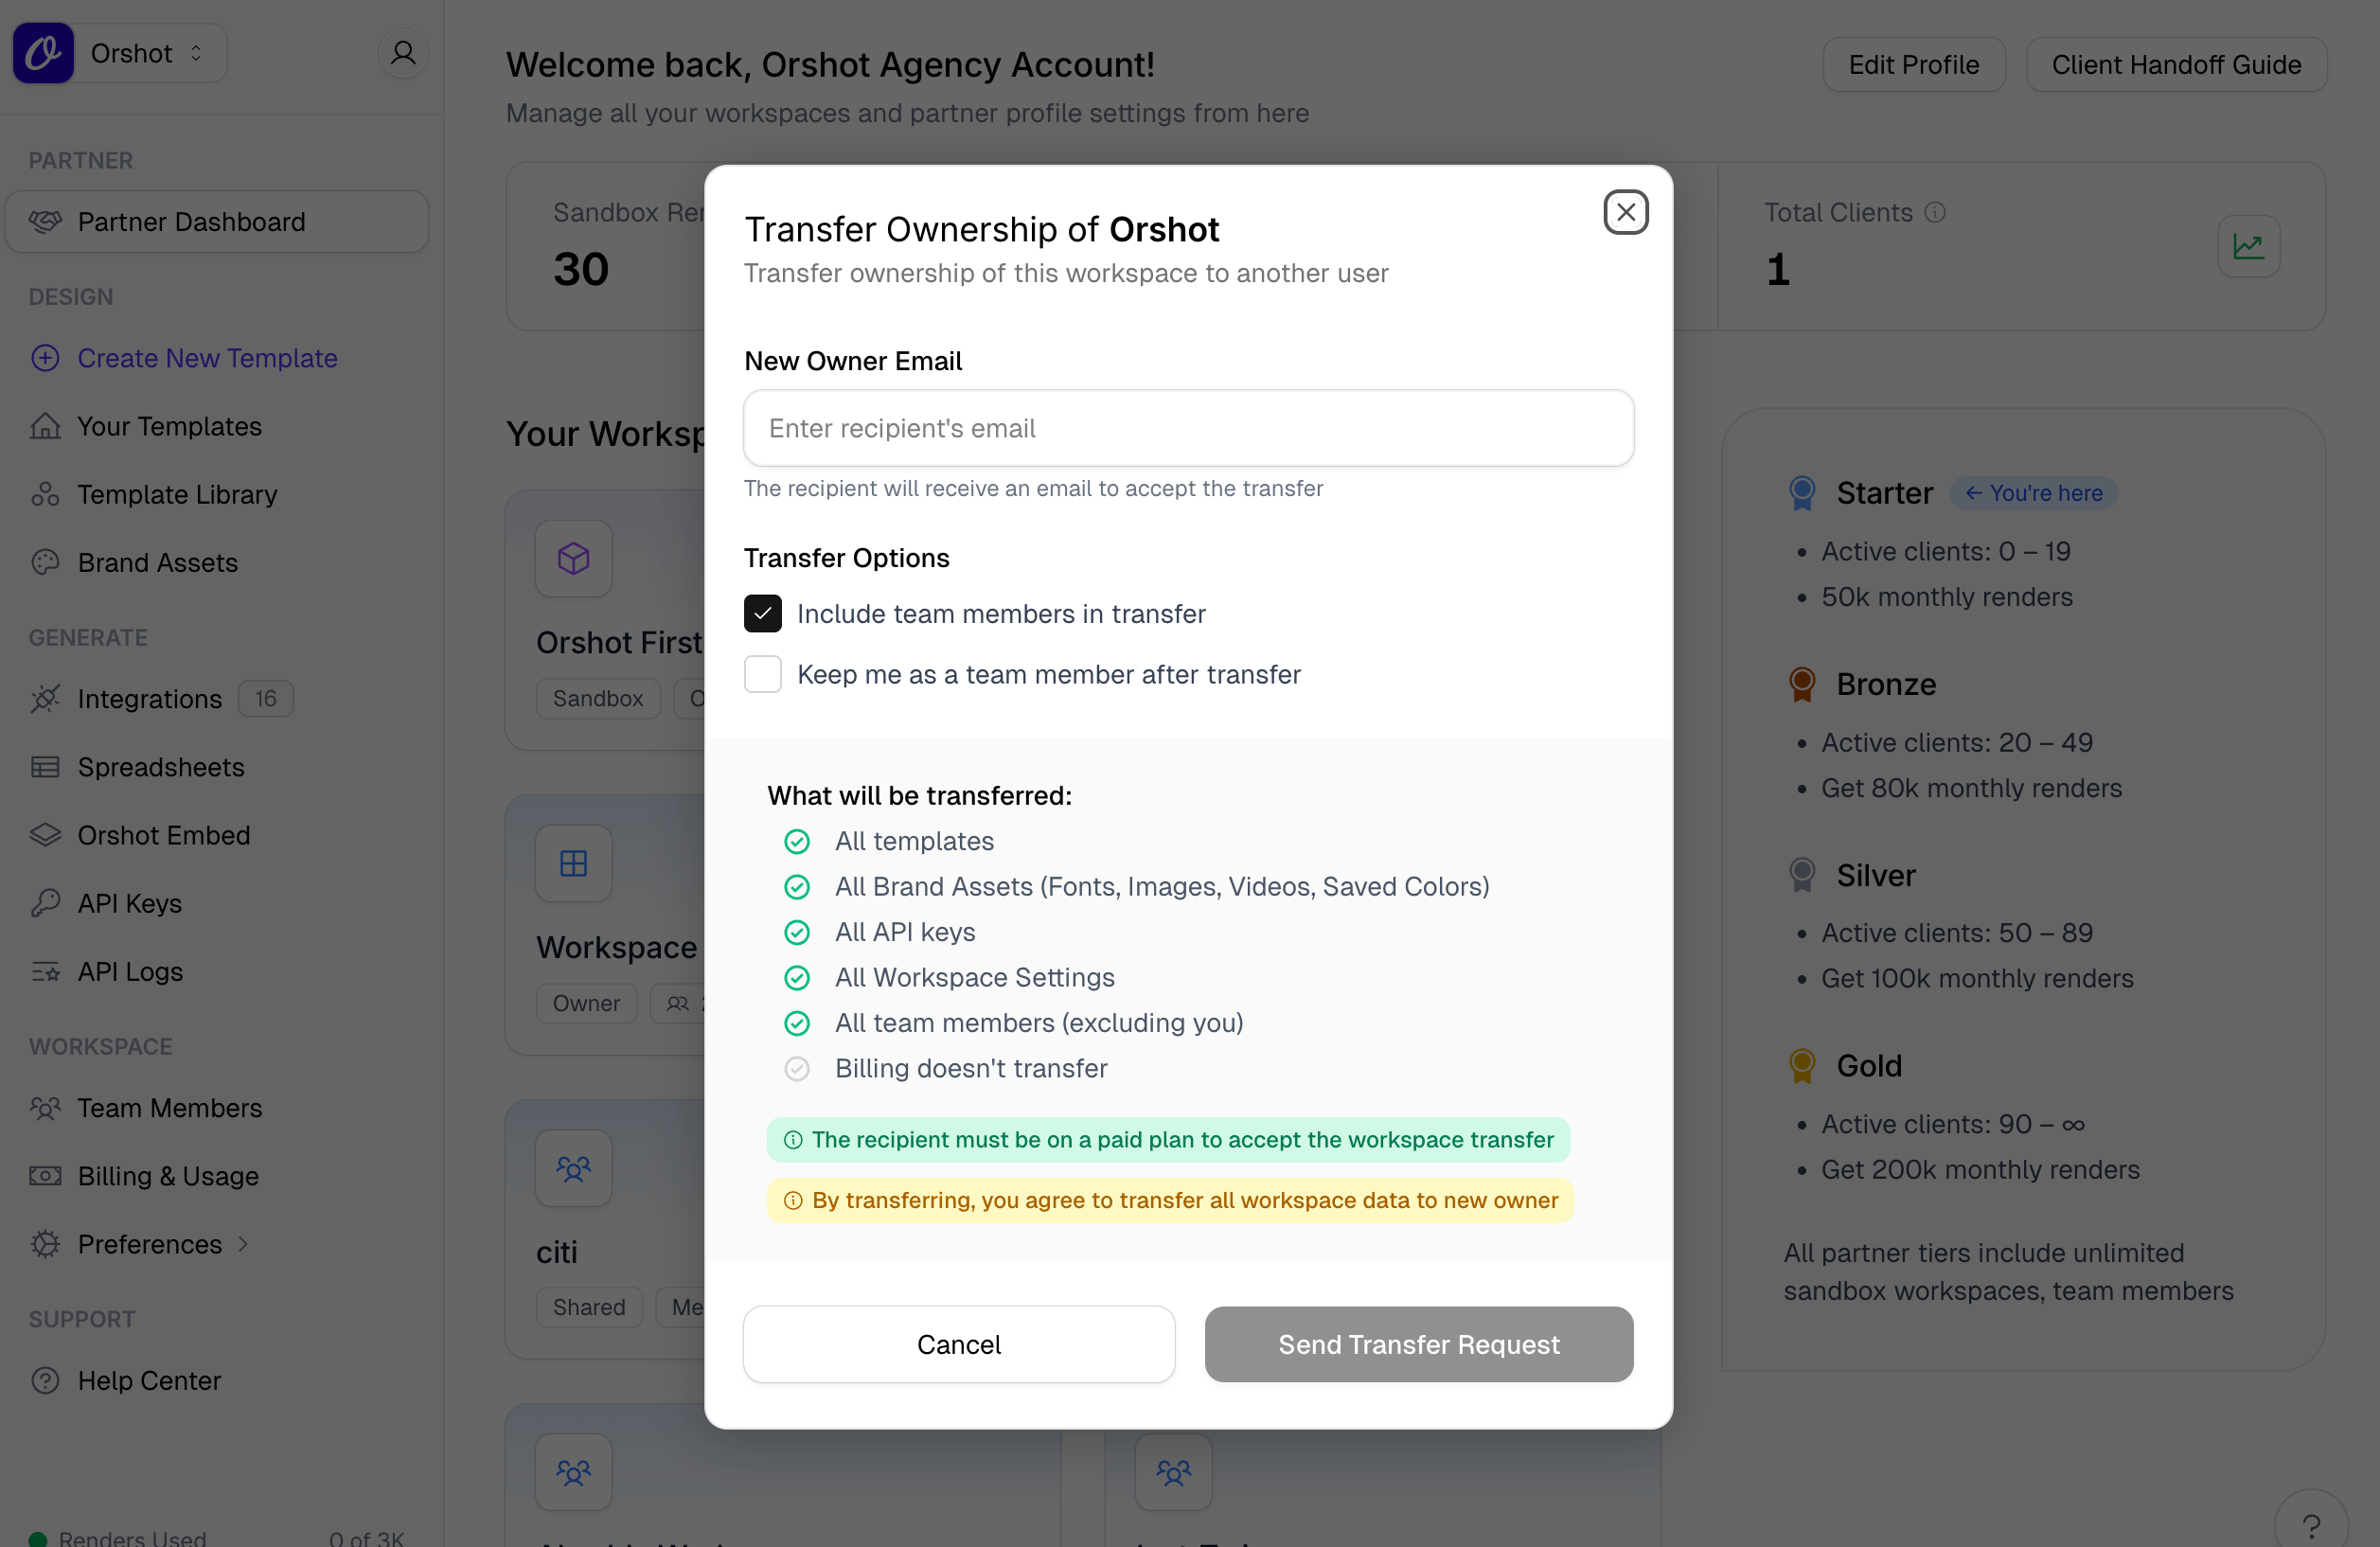
### How to Transfer
1. In the workspace, go to **Settings** → **General**
2. Scroll to **Transfer Workspace**
3. Enter the client's email address
4. Choose transfer options:
- **Include team members** — Keep existing team in the workspace
- **Keep me as a team member** — Stay on as a contributor
5. Click **Send Transfer Invite**
The client receives an email to accept the transfer. Once they accept and subscribe, they're counted as your referred client.
## Editing Your Profile
When your client is ready to take ownership of their workspace:
1. **Prepare the workspace** — Ensure all templates and assets are set up
2. **Transfer ownership** — Use the workspace transfer feature
3. **Client subscribes** — After accepting, the client chooses their plan
4. **You get credit** — The client counts toward your active client count
### How to Transfer
1. In the workspace, go to **Settings** → **General**
2. Scroll to **Transfer Workspace**
3. Enter the client's email address
4. Choose transfer options:
- **Include team members** — Keep existing team in the workspace
- **Keep me as a team member** — Stay on as a contributor
5. Click **Send Transfer Invite**
The client receives an email to accept the transfer. Once they accept and subscribe, they're counted as your referred client.
## Editing Your Profile
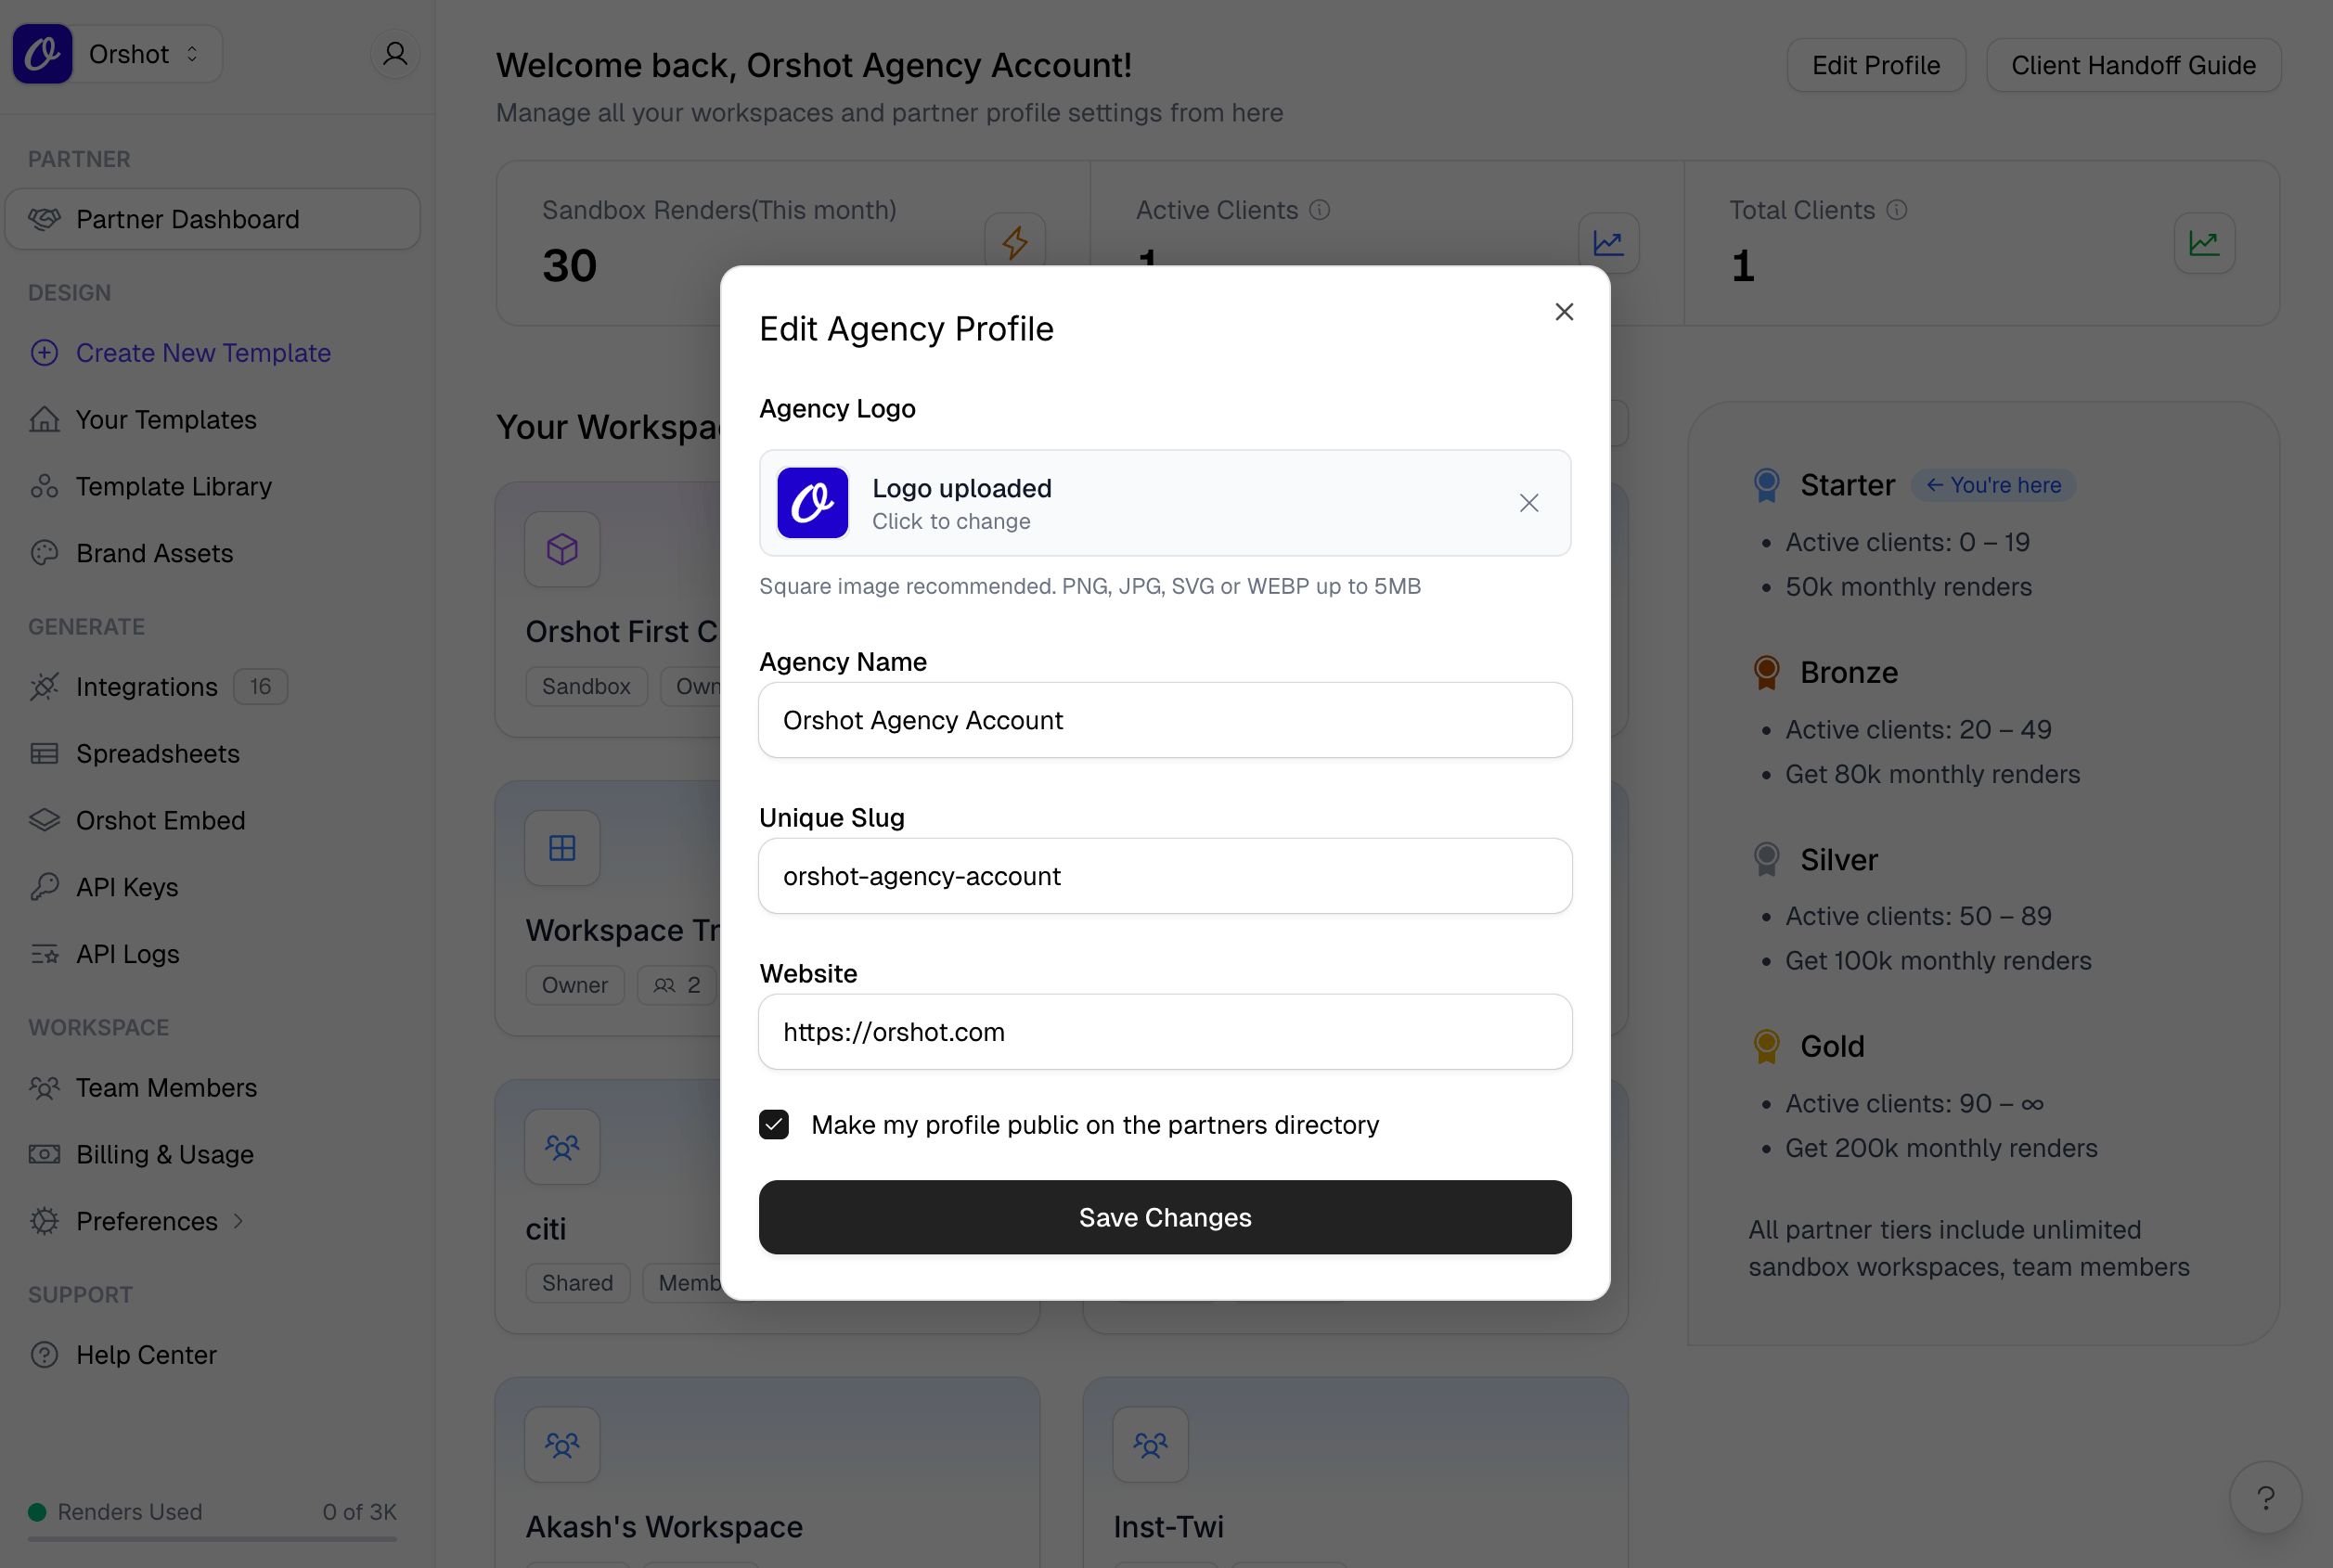 1. From the Partner Dashboard, click **Edit Profile**
2. Update your agency logo, name, slug, or website
3. Toggle **Make my profile public** to appear in the partners directory
4. Click **Save Changes**
## Tracking Your Tier
Your tier updates automatically based on active client count:
| Active Clients | Tier | Monthly Renders |
| -------------- | ------- | --------------- |
| 0–19 | Starter | 50,000 |
| 20–49 | Bronze | 80,000 |
| 50–89 | Silver | 100,000 |
| 90+ | Gold | 200,000 |
As clients subscribe or cancel, your tier and render quota adjust accordingly.
## Best Practices
- **Use sandboxes for development** — Keep client work in sandboxes until handoff
- **Name workspaces clearly** — Include client name for easy tracking
- **Test before handoff** — Verify all templates work as expected
- **Document for clients** — Include setup notes or template guides before transfer
1. From the Partner Dashboard, click **Edit Profile**
2. Update your agency logo, name, slug, or website
3. Toggle **Make my profile public** to appear in the partners directory
4. Click **Save Changes**
## Tracking Your Tier
Your tier updates automatically based on active client count:
| Active Clients | Tier | Monthly Renders |
| -------------- | ------- | --------------- |
| 0–19 | Starter | 50,000 |
| 20–49 | Bronze | 80,000 |
| 50–89 | Silver | 100,000 |
| 90+ | Gold | 200,000 |
As clients subscribe or cancel, your tier and render quota adjust accordingly.
## Best Practices
- **Use sandboxes for development** — Keep client work in sandboxes until handoff
- **Name workspaces clearly** — Include client name for easy tracking
- **Test before handoff** — Verify all templates work as expected
- **Document for clients** — Include setup notes or template guides before transfer