Orshot CLI
Generate visuals from your terminal with the Orshot command-line interface
NPM Package: https://www.npmjs.com/package/orshot-cli
Video Tutorial#
Introduction#
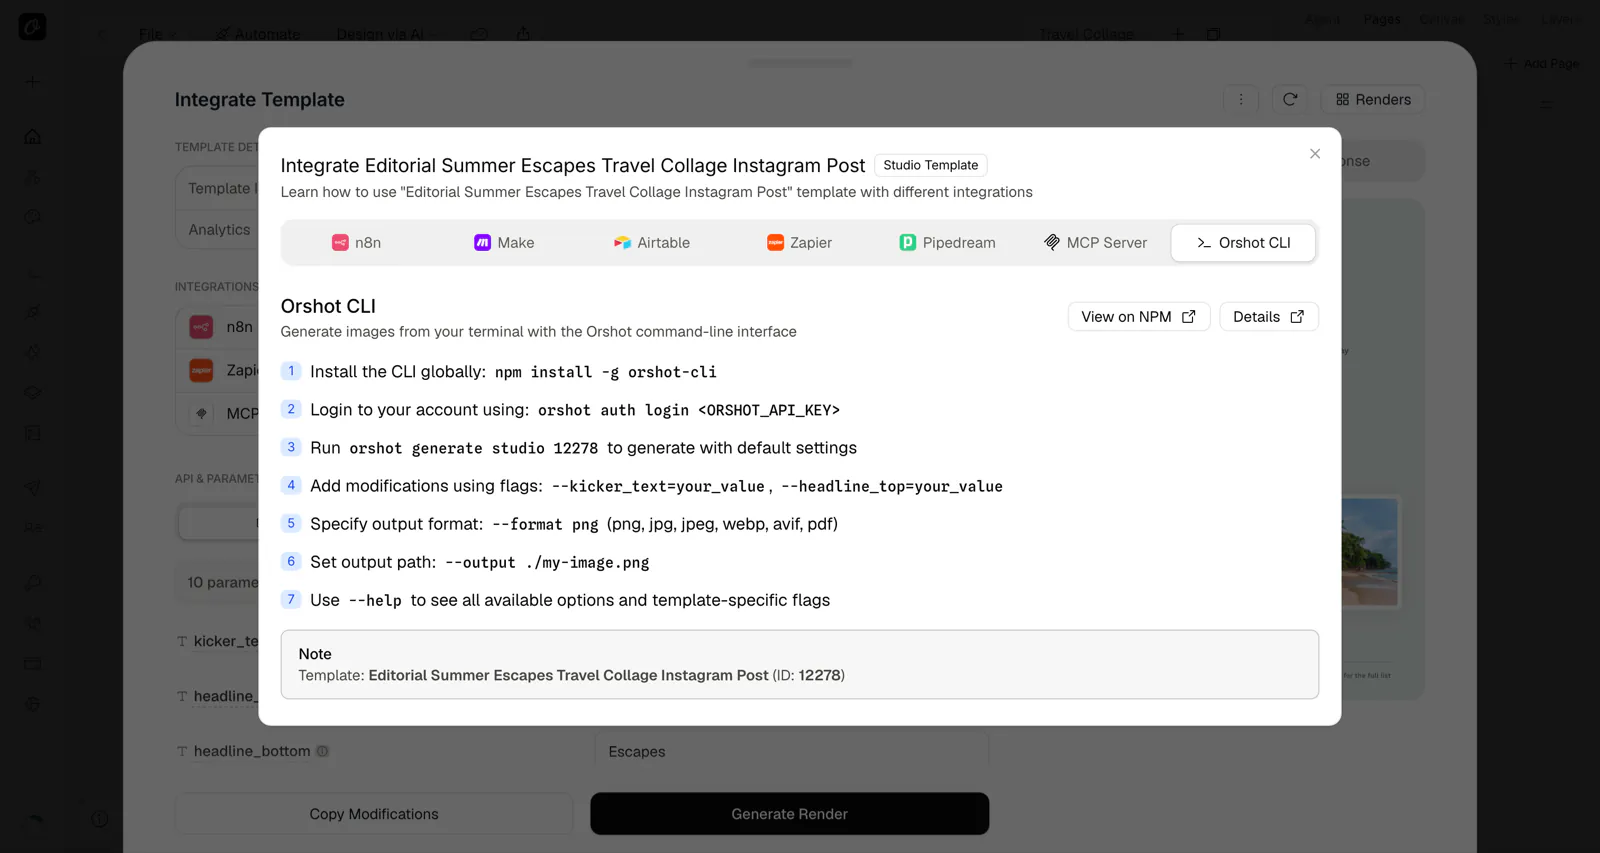
The Orshot CLI is a command-line interface that allows you to generate dynamic images from your Orshot templates directly from your terminal. Perfect for automation, scripting, and integrating image generation into your development workflow.
Tip: In Orshot, open any template's Automate panel and pick the Orshot CLI tab — it shows the exact
orshotcommands pre-filled with your template's ID and modification flags.
Features#
- Template Management: List and discover available library and studio templates
- Image Generation: Generate images from both library and studio templates
- Video & PDF Generation: Create MP4, WebM, GIF, and multi-page PDFs
- Multiple Output Formats: Support for PNG, JPG, JPEG, WebP, AVIF, PDF, MP4, WebM, GIF
- Flexible Response Types: Get outputs as base64, binary files, or hosted URLs
- Interactive Mode: Guided template modification setup
- Batch Processing: Generate multiple variations with different modifications
- Cross-Platform: Works on macOS, Linux, and Windows
Installation#
Install the CLI globally using npm:
npm install -g orshot-cliGetting Started#
1. Authentication#
First, obtain your API key from Orshot Workspace > Settings > API Key, then authenticate:
orshot auth login <your-api-key>You can also run the command without the API key to be prompted securely:
orshot auth login2. Verify Authentication#
Check your authentication status:
orshot auth whoami3. Discover Templates#
List your available templates:
# List library templates
orshot templates library

# List studio templates
orshot templates studio
4. Generate Your First Image#
Generate an image from a template:
# Basic generation
orshot generate library website-screenshot

# Generate with custom modifications
orshot generate library website-screenshot -m websiteUrl="https://example.com"

# Interactive mode for guided setup
orshot generate library website-screenshot --interactive
Commands Reference#
Authentication Commands#
orshot auth login [api-key]- Log in with your API keyorshot auth logout- Log out and clear credentialsorshot auth whoami- Show current user information
Template Commands#
orshot templates library- List library templatesorshot templates studio- List studio templatesorshot templates modifications <template-id>- Show available modifications
Generation Commands#
orshot generate library <template-id>- Generate from library templateorshot generate studio <template-id>- Generate from studio template
Common Options#
Generation Options#
-m, --modification <key=value>- Template modifications (repeatable)-f, --format <format>- Output format: png, jpg, webp, avif, pdf, mp4, webm, gif-t, --type <type>- Response type: base64, binary, url-o, --output <filename>- Custom output filename-s, --scale <number>- Scale factor (e.g., 2 for 2x size)-p, --pages <numbers...>- Specific pages to render (e.g., 1 3 for multi-page templates)--dpi <number>- DPI for PDF output (default: 72)--quality <number>- Quality (1-100) for JPG/WebP/AVIF/Video--video-loop- Set video output to loop--video-muted- Mute audio in video output--video-trim-start <seconds>- Trim video start time--video-trim-end <seconds>- Trim video end time--webhook <url>- Webhook URL for async notification-i, --interactive- Interactive modification mode-j, --json- Output response as JSON
Template Options#
-l, --limit <number>- Limit number of results-j, --json- Output as JSON-t, --type <type>- Template type: library or studio
Usage Examples#
Basic Workflow#
# Authenticate
orshot auth login your-api-key

# List available templates
orshot templates library

# Generate with modifications
orshot generate library website-screenshot \
  -m websiteUrl="https://github.com" \
  -o github-screenshot.png
Interactive Mode#
For templates with many modifications, use interactive mode:
orshot generate library website-screenshot --interactiveThis will guide you through setting up modifications step by step.
Batch Processing#
Generate multiple variations:
orshot generate library website-screenshot -m websiteUrl="https://github.com" -o github.png
orshot generate library website-screenshot -m websiteUrl="https://stackoverflow.com" -o stackoverflow.png
orshot generate library website-screenshot -m websiteUrl="https://npmjs.com" -o npmjs.png
Different Output Formats#
# Generate PNG (default)
orshot generate library website-screenshot -m websiteUrl="https://example.com" -o website.png

# Generate JPG
orshot generate library website-screenshot -m websiteUrl="https://example.com" -f jpg -o website.jpg

# Generate PDF
orshot generate library website-screenshot -m websiteUrl="https://example.com" -f pdf -o website.pdf

# Get download URL instead of file
orshot generate library website-screenshot -m websiteUrl="https://example.com" -t url
Video Generation#
Generate MP4 videos or GIFs with trim and loop options:
# Generate a looping video
orshot generate studio video-template-123 -f mp4 --video-loop

# Generate a GIF trimmed to first 5 seconds
orshot generate studio video-template-123 -f gif --video-trim-start 0 --video-trim-end 5
Multi-Page Documents#
Generate PDF reports or specific page ranges:
# Generate high-quality PDF (300 DPI)
orshot generate studio report-template-456 -f pdf --dpi 300

# Generate only specific pages (1 and 3)
orshot generate studio multi-page-template-789 -f pdf --pages 1 3
Async Operations (Webhooks)#
For long-running tasks like 4K video rendering, use webhooks:
orshot generate studio heavy-video-template \
  -f mp4 \
  --quality 100 \
  --webhook "https://your-api.com/webhooks/orshot-callback"
Studio Templates#
Studio templates work the same way as library templates:
# List studio templates
orshot templates studio

# Generate from studio template
orshot generate studio def456 -m name="John Doe" -m title="CEO"Configuration#
The CLI stores configuration in your system's config directory:
- macOS:
~/Library/Preferences/orshot-cli/config.json - Linux:
~/.config/orshot-cli/config.json - Windows:
%APPDATA%/orshot-cli/config.json
Troubleshooting#
Common Issues#
Authentication Error:
❌ Not authenticated. Please run:
   orshot auth login <your-api-key>
Solution: Run the login command with your API key.
Template Not Found:
❌ Failed to generate image: Template not found.Solution: Verify the template ID and ensure you have access to it.
Invalid API Key:
❌ Login failed: Invalid API key. Please check your credentials.Solution: Double-check your API key from the Orshot dashboard.
Getting Help#
Use the --help flag with any command for detailed usage information:
orshot --help
orshot generate --help
orshot templates --help
Integration with Scripts#
The CLI is perfect for automation and scripting:
#!/bin/bash

# Generate website screenshots for different sites
orshot generate library website-screenshot \
  -m websiteUrl="https://github.com/$REPO_NAME" \
  -o "github-${REPO_NAME}.png"

orshot generate library website-screenshot \
  -m websiteUrl="https://docs.$DOMAIN.com" \
  -o "docs-${DOMAIN}.png"
The CLI supports JSON output for programmatic use:
# Get template list as JSON
templates=$(orshot templates library --json)

# Generate image and get response as JSON
response=$(orshot generate library website-screenshot -m websiteUrl="https://example.com" -j)Ready to automate?
Start rendering images, PDFs and videos from your templates in under 2 minutes. Free plan, no credit card.
Get your API key- Image, PDF and video generation via API
- Visual editor with AI and smart layouts
- Zapier, Make, MCP and 50+ integrations
- White-label embed for your own app
- 30 free credits — no credit card required