Webflow
Auto-generate Open Graph and social images for your Webflow CMS items from your Orshot templates — uploaded to your site and written onto the item
Published ·Updated

Introduction#
The Orshot Webflow integration turns a template into every CMS item's social image. Design the template once in Orshot Studio, map your collection fields to it, and each blog post, case study or product gets its own on-brand Open Graph image — uploaded into your Webflow site's Asset Manager and written straight onto the item.
What you can do#
- Generate an image per CMS item from any collection, using that item's own field values.
- Write it back onto the item — the render lands in an Image field, so your Open Graph settings can bind to it like any other image.
- Backfill a whole collection — generate for every existing item, not just new ones.
- Upload renders to the Asset Manager on their own, without touching the CMS, when you just need the file hosted on your site.
- Any format Webflow accepts — PNG, JPG, WebP, GIF, SVG, PDF.
Connect Webflow#
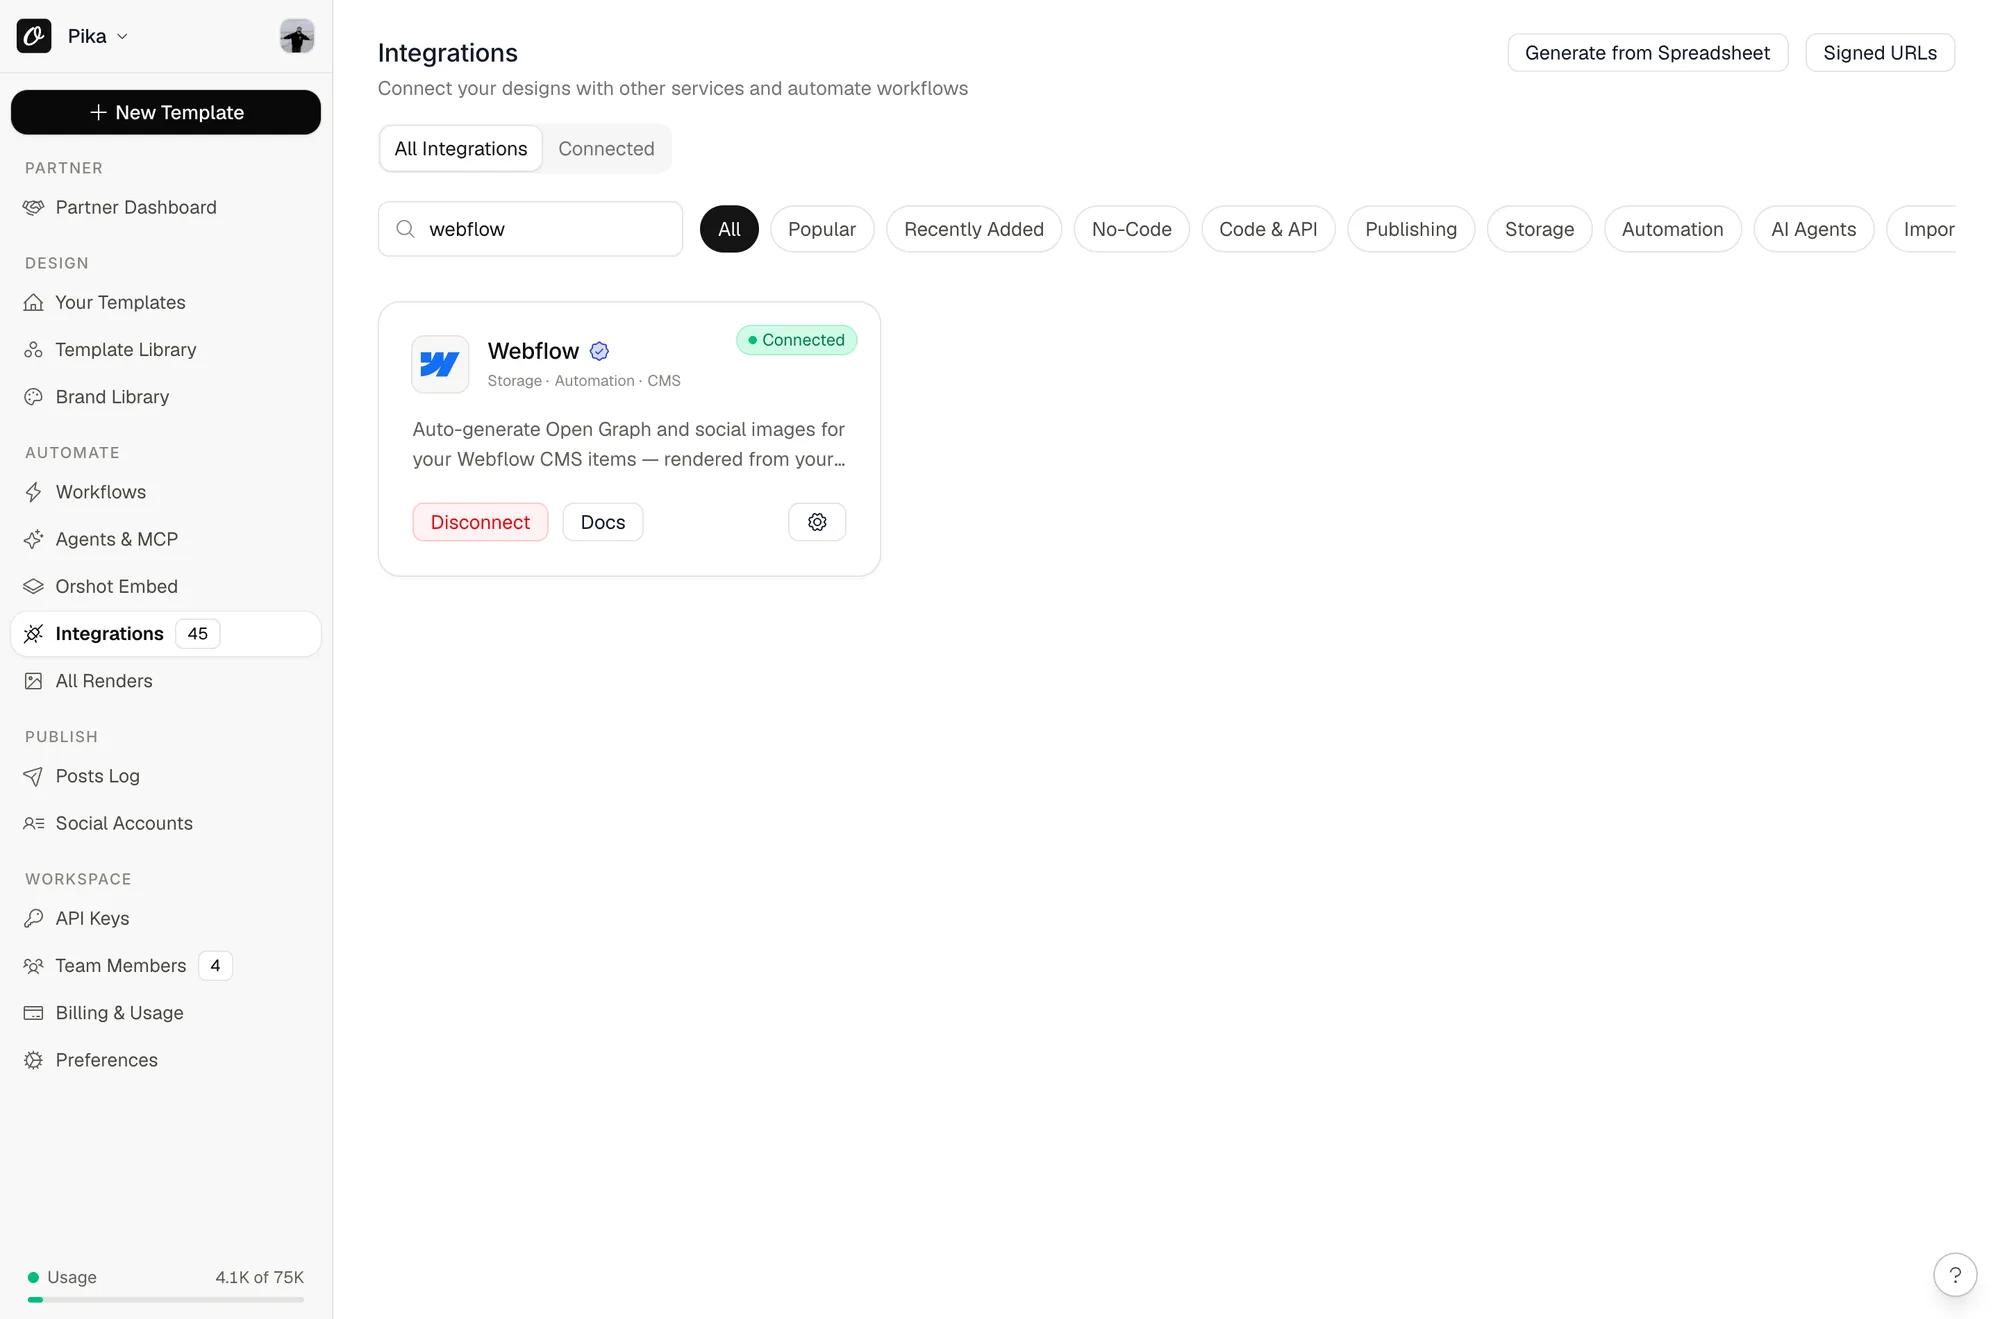
- In Orshot, open Integrations from your workspace sidebar.
- Find Webflow and click Connect.
- On Webflow's authorization screen, select the sites you want Orshot to work with, then approve.
- You're returned to Orshot as Connected.
Open the settings to pick a default site — renders land in that site's Asset Manager unless a workflow names another one.
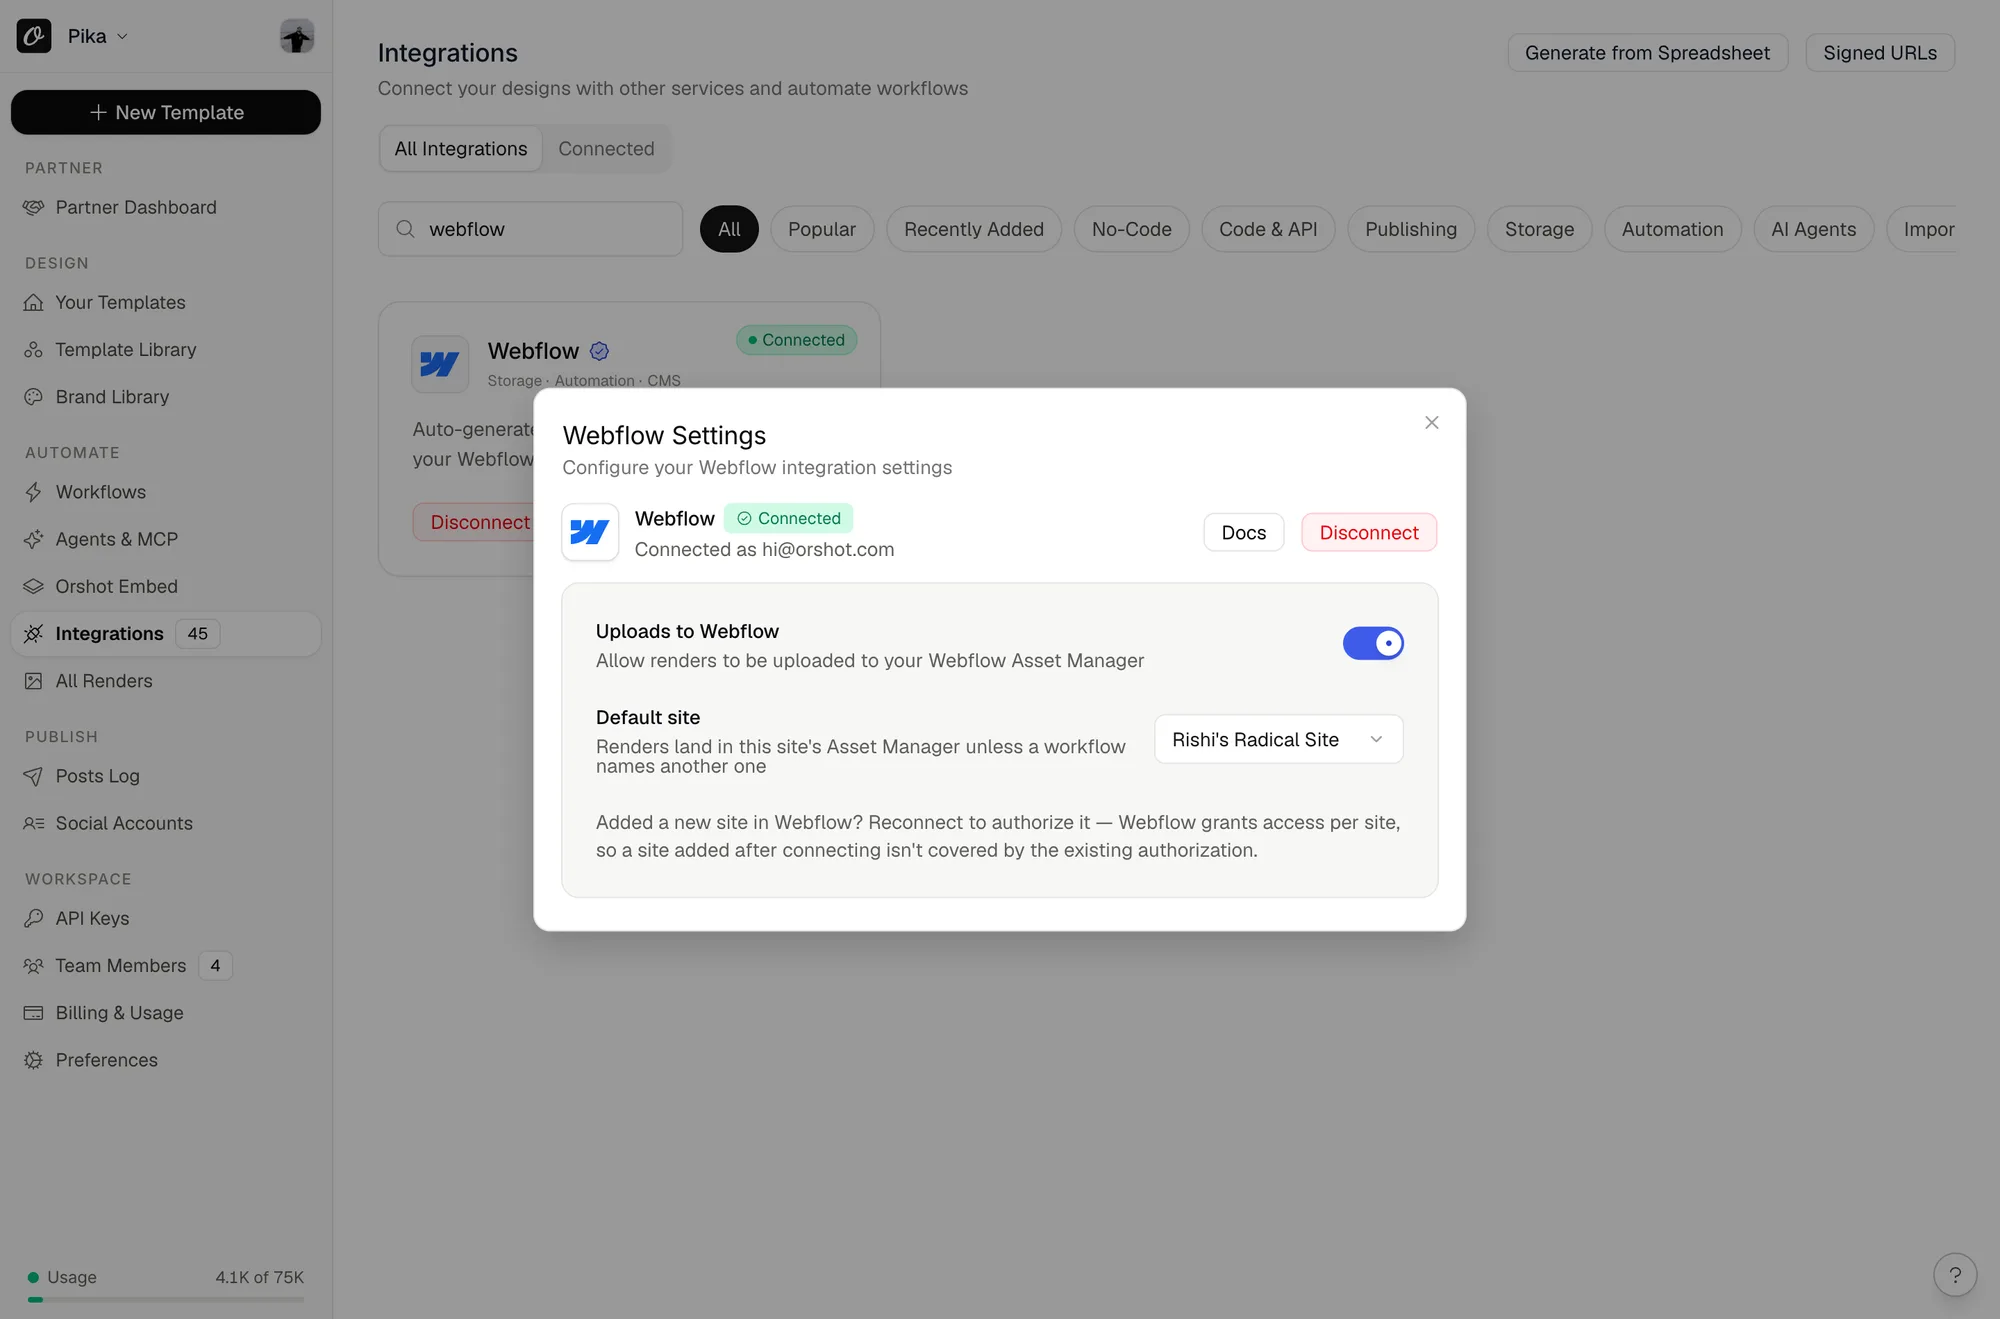
Connecting uses Webflow's OAuth; you don't create a Webflow app or copy any API tokens. Only workspace owners and admins can connect or disconnect, and there's one connection per workspace.
Webflow grants access per site. If you add a new site later, reconnect Orshot and tick it on the authorization screen — an existing connection doesn't cover sites that didn't exist when you approved it.
Set up Open Graph images for a collection#
- In Webflow, make sure the collection has an Image field for the generated graphic (for example
OG Image). Add one if it doesn't. - In Orshot, choose the site, the collection, and the template to render.
- Map your collection's text fields to the template's parameters — the post title to the headline, the author to the byline, and so on.
- Choose the Image field that receives the render.
- In Webflow, open the collection page's Settings → Open Graph and bind the Open Graph image to that Image field.
Step 5 is a one-time Webflow setting. Until it's bound, the image exists on the item but social platforms won't use it.
Automate it with a workflow#
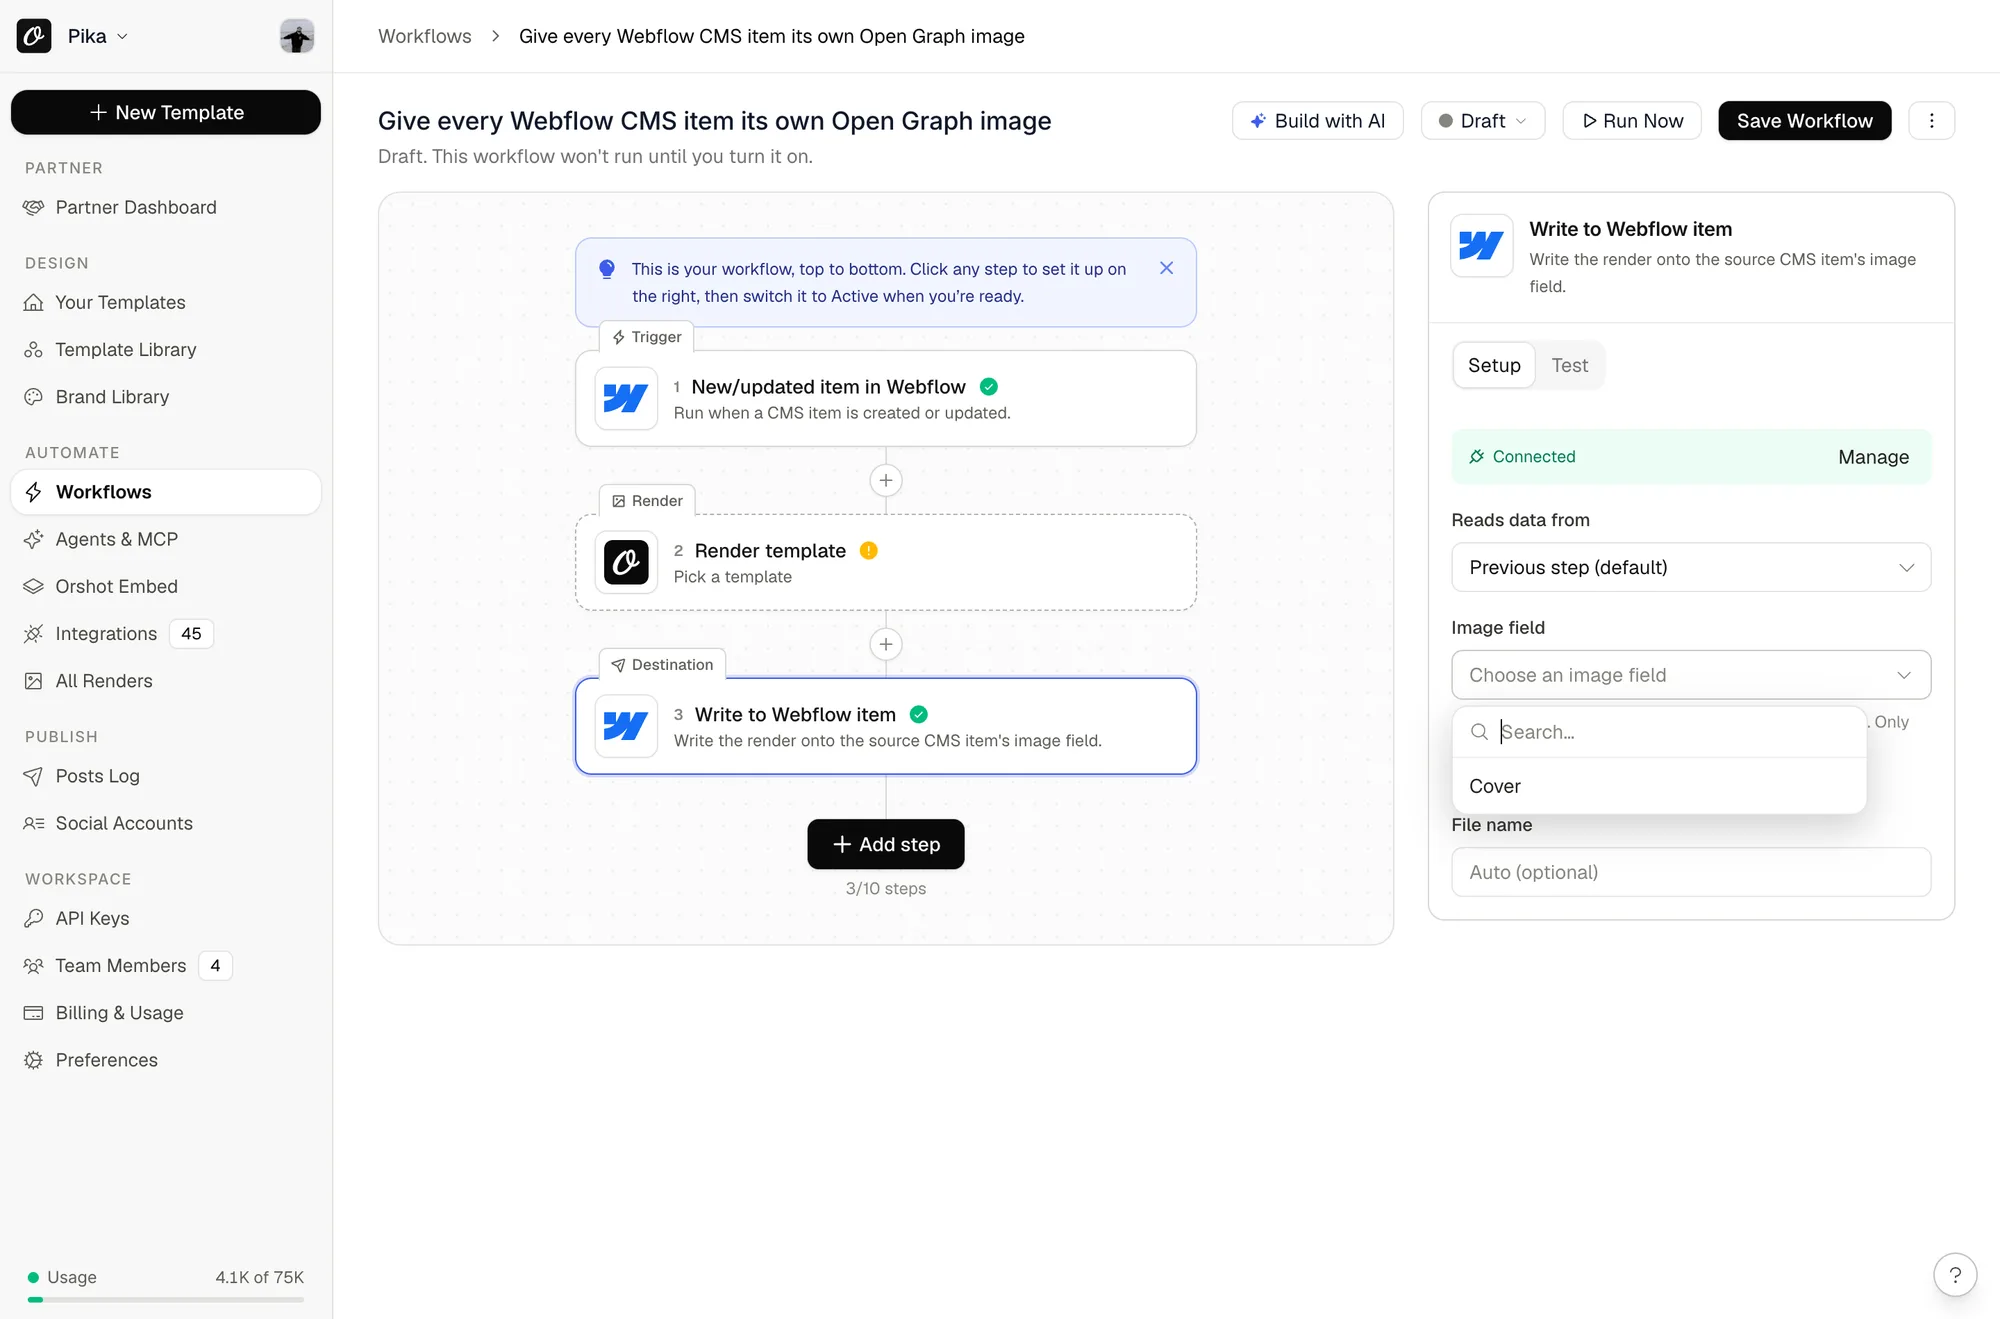
The fastest path is a preset: open Workflows → Explore presets and install "Give every Webflow CMS item its own Open Graph image".
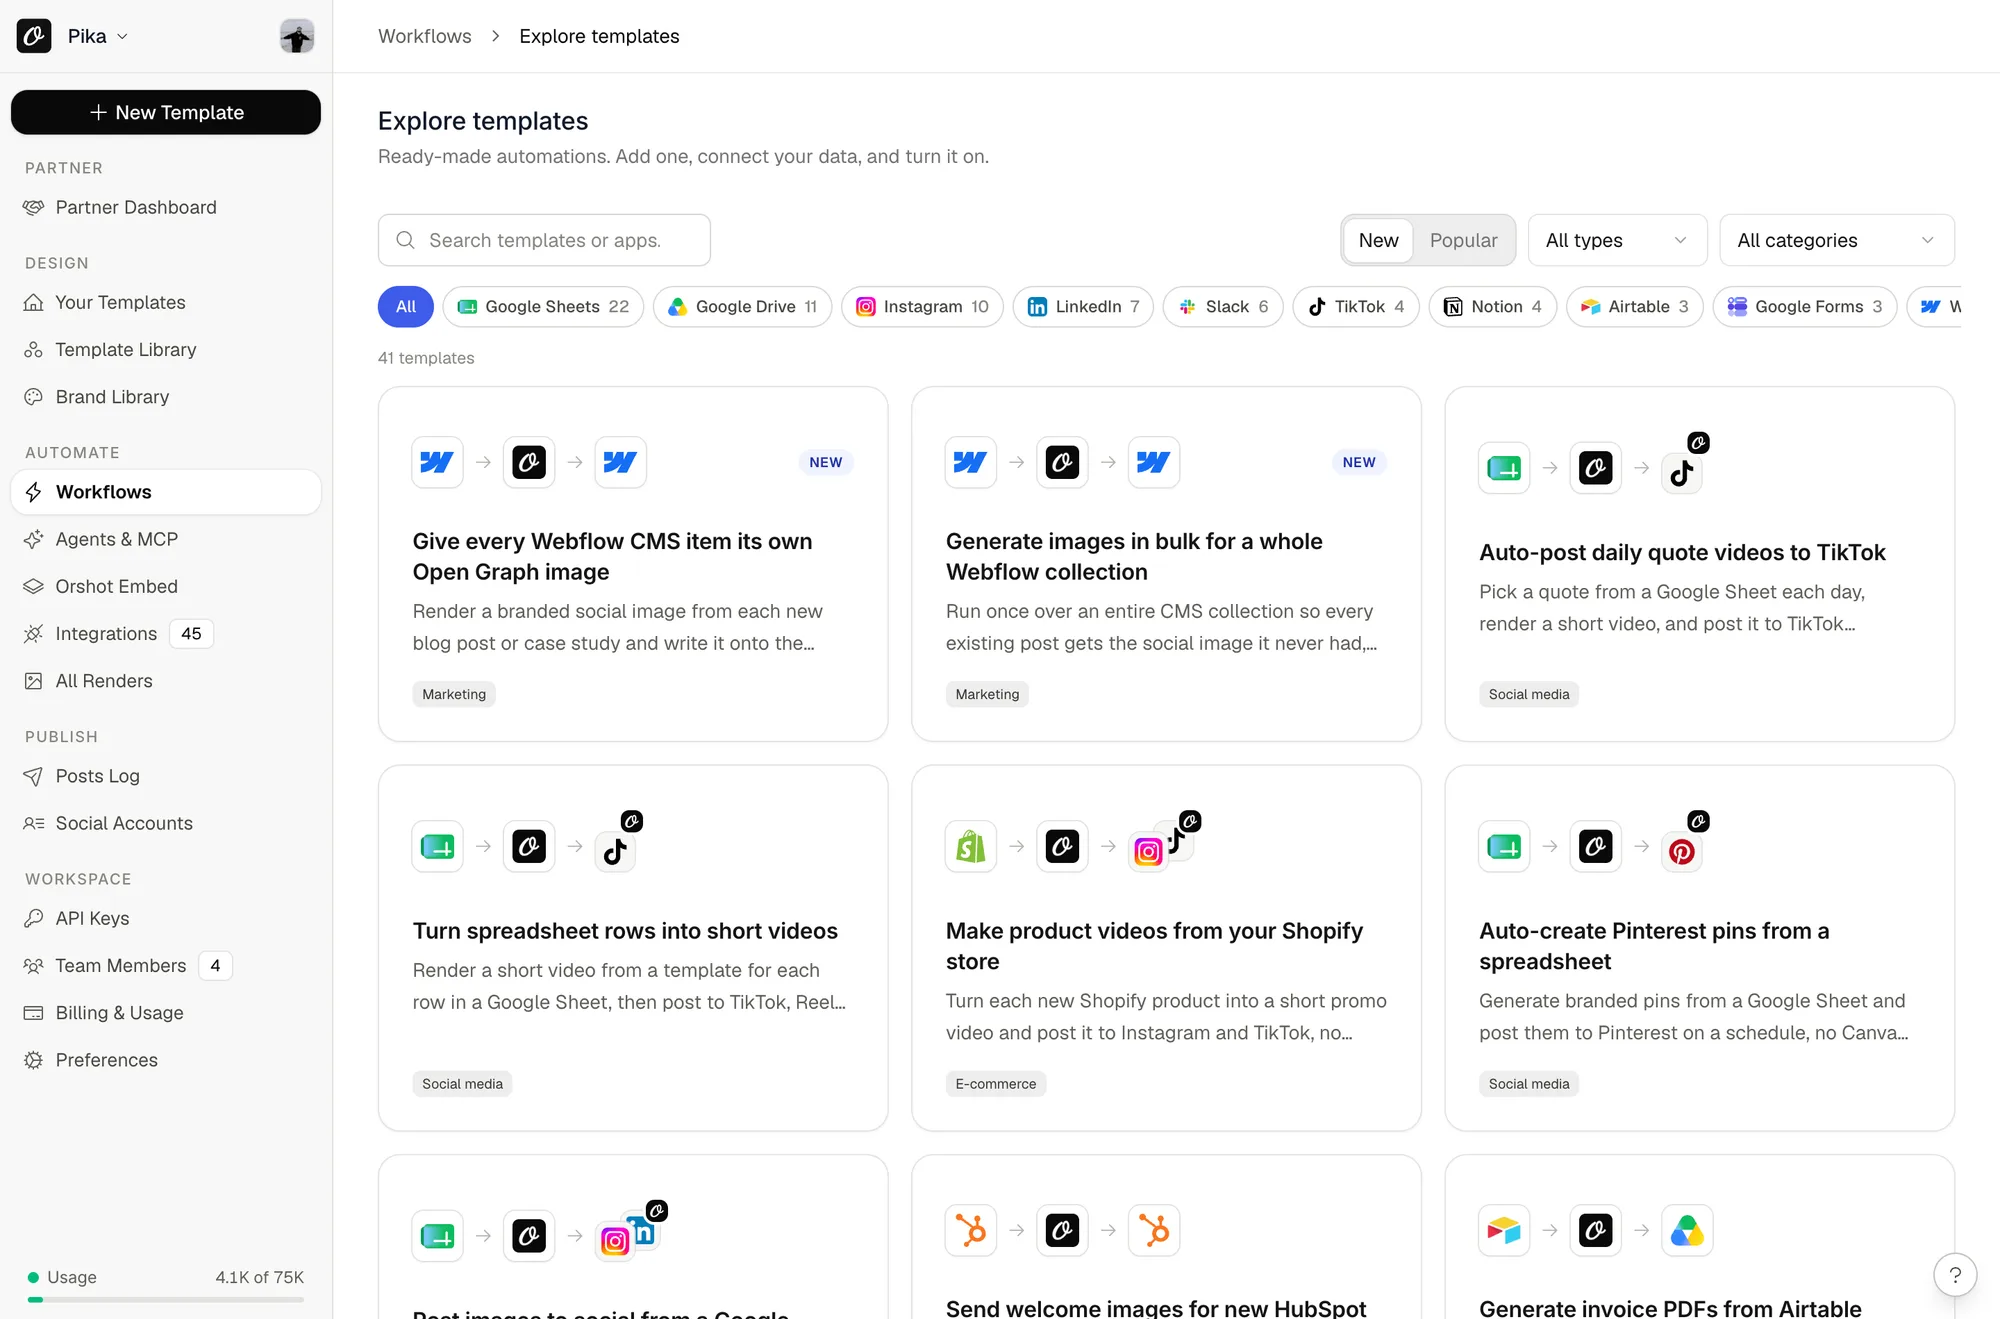
It builds this three-step workflow for you:
- New/updated item in Webflow — watches one collection
- Render template — map the item's fields to your template
- Write to Webflow item — puts the render on the item's Image field
Pick the site and collection once on the trigger.
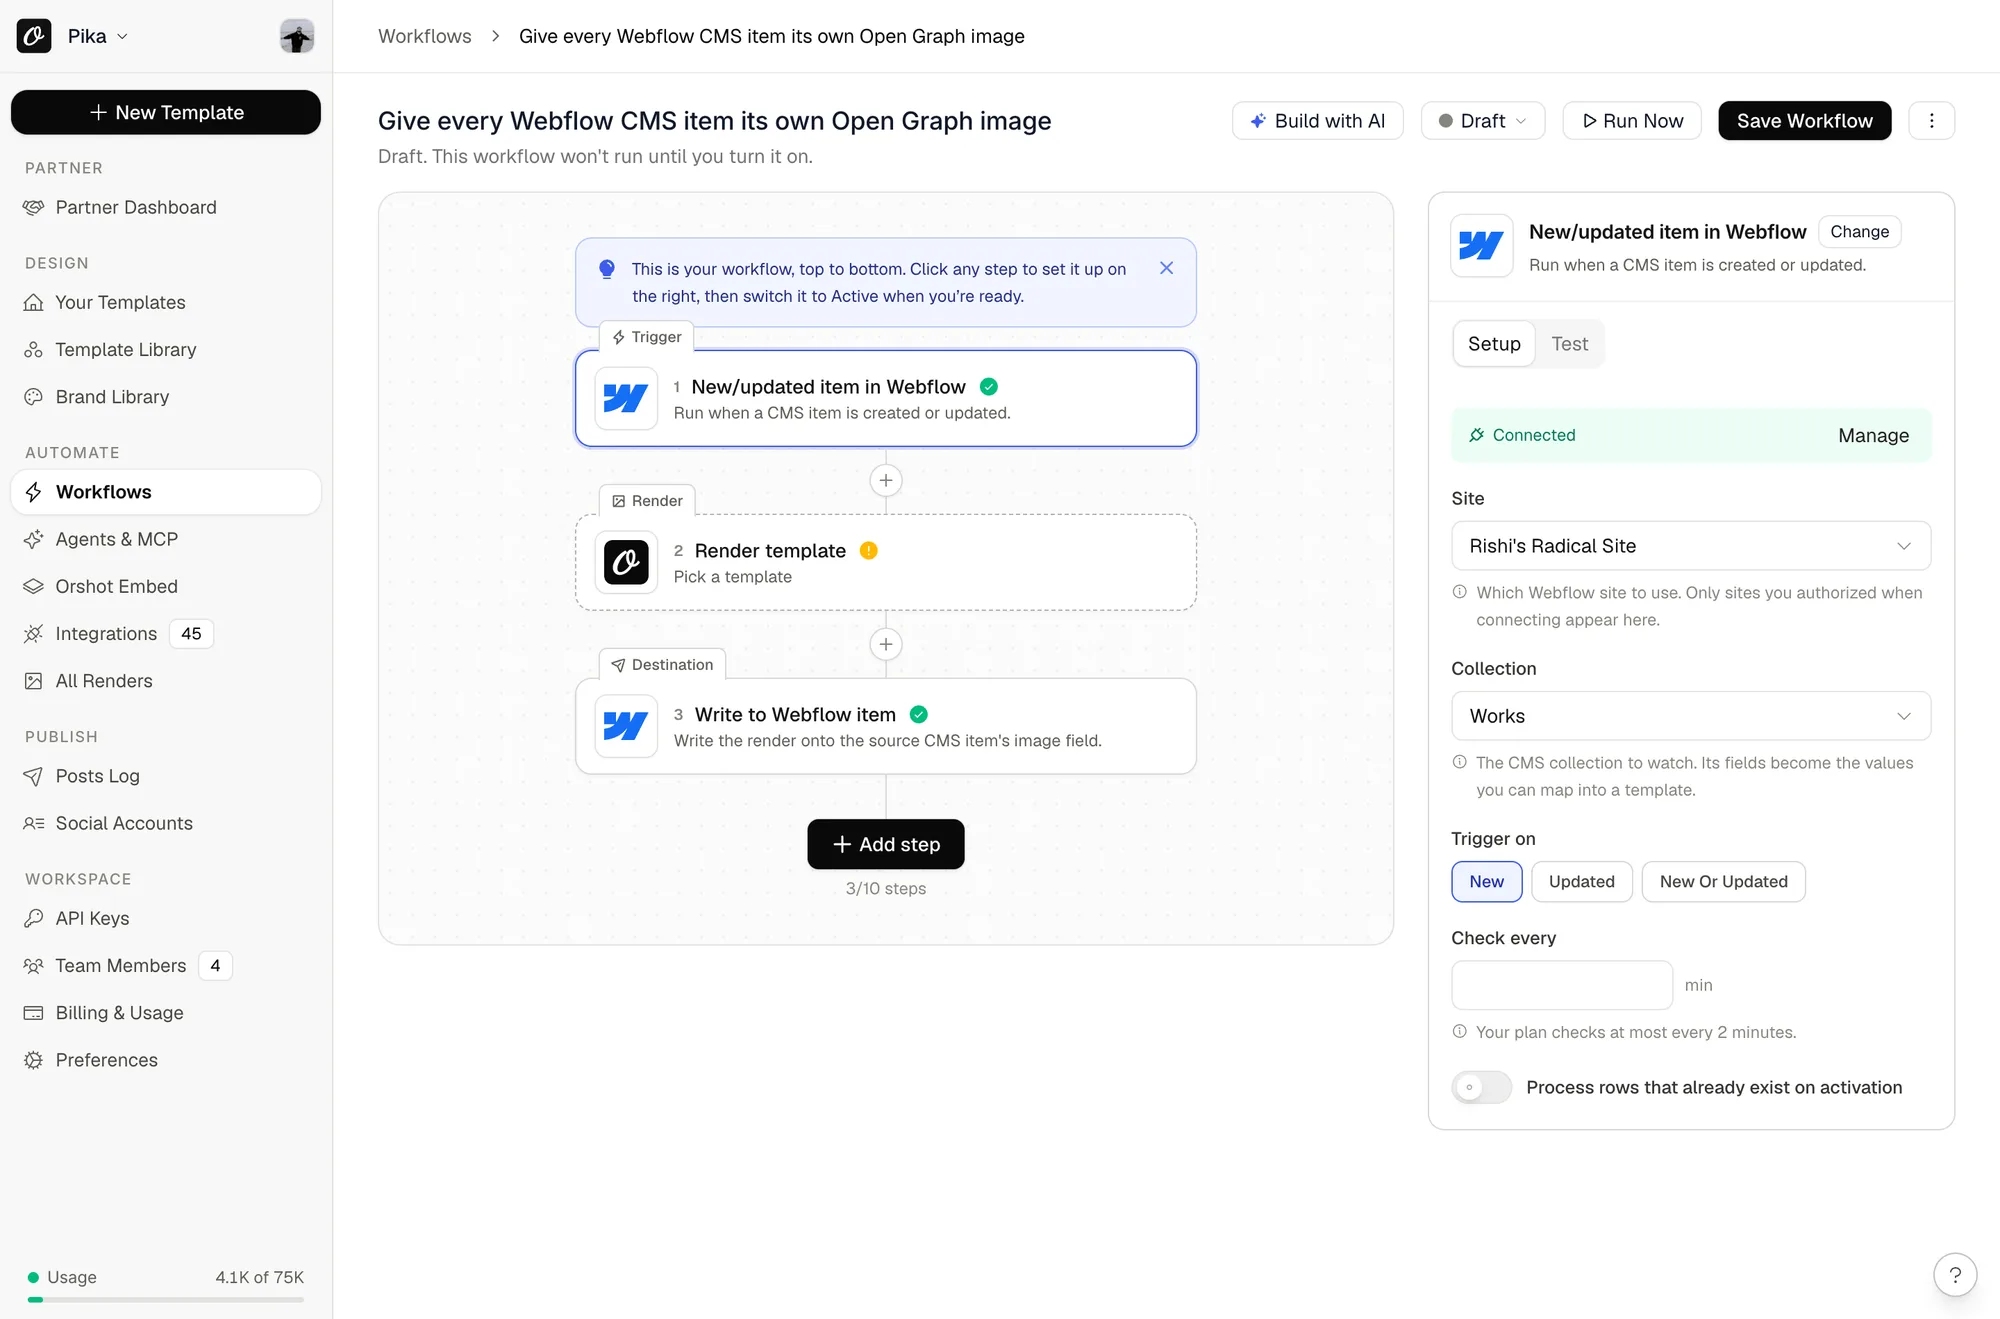
The write step figures out the rest, because it targets whichever item produced the row — so it only asks which Image field should receive the render.
Four Webflow steps are available:
| Step | Type | What it does |
|---|---|---|
| New/updated item in Webflow | Trigger | Runs when a CMS item is created or updated |
| Webflow collection | Source | Reads every item in a collection — use this to backfill |
| Webflow | Destination | Uploads renders to the site's Asset Manager |
| Write to Webflow item | Destination | Writes the render onto the source item's Image field |
Backfilling existing items. Install the "Backfill Open Graph images across a Webflow collection" preset, or switch on Process rows that already exist on activation on the trigger. Without that toggle, activating the trigger deliberately emits nothing — otherwise switching it on against 500 existing posts would render 500 images at once.
How fresh is it? The trigger polls, so a new item is picked up on the next check (as often as every 5 minutes on Grow and above). Open Graph images are read when someone shares the link, not the instant you publish, so polling is normally enough.
Two things to know:
- Write to Webflow item only works downstream of a Webflow trigger or source. It writes to the item the row came from, so rows from a spreadsheet or another integration have no item to target and the step reports that instead of failing silently.
- It writes one image. A CMS Image field holds a single image, so for multi-page templates only the first page lands on the item. Add the Webflow destination alongside it if you also want the other pages in the Asset Manager.
Where files go#
| Target | What happens |
|---|---|
| Asset Manager | The render is uploaded to the selected site's assets and the hosted URL is returned. |
| CMS item | The render is uploaded as above, then written onto the item's Image field — staged first, then to the live item so an already-published page updates without a full site publish. |
An item that has never been published only gets the staged write; the image appears when you next publish.
Notes#
- Webflow requires images to be site assets — an external URL can't be set on an Image field. Orshot uploads the file for you, which is why the render is stored on your site rather than hot-linked.
- Webflow rate-limits its API per site plan: 60 requests per minute on Starter and Basic, 120 on CMS and Business. Large backfills are paced to stay under it.
- Renders use your Orshot workspace's credits.
- Video output isn't supported here — Webflow's API has no video-asset upload. Render video to a URL and use it elsewhere on the page.
Ready to automate?
Start rendering images, PDFs and videos from your templates in under 2 minutes. Free plan, no credit card.
Get your API key- Image, PDF and video generation via API
- Visual editor with AI and smart layouts
- Zapier, Make, MCP and 50+ integrations
- White-label embed for your own app
- 100 free credits a month, no credit card required