Custom Buttons
Extend the embed toolbar with custom actions and buttons
Custom Buttons allow you to add your own buttons to the Orshot Embed toolbar. This is perfect for building seamless integrations where you want users to "Save to App" or trigger specific workflows instead of just downloading files to their device.
Configuring Custom Buttons#
Custom buttons are available only on supported plans. You can configure them in your workspace settings under Embed Settings > Custom Buttons.
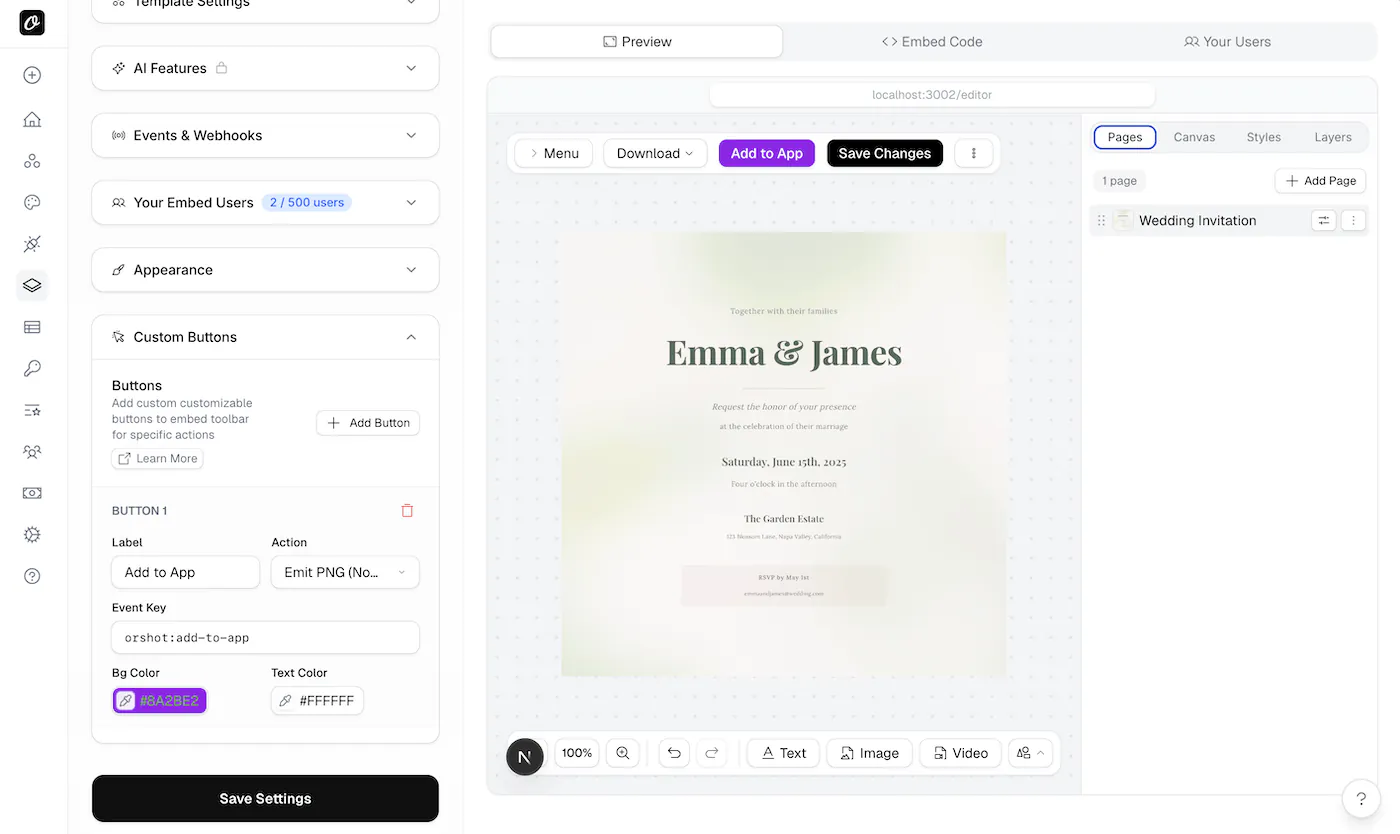
For each button, you can customize:
- Label: The text displayed on the button (e.g., "Save to App", "Export").
- Action Type: What happens when the user clicks the button.
- Event Key: The event name sent to your application (default:
orshot:custom_action). - Colors: Background and text colors to match your brand.
Action Types#
There are three main categories of actions:
1. Emit Data (No Download)#
These actions generate the file in the browser but do not trigger a download. Instead, they send the file data (Base64) to your application via a window event. This is ideal for "Save to App" functionality.
- Emit PNG (No Download)
- Emit PDF (No Download)
- Emit HTML (No Download)
2. Download Files#
These actions trigger a standard browser download for the user. Useful for adding quick download presets.
- Download PNG
- Download PDF
- Download HTML
3. Trigger Event Only#
This action simply sends an event to your application without generating any file data. Use this for custom workflows like "Send for Approval" or opening a modal in your app.
Handling Events#
When a user clicks a custom button, Orshot emits an event to the parent window. You can listen for this event to handle the data.
Single Page Response#
For single page renders (or PDF/HTML emits):
window.addEventListener("message", (event) => {
  // Check for your specific Event Key (default: orshot:custom_action)
  if (event.data.type === "orshot:custom_action") {
    const {
      base64, // Data URI (data:image/png;base64,...)
      format, // "png", "pdf", etc.
      mimeType, // "image/png"
      buttonId, // ID of the button clicked
    } = event.data;

    console.log("Received image data", base64);
  }
});
Multi-Page Response#
For templates with multiple pages, when using Emit PNG, the structure changes to return an array of pages in the data property:
window.addEventListener("message", (event) => {
  if (event.data.type === "orshot:custom_action") {
    // Check if we received a multi-page array
    if (event.data.data && Array.isArray(event.data.data)) {
      event.data.data.forEach((page) => {
        // page object: { page: 1, base64: "data:image/png;base64,..." }
        console.log(`Page ${page.page}:`, page.base64);
      });
    } else {
      // Handle single page logic
    }
  }
});
Common Use Cases#
"Save to Dashboard"#
Instead of asking users to download an image and re-upload it to your app, add a "Save" button with Emit PNG. Listen for the event, take the base64 data, and upload it directly to your server/S3 in the background.
"Send for Review"#
Use Trigger Event Only to create a "Submit for Review" button. When clicked, your app can lock the editor or change the state in your database, letting the user know their design has been submitted.
Custom Export Formats#
If you need to process the image (e.g., convert to CMYK or add metadata), use Emit PNG to get the raw image data, then process it on your server before presenting the final file to the user.
Programmatic Control#
You can change button labels or toggle their visibility at runtime using postMessage. Each button's ID is shown in your embed settings — click it to copy.
iframe.contentWindow.postMessage(
  {
    type: "orshot:embed:control",
    customButtons: {
      "custom-btn-1716384000000": { label: "Save to CRM", visible: false },
    },
  },
  "*",
);
Overrides are session-scoped and reset when the embed reloads. See Controlling the Embed for the full API reference.
Ready to automate?
Start rendering images, PDFs and videos from your templates in under 2 minutes. Free plan, no credit card.
Get your API key- Image, PDF and video generation via API
- Visual editor with AI and smart layouts
- Zapier, Make, MCP and 50+ integrations
- White-label embed for your own app
- 30 free credits — no credit card required