LinkedIn carousels are one of the best formats for reach right now. The catch is the production loop: design five or seven slides in Canva, export a PDF, open LinkedIn, upload the file, write a caption, then do it all again from scratch next week.
This guide is about skipping most of that with Orshot. Two ideas do the heavy lifting:
- A dynamic template. Design the carousel once, then generate new ones by just swapping the text. No redesigning, no blank canvas.
- A workflow. Connect LinkedIn once and let a spreadsheet row, a Notion page, or a schedule turn into a finished carousel that posts itself.
I'll build it up step by step, so you can stop wherever it fits how you work. It all rests on one detail about LinkedIn carousels that most people miss, so let's start there.
What a LinkedIn carousel actually is
LinkedIn has no "carousel" button. A carousel is a document post: you upload a PDF and LinkedIn turns each page into a swipeable card in the feed. Get that right and it reads as a real native carousel instead of a flat multi-image post.
The specs worth knowing:
| Spec | What to use | |
|---|---|---|
| Best size | 1080 x 1350 (portrait) fills the most feed space. Square 1080 x 1080 also works. | |
| Format | PDF. This is what makes it a native swipeable carousel. | |
| Pages | 5 to 12 slides is the sweet spot. LinkedIn allows many more. |
One thing to clear up: this guide is about organic carousels, the PDF document post. LinkedIn carousel ads are a separate thing you set up as individual images in Campaign Manager.
The manual way, and why it doesn't scale
If you only ever post one carousel, doing it by hand is fine. Here's the flow:
- Design your slides in Canva, Figma, or slides.
- Export the whole thing as a single PDF.
- On LinkedIn, click Start a post, then the document icon.
- Upload the PDF, give it a title, write your caption, and post.
It works, but it doesn't scale, and two headaches show up constantly:
- The text comes out blurry and pixelated after you upload it, usually because the file was exported at the wrong size and LinkedIn compresses it hard. So you go back, re-export, and guess at settings until it looks right.
- Export your slides as images instead of one PDF and the post looks haywire rather than a real carousel.
On top of that, nothing batches. Every small change means redesign, re-export, and re-upload, and your brand drifts a little each time a different person makes one.
That's the part we're going to fix.
1. Start from a template
Instead of a blank canvas, start from a carousel that's already designed and just change the words.
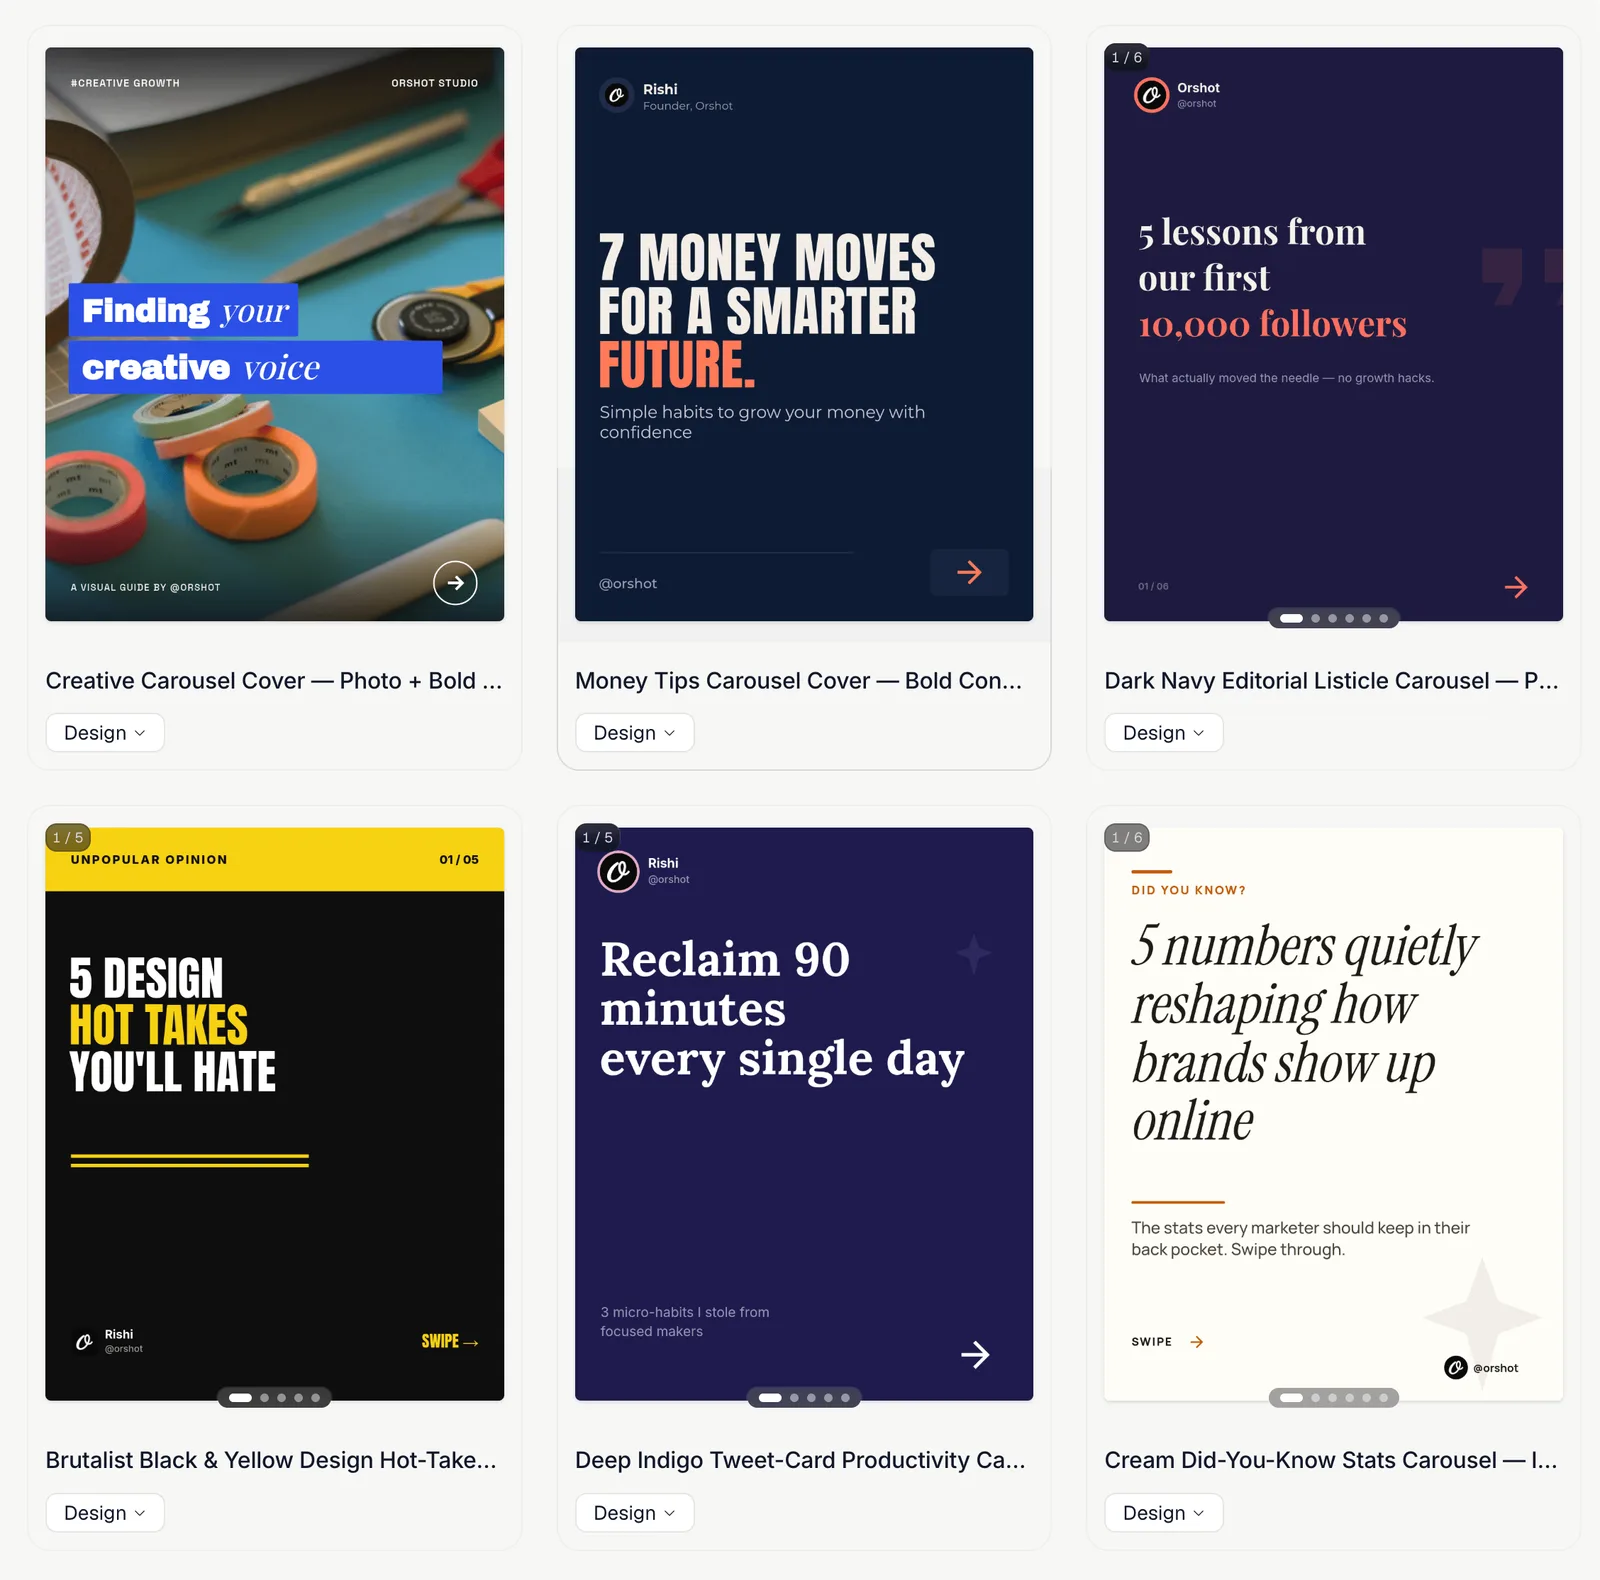
Head to the LinkedIn templates gallery and pick a carousel you like. The multi-page ones show a slide count on the thumbnail, so you can tell a real carousel from a single graphic.
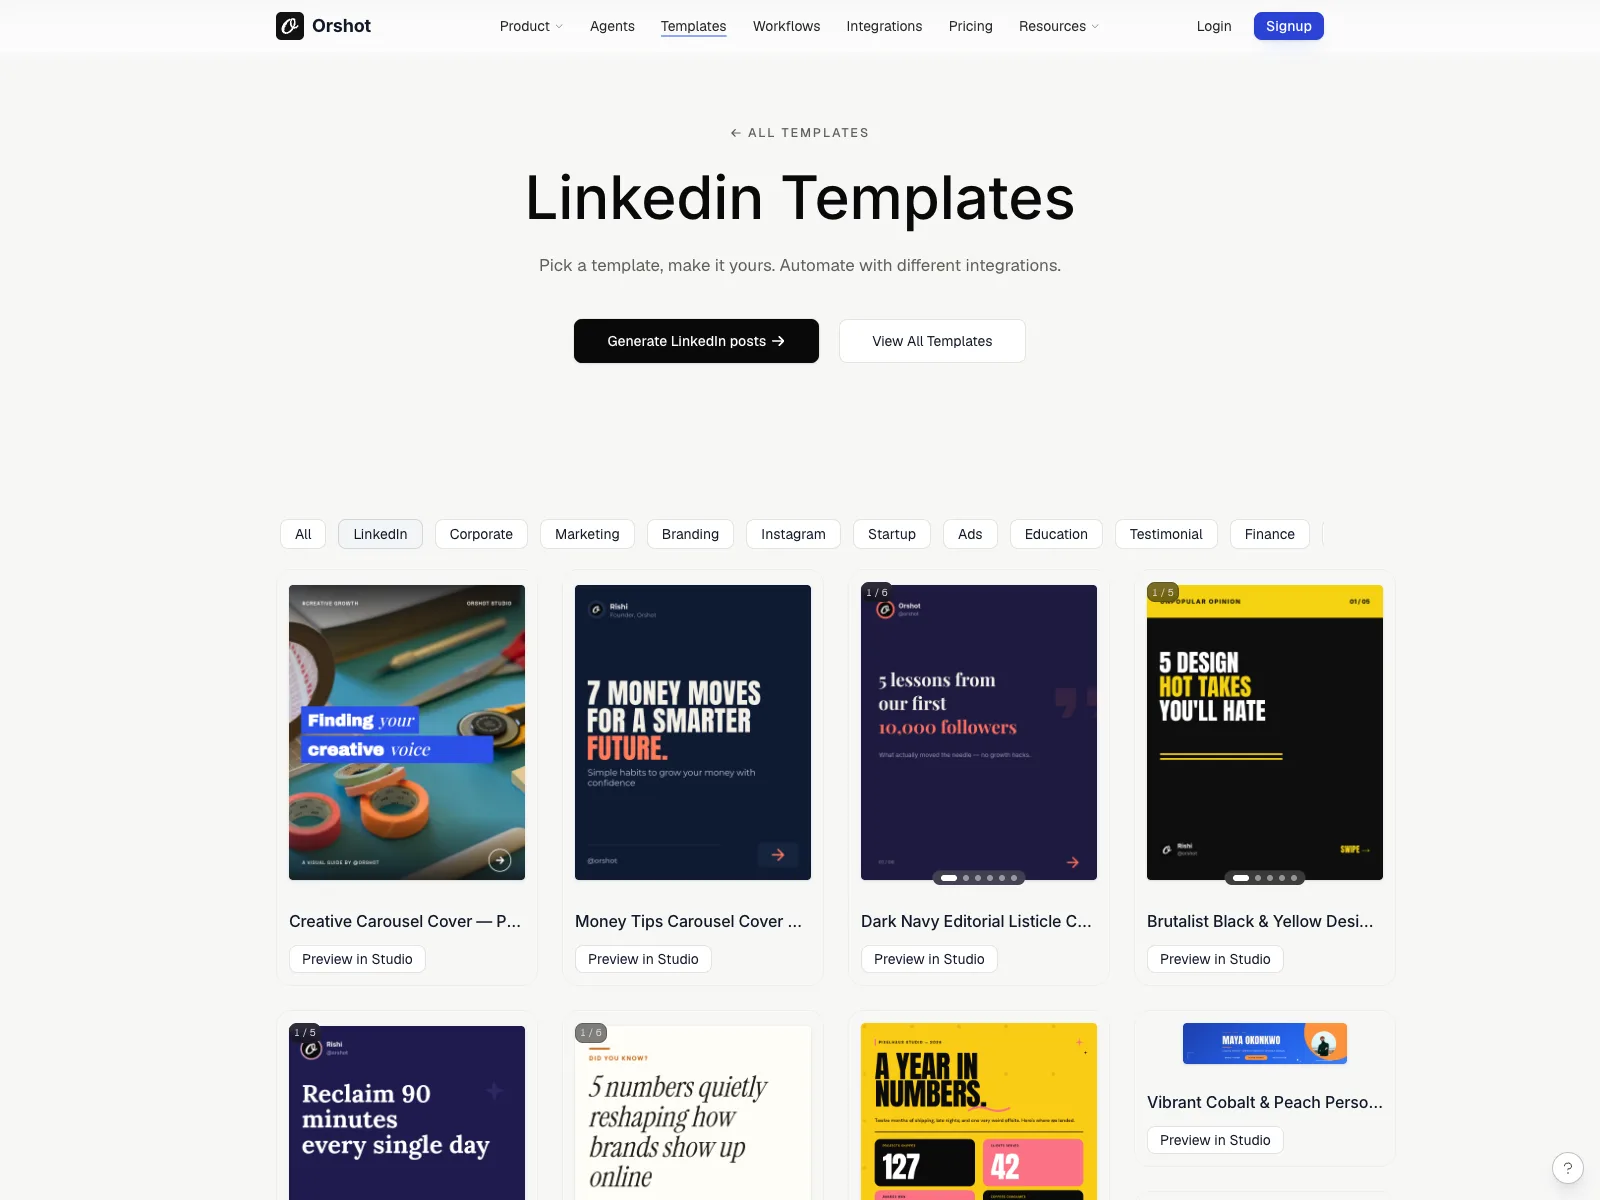
A few good ones to start from:
- Dark Navy Editorial Listicle (6 slides)
- Brutalist Black & Yellow (5 slides)
- Money Tips Carousel Cover
- Creative Carousel Cover
Here's one of them embedded live. Edit the text right here to see how fast it is to make it yours:
When you edit a template like this, every slide updates together, so the design stays consistent no matter what you type.
And because LinkedIn wants a PDF, you export the whole set as one file. Here's the actual PDF this template produced, ready to drop into a LinkedIn document post.
Already have carousels designed in Canva? You don't have to rebuild them. Import your design and it becomes an editable Orshot template you can brand and automate like any other.


In Canva: Share → “Public View Link” → copy the link.
2. Make it on-brand in Studio
Templates get you 90% there. To make it feel like yours, open it in Orshot Studio and bring in your brand.
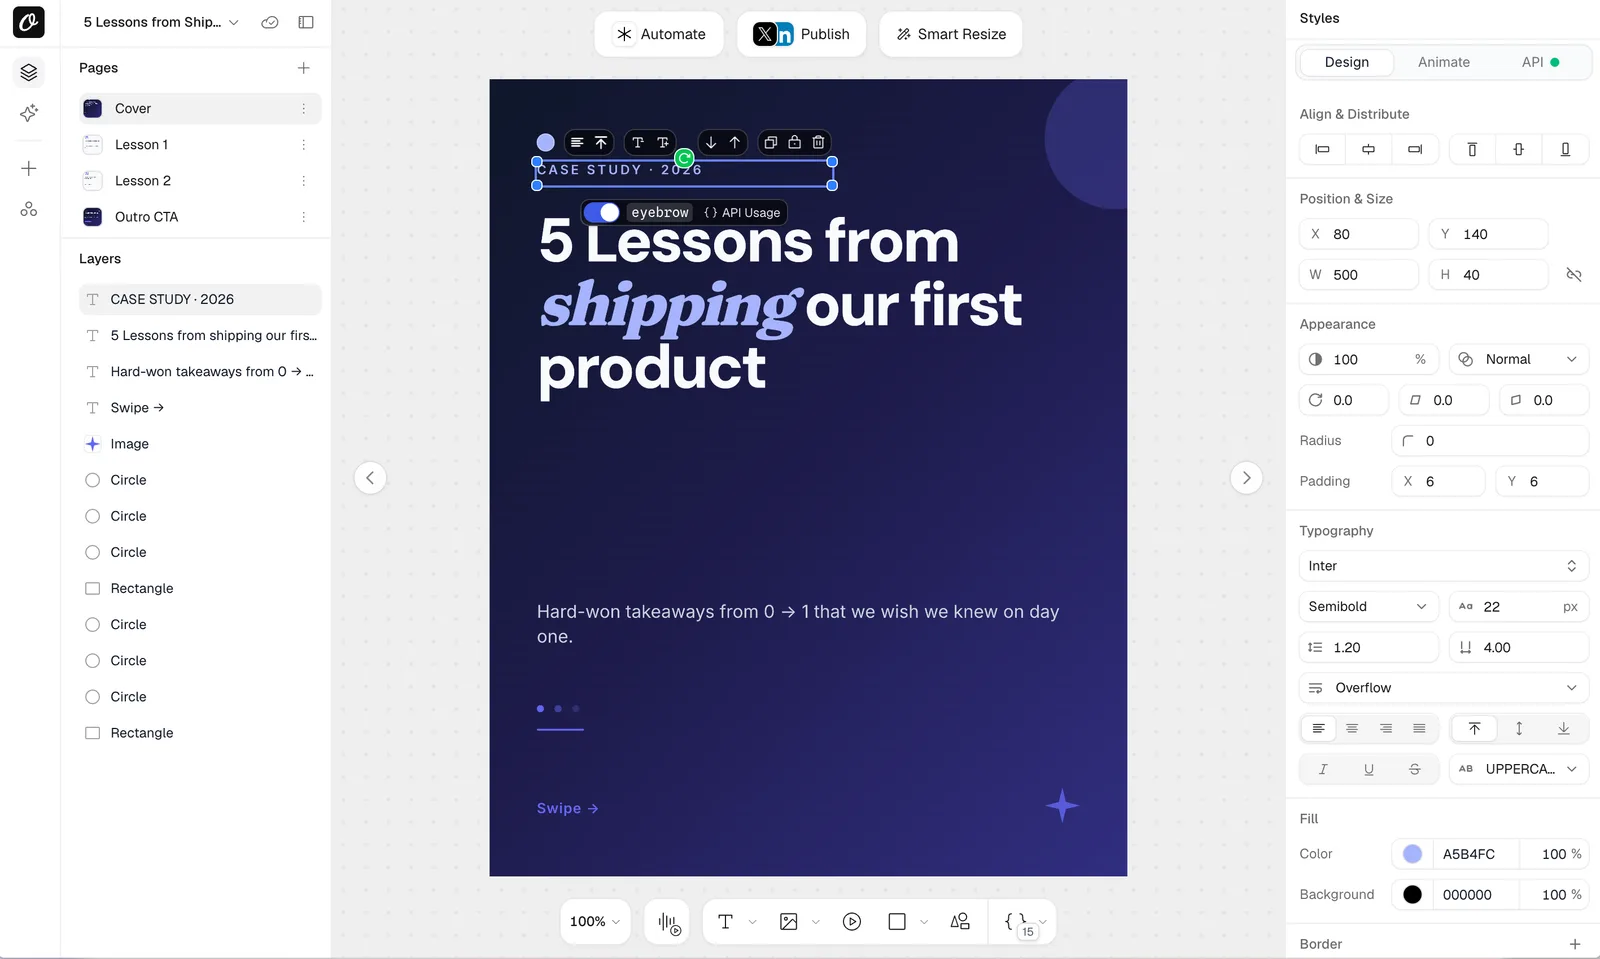
In Studio you can:
- Swap in your brand colors and fonts from your Brand Library, so every carousel matches without fiddling.
- Drop in your logo and change photos or icons.
- Adjust layouts, then save it as your own reusable template.
3. Connect your LinkedIn account
Before you can post from Orshot, connect LinkedIn once. In Studio, go to Publish > Social Accounts, pick LinkedIn, and finish the connection.
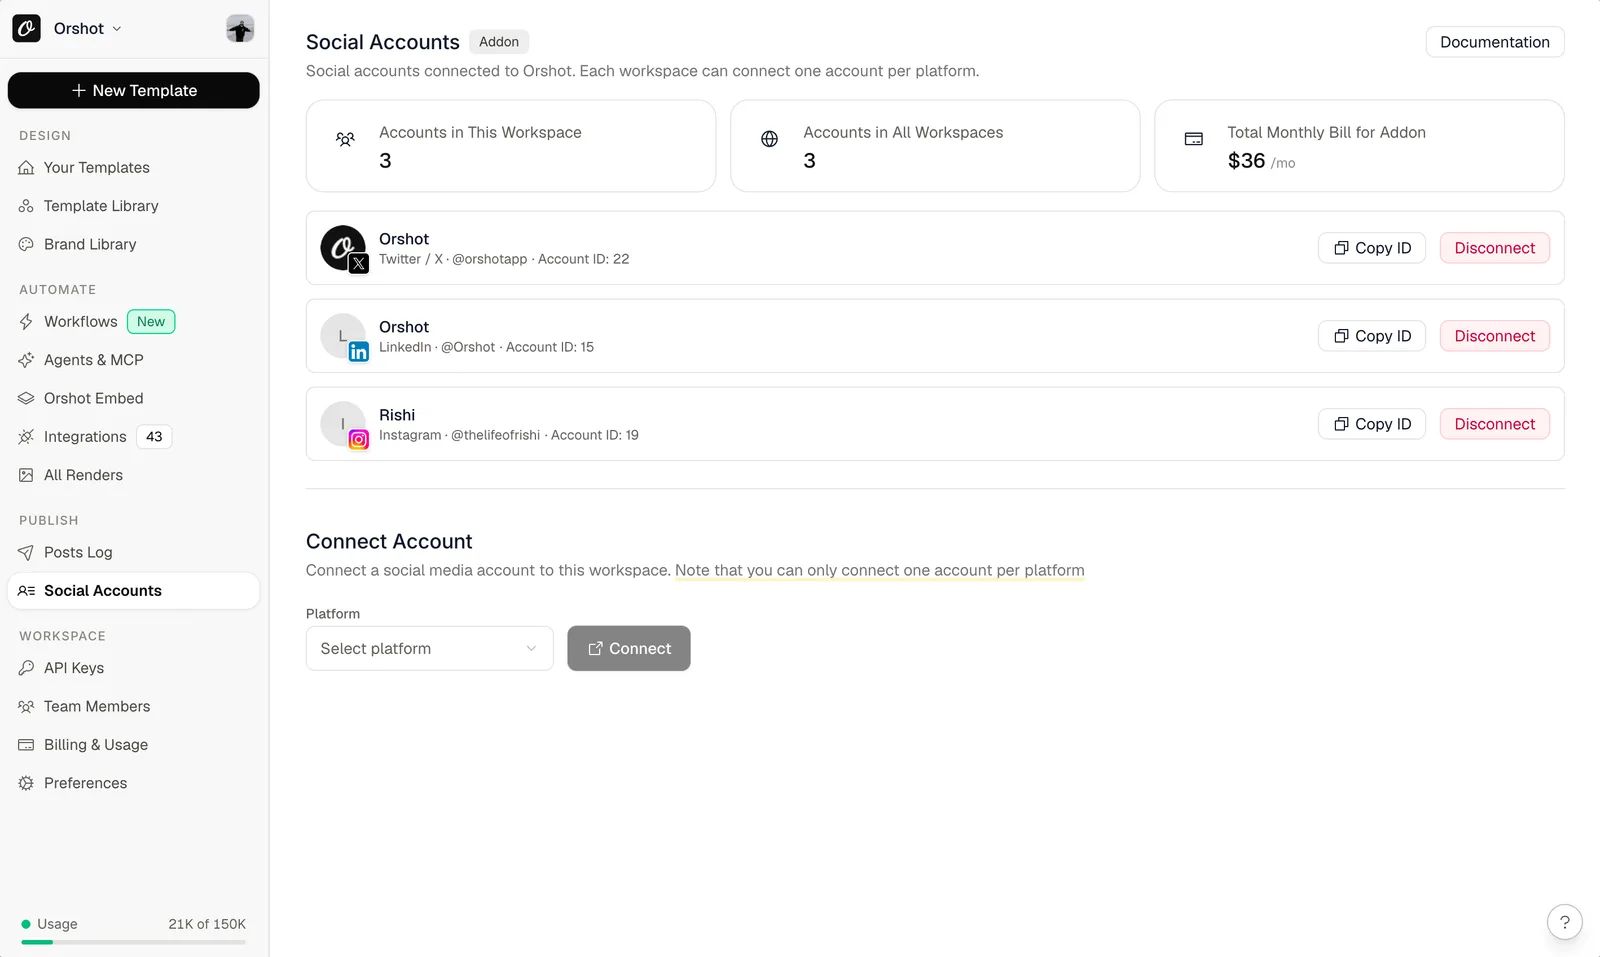
Once it's connected, you have two ways to post: straight from Studio, or fully automated.
4. Post a carousel from Studio (the quick way)
If you just want to ship one carousel, open it in Studio and hit Publish. Pick the pages, choose your LinkedIn account, write a caption, and post it now, schedule it, or save it as a draft.
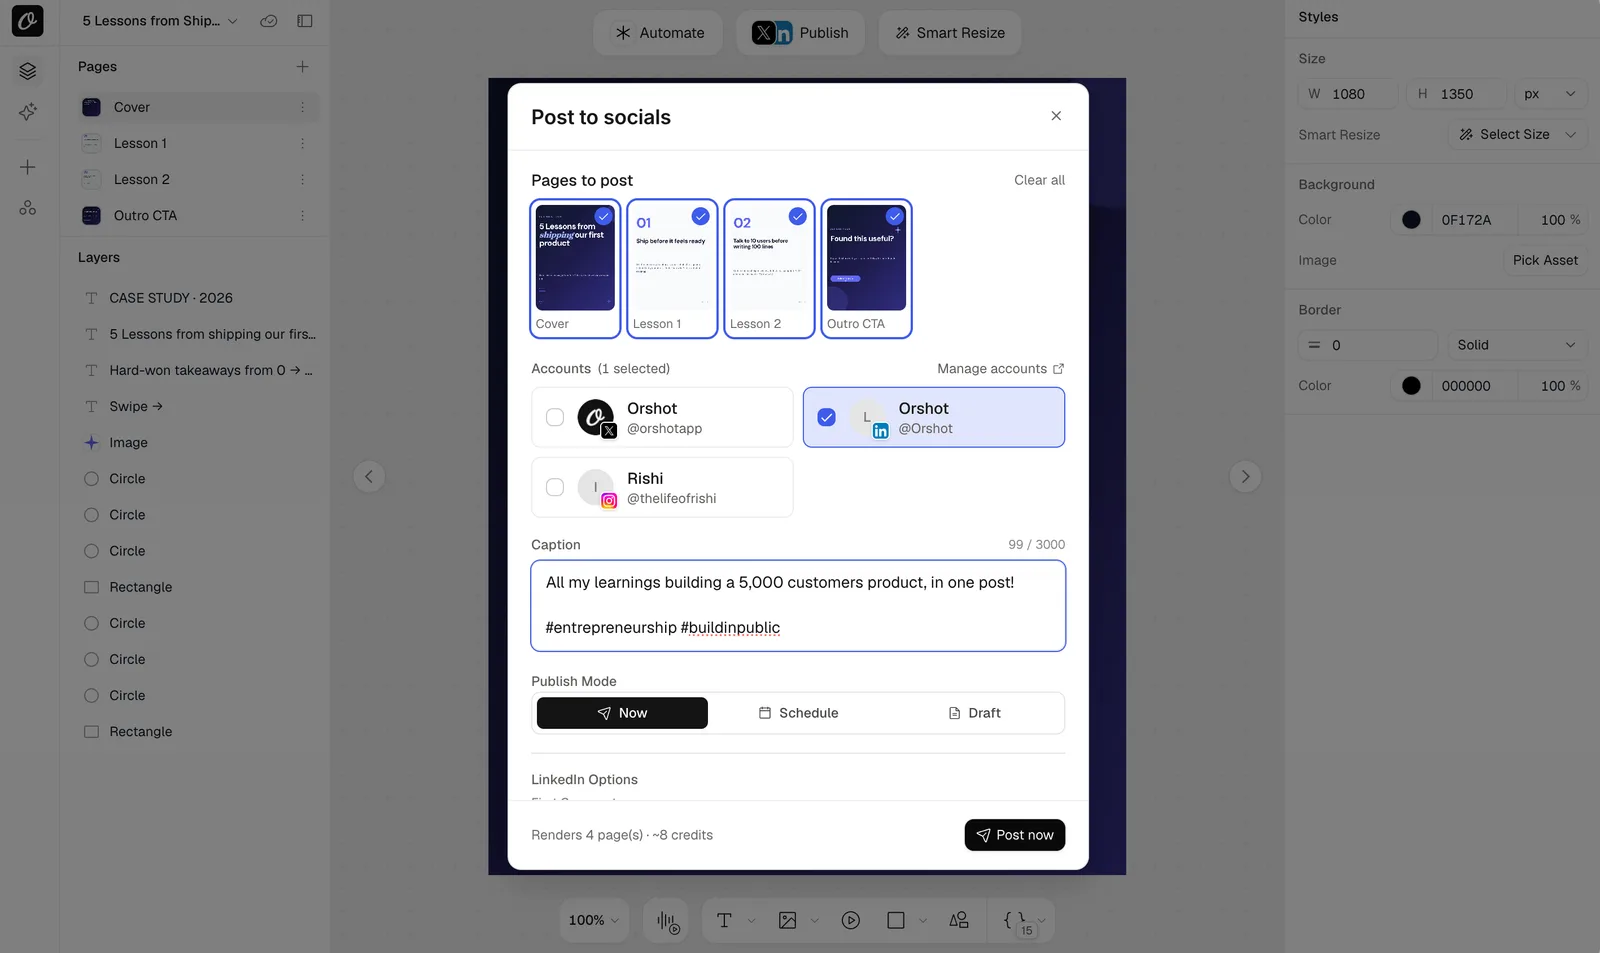
That alone beats exporting a PDF and uploading it by hand. But if you post regularly, you can make it hands-off.
5. Automate it end to end with Workflows
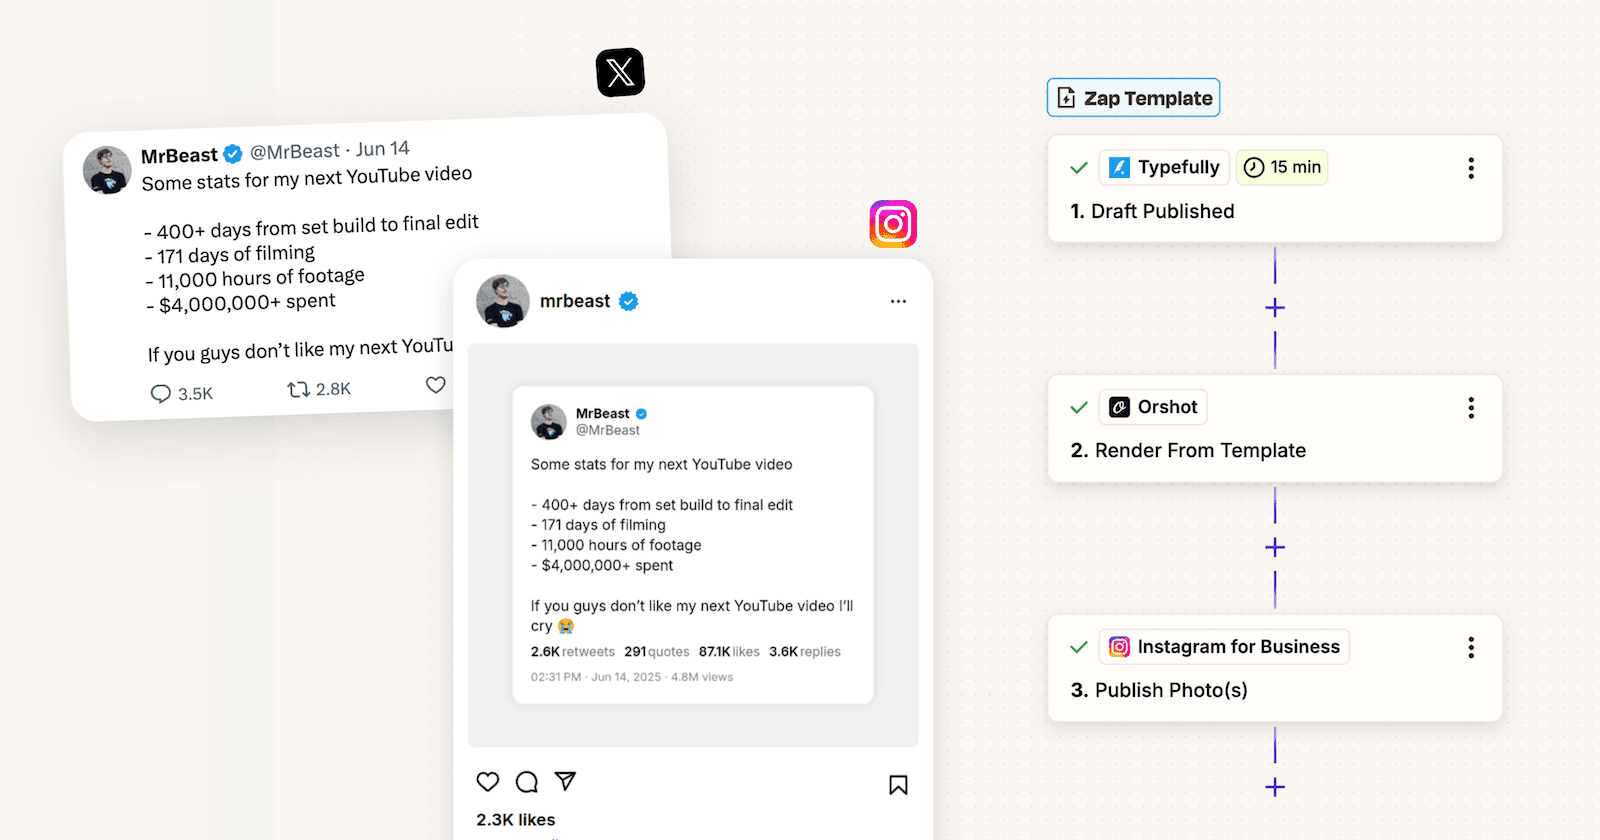
With Workflows, carousels generate and post themselves. If you have ever wished you could hand over your content and a template and have it fill in each carousel for you, this is that. A workflow is just: something happens, a carousel gets rendered, and it posts to LinkedIn. The trigger can be:
- A schedule (post a new carousel every weekday morning)
- A new Google Sheets row (fill a row, get a posted carousel)
- A new Airtable record or Notion page (great if your content calendar already lives there)
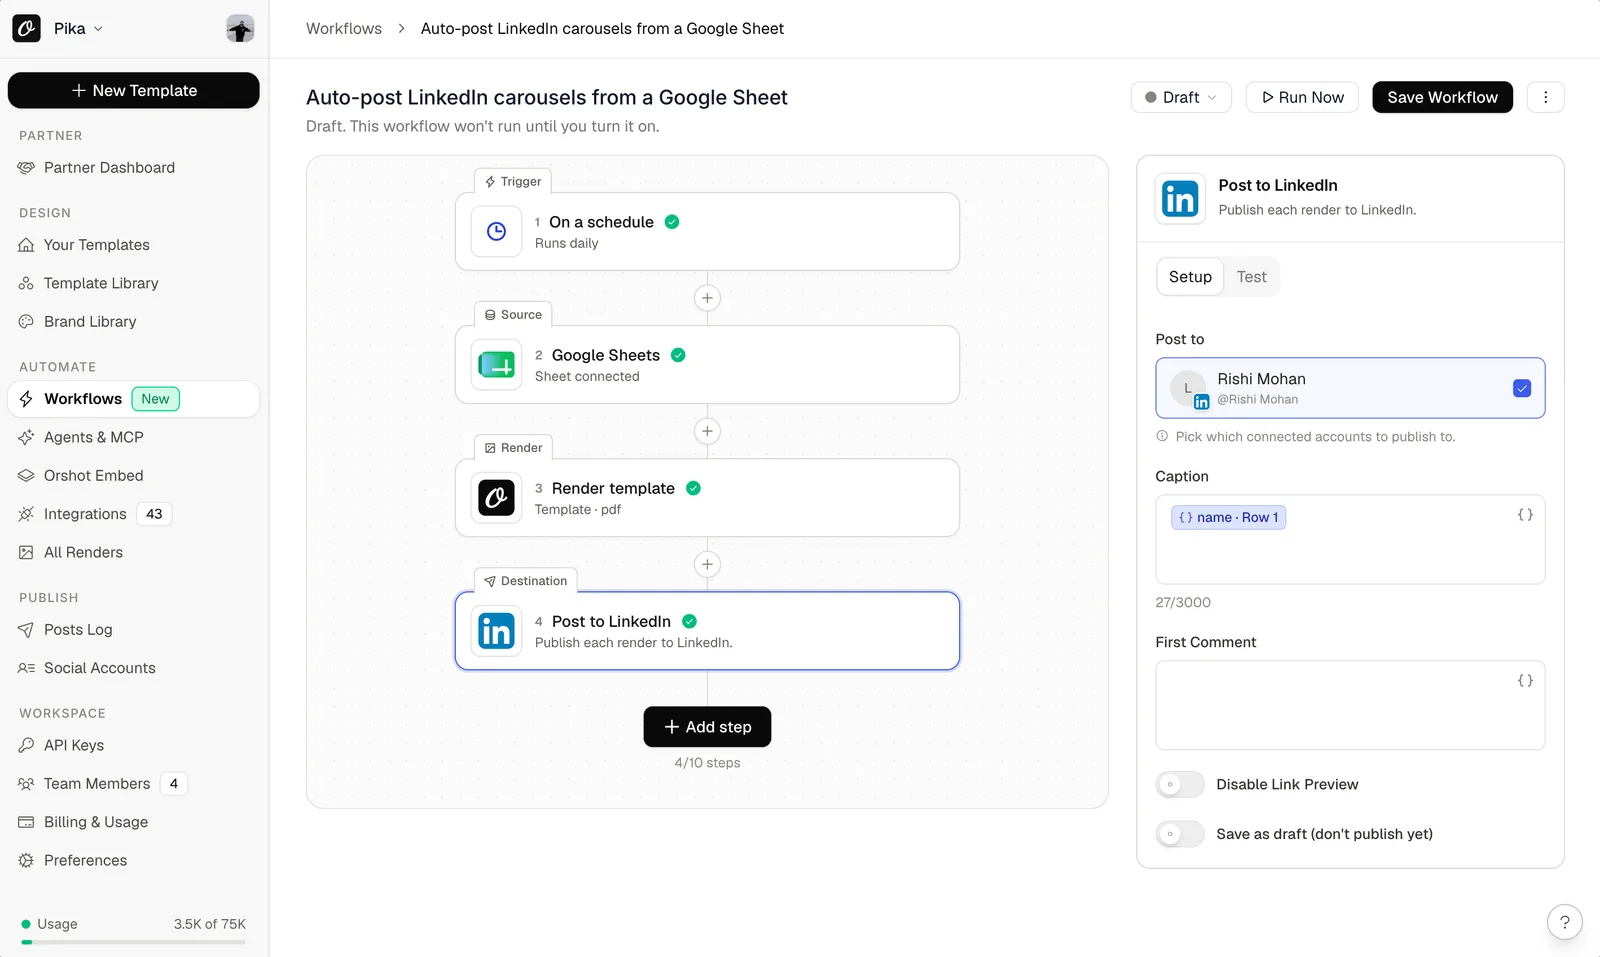
Here's that same workflow, ready to fork. It takes rows from a Google Sheet, renders each as a carousel, and posts it to LinkedIn on a schedule:
There are two more presets set up the same way if your content lives elsewhere: one for Notion and one for Airtable. Fork whichever matches your setup.
One important setting: in the render step, set the format to PDF. That's what makes LinkedIn treat it as a real swipeable document carousel. If you render as PNG instead, it posts as a multi-image swipe, which is fine but isn't the native carousel viewer. Orshot lets you send a PDF straight to LinkedIn, so use PDF when you want the true carousel.
A couple of honest notes so there are no surprises:
- Auto-posting runs through Orshot's Social Publishing add-on ($12 per connected account) plus a connected LinkedIn account. Rendering carousels is separate and doesn't need it.
- The schedule and Google Sheets triggers work on every plan. Airtable, Notion, and webhook triggers are on the Grow plan and up.
For developers: do it in one API call
If you'd rather wire this into your own app, you don't need the visual builder at all. Render a carousel as a PDF with a single request:
curl -X POST https://api.orshot.com/v1/studio/render \
  -H "Authorization: Bearer YOUR_API_KEY" \
  -H "Content-Type: application/json" \
  -d '{
    "templateId": 8321,
    "modifications": {
      "page1@headline": "5 lessons from our first launch",
      "page2@body": "Ship before it feels ready.",
      "page3@body": "Talk to 10 users before writing 100 lines."
    },
    "response": { "type": "url", "format": "pdf" }
  }'
You get back a PDF URL. From there you can post it to LinkedIn through the same Social Publishing accounts, so rendering and posting happen from one place. The full reference is in the render API docs. If you want a worked example, we have a full SvelteKit walkthrough too.
Best practices for LinkedIn carousels
A few things that consistently help:
- Lead with a strong cover. The first slide decides whether anyone swipes.
- One idea per slide. Carousels are for pacing, not paragraphs.
- Get them to the last slide. LinkedIn rewards dwell time, so give people a reason to keep swiping.
- Keep it portrait (1080 x 1350) so it fills more of the feed.
- End with a clear ask, like follow, repost, or a link in the first comment.
- Stay consistent. Same fonts and colors every time build recognition, which is exactly what templates and your Brand Library give you for free.
FAQ
How do I actually post a carousel on LinkedIn?
What size should a LinkedIn carousel be?
Can I automate posting carousels to LinkedIn?
Do I need design skills?
PDF or images, what's the difference on LinkedIn?
Why does my LinkedIn carousel look blurry or pixelated?
Can I schedule a carousel to post as a PDF instead of images?
Bottom line
Making one LinkedIn carousel by hand is fine. Making them every week is where it falls apart. Start from a template so you never open a blank canvas, brand it once in Studio, and then let a workflow generate and post them for you. You keep the consistency and lose the busywork.
If you want to try it, you can start for free and have your first carousel out today.