Airtable is great at holding data — testimonials, products, listings, events. It's just not built to turn that data into finished graphics. So the work lands on you: export to a sheet, open Canva, rebuild the same layout for every row.
This is about automating that away. Design the layout once in Orshot, point an Airtable automation at it, and every record renders itself into a branded image or PDF — with the file written straight back into an attachment field.
Quick expectation-check, since "images from Airtable" gets used two ways:
- AI art from a prompt — type "a watercolor fox," get a fox. That's a text-to-image model, not this.
- Designed graphics and PDFs from your records — every row becomes an on-brand card, certificate, or social post. That's what we're doing, basically template-based graphics from your Airtable data.
Try it on your own base free — 30 credits, no card.
What you'll build
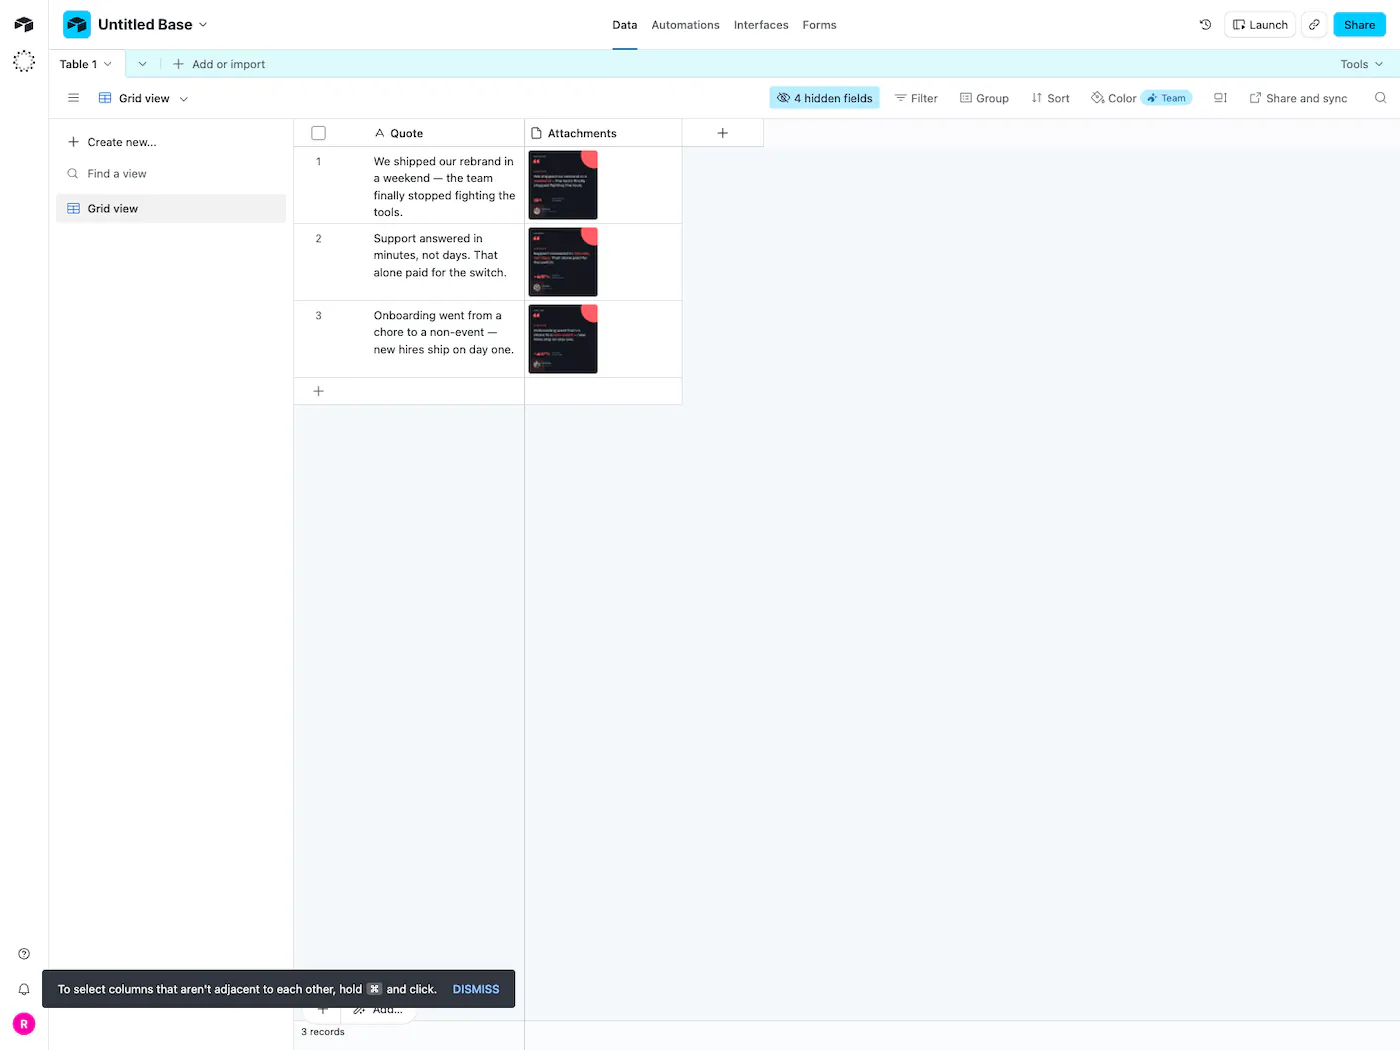
Here's the end state. This is a testimonials table where every quote rendered itself into a branded review card, dropped right into the Attachments field:
Same idea works for product cards, event banners, listing graphics, or per-record certificates — you template the design once, then every row fills it in.
Step 1 — your table
You need a Quote column for the text and an Attachments field for the finished card. Add a column for anything else each card should pull from your data — a name, a company, a stat — then map it in the next step.
Step 2 — a template
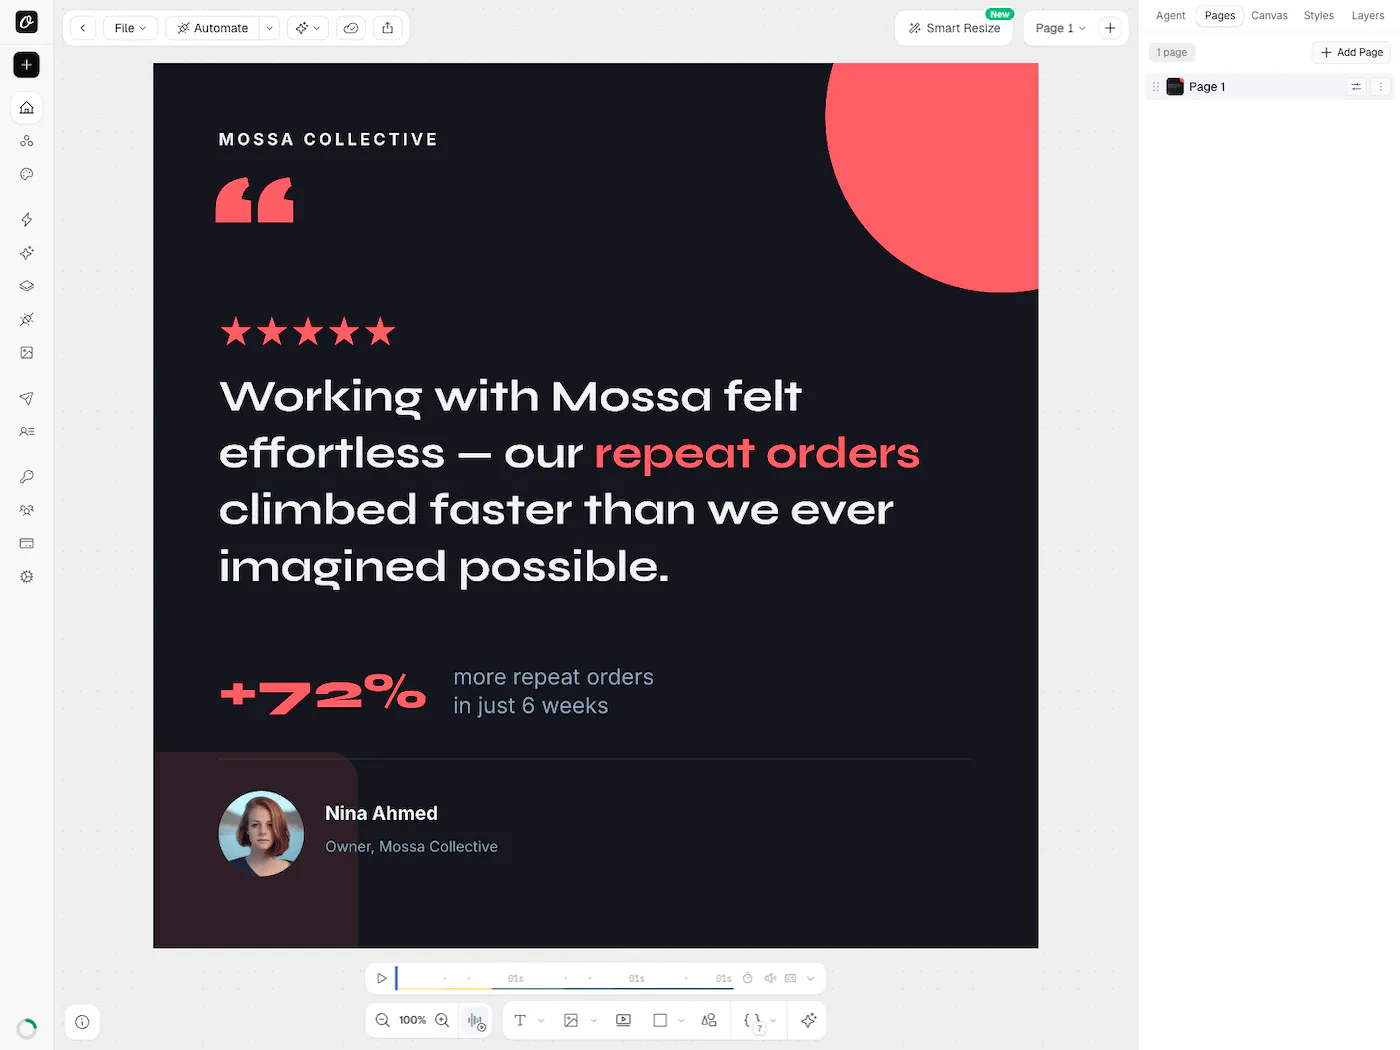
The Attachments column fills from an Orshot template — the design your rows pour into. This is the review card open in Studio, with the quote, stat, photo, and name all set up as fields:
Build your own from scratch, generate one with AI, or paste a Canva link and start from that:
In Canva: Share → “Public View Link” → copy the link.
Mark the parts you want driven by data — the quote, a name, a stat — as dynamic, and you're ready to wire it up.
Step 3 — the render
This is the part that calls Orshot and writes the card back. In Airtable it runs in the Scripting extension (fired by a button) or an Automation's Run a script action — both are on Airtable's paid (Team) plans. On the Free plan, skip to the no-code route below; it works on any plan.
You don't have to write the script from scratch. Open your template, hit Automate → Airtable, and Orshot hands you a ready-made script for that template with its fields already mapped — here's a trimmed version that drives the card from a couple of columns:
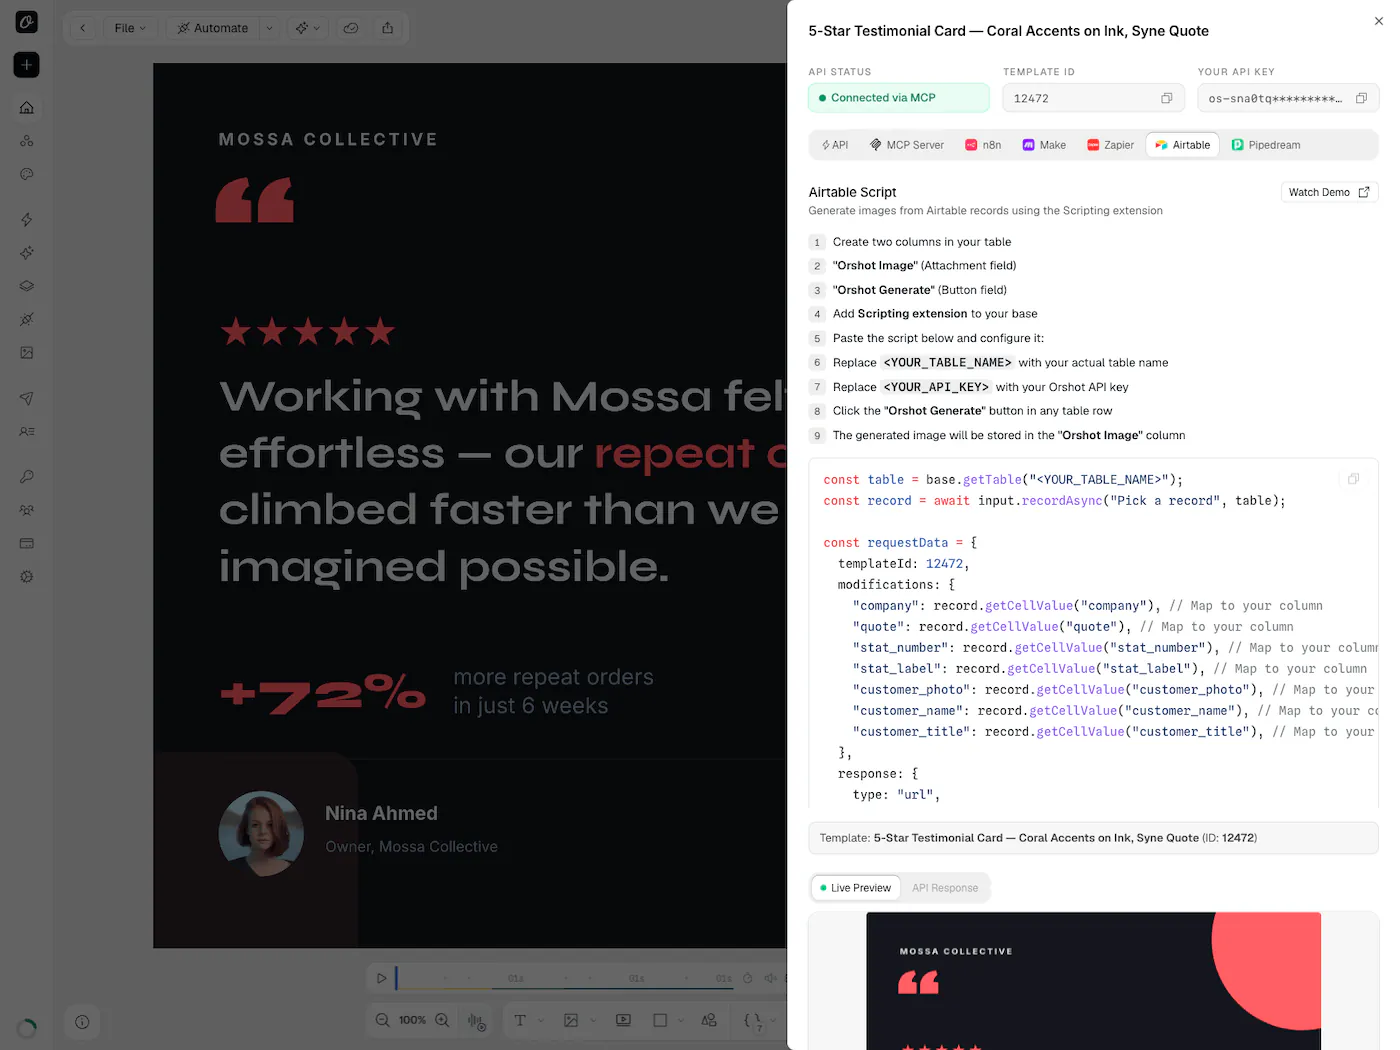
It reads a row, sends its fields to Orshot, and saves the returned file to the attachment field:
// Airtable script — render a review card from each row
const table = base.getTable("Testimonials");
const record = await input.recordAsync("Pick a record", table);

const res = await fetch("https://api.orshot.com/v1/studio/render", {
  method: "POST",
  headers: {
    Authorization: "Bearer YOUR_ORSHOT_API_KEY",
    "Content-Type": "application/json",
  },
  body: JSON.stringify({
    templateId: "your_template_id",
    modifications: {
      // map each column to a field in your template
      quote: record.getCellValueAsString("Quote"),
      customer_name: record.getCellValueAsString("Customer"),
      customer_title: record.getCellValueAsString("Title"),
      // add company, stat_number, stat_label, customer_photo to drive the rest
    },
    response: { type: "url", format: "png" }, // "pdf" gives a document instead
  }),
});

const { data } = await res.json();
await table.updateRecordAsync(record, { Attachments: [{ url: data.content }] });
modifications maps your columns onto the template. The render comes back as a hosted URL, and updateRecordAsync drops it into the Attachments field — that attachment URL is what shows the card right in the record — the same card you saw up top. (Quick Connect names the field Orshot Image; I used Airtable's default Attachments — use either, just match it in the script, and keep your key in the script's secrets, not in a shared base.)
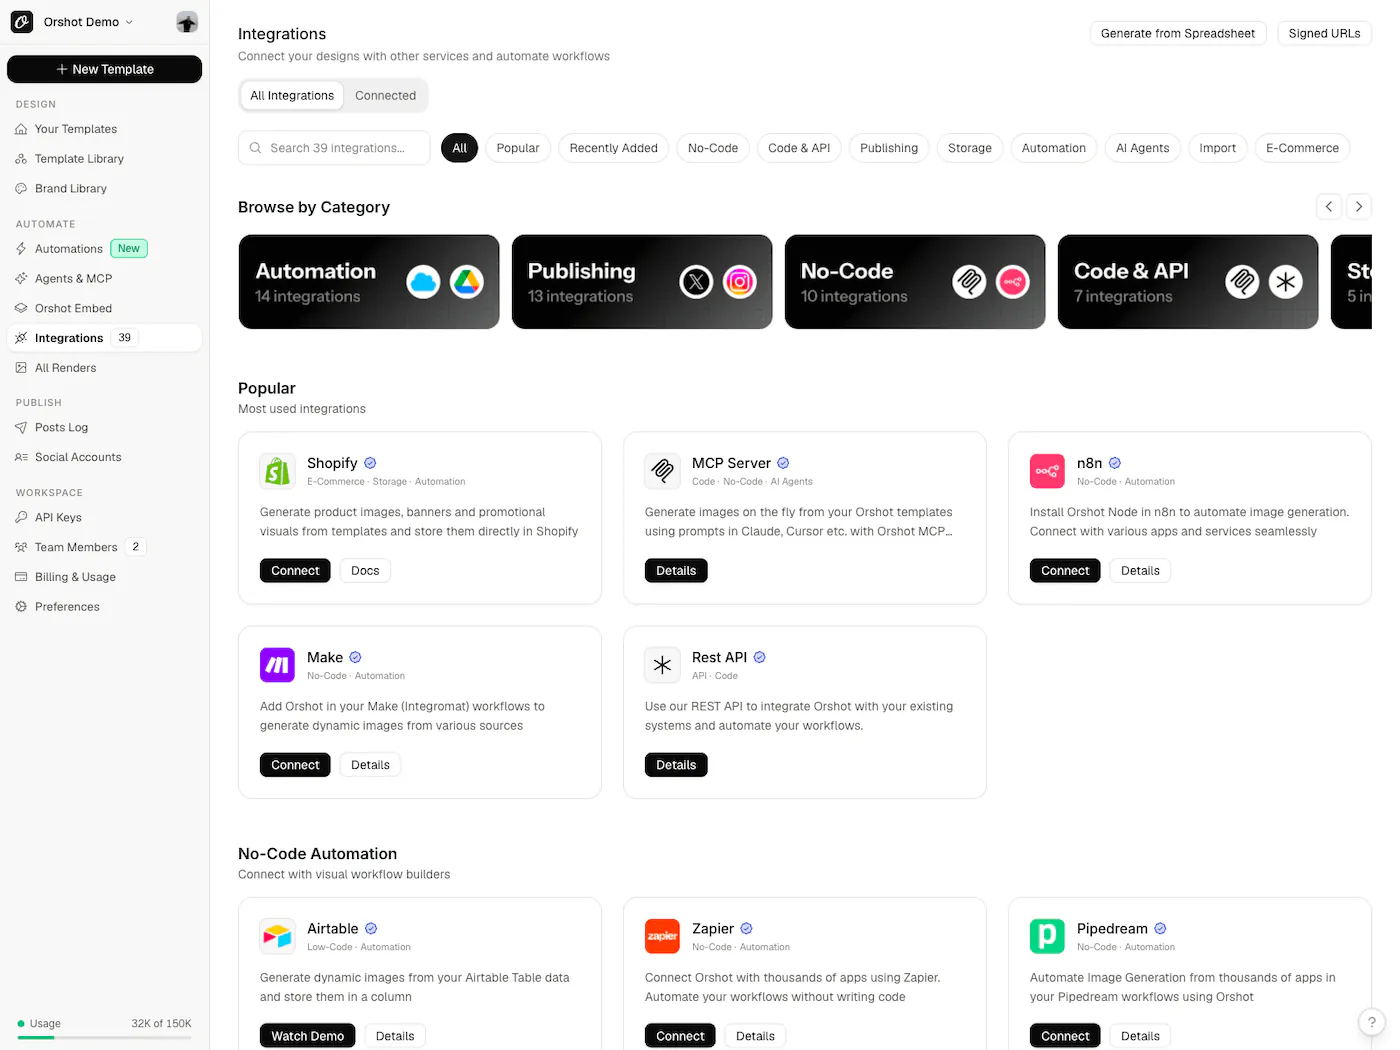
No-code: Make, Zapier, or n8n
On a Free Airtable plan, or if you'd rather not touch code, wire it up in a no-code tool instead. Orshot connects to Zapier, Make, n8n, and Pipedream directly:
The recipe's the same in all of them:
- Trigger — a new or updated Airtable record
- Render — send the fields to an Orshot render step
- Write back — update the record with the URL that returns
Full walkthroughs for Make and n8n. If you've built a Sheets-to-image flow before, this is the same shape against your base.
Then let it run
One render is a demo. The point is never thinking about it again. With the content automation in place, every new row turns itself into a finished file — like this base quietly rendering content and listings on its own:

A few things worth knowing:
- PDFs, not just images — switch
formattopdfand the same template becomes a per-record certificate, invoice, or one-pager.mp4gives you a short clip. - Backfill old rows by looping the script over a view, or batch the whole set at once
- It scales — renders run in parallel, so a big batch doesn't crawl
Point it at your base → — free, 30 credits, no card.
Common questions
Bottom line
If you meant AI art, grab a text-to-image model — Orshot isn't that.
If you meant automating Airtable to spit out clean, designed images and PDFs from the records you already keep, that's the whole job: template the design once, connect it through a script or a no-code automation, and every row renders its own.
The same approach works from Google Sheets and most data sources. Try it on the free credits, and if the field mapping trips you up, hit the chat — I'll walk you through it.