If you render videos on your own machine, use Remotion agent skills with Claude Code. If you want to make videos anywhere without hosting costs or setup, use Orshot.
Orshot renders in its cloud from Claude on your phone, desktop or the web, with a full editor and ready-made templates. Remotion runs in the cloud only on servers you set up and pay for.
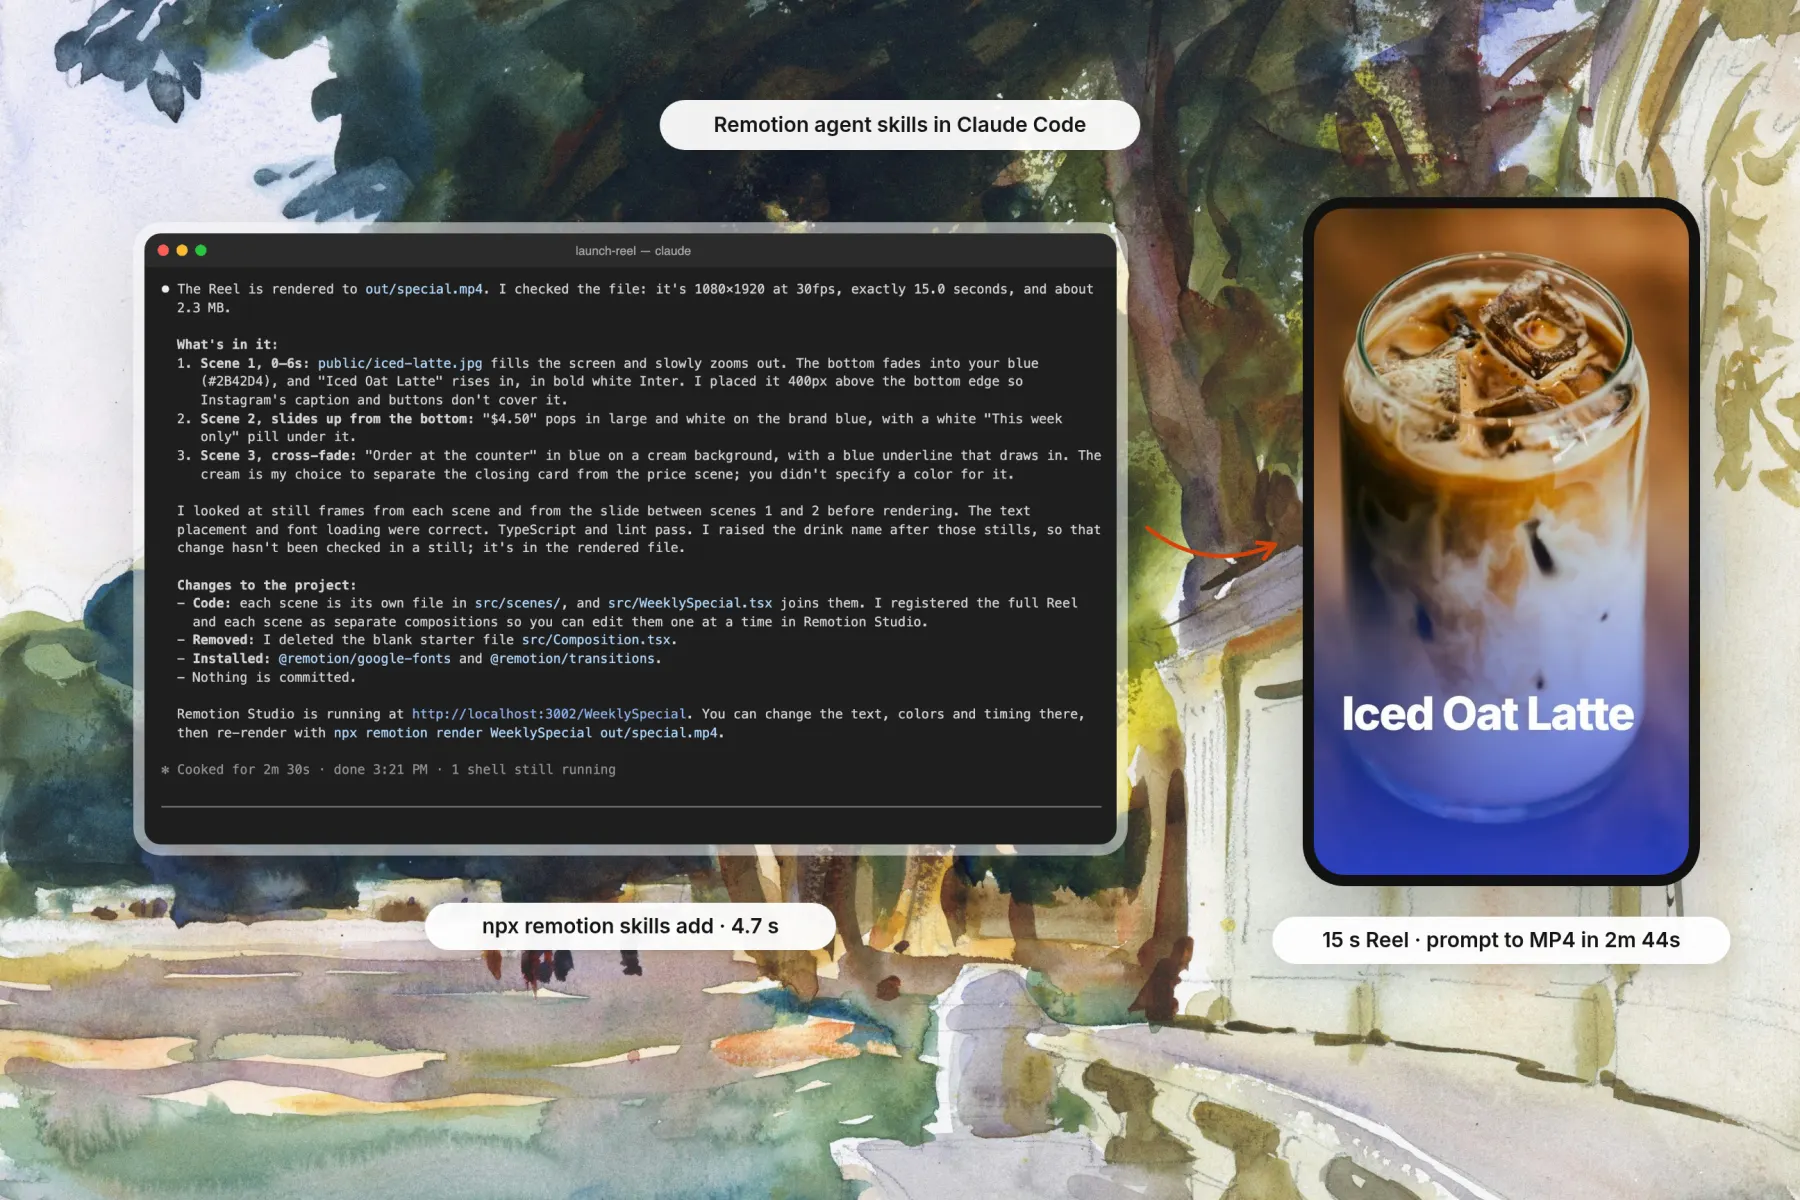
The Remotion setup is one command, npx remotion skills add, then /remotion-best-practices in Claude Code. In my run on November 8, 2026, the skills installed in 4.7 seconds and a 15-second Reel took 2 minutes 44 seconds.
| Route | Renders on | You set up | Best for |
|---|---|---|---|
| Remotion agent skills | Your computer, or your own AWS with Lambda | Node.js, a project and a terminal | Developers who want every frame in code |
| Orshot in Claude | Orshot's cloud | One connector, nothing to host | Videos made anywhere: phone, desktop or claude.ai |
I ran every step on an M5 Pro MacBook with Claude Code v2.1.319, Opus 5.5 and Remotion 4.0.541, then gave the same brief to Orshot in Claude Code.
1. Install Remotion Agent Skills in Claude Code
Remotion agent skills are 13 instruction files from the Remotion team that teach Claude Code how to write and render Remotion videos. You install them once per project with one command.
Pick this if you render on your own machine and want full control of every frame in code.
Step 1: Create a Remotion project
Remotion needs Node.js 20.19 or newer (or 22.13+, or 24+). Create a blank project and open it:
npx create-video@latest --yes --blank my-video
cd my-video
The project took 58.8 seconds to create, most of it npm install.
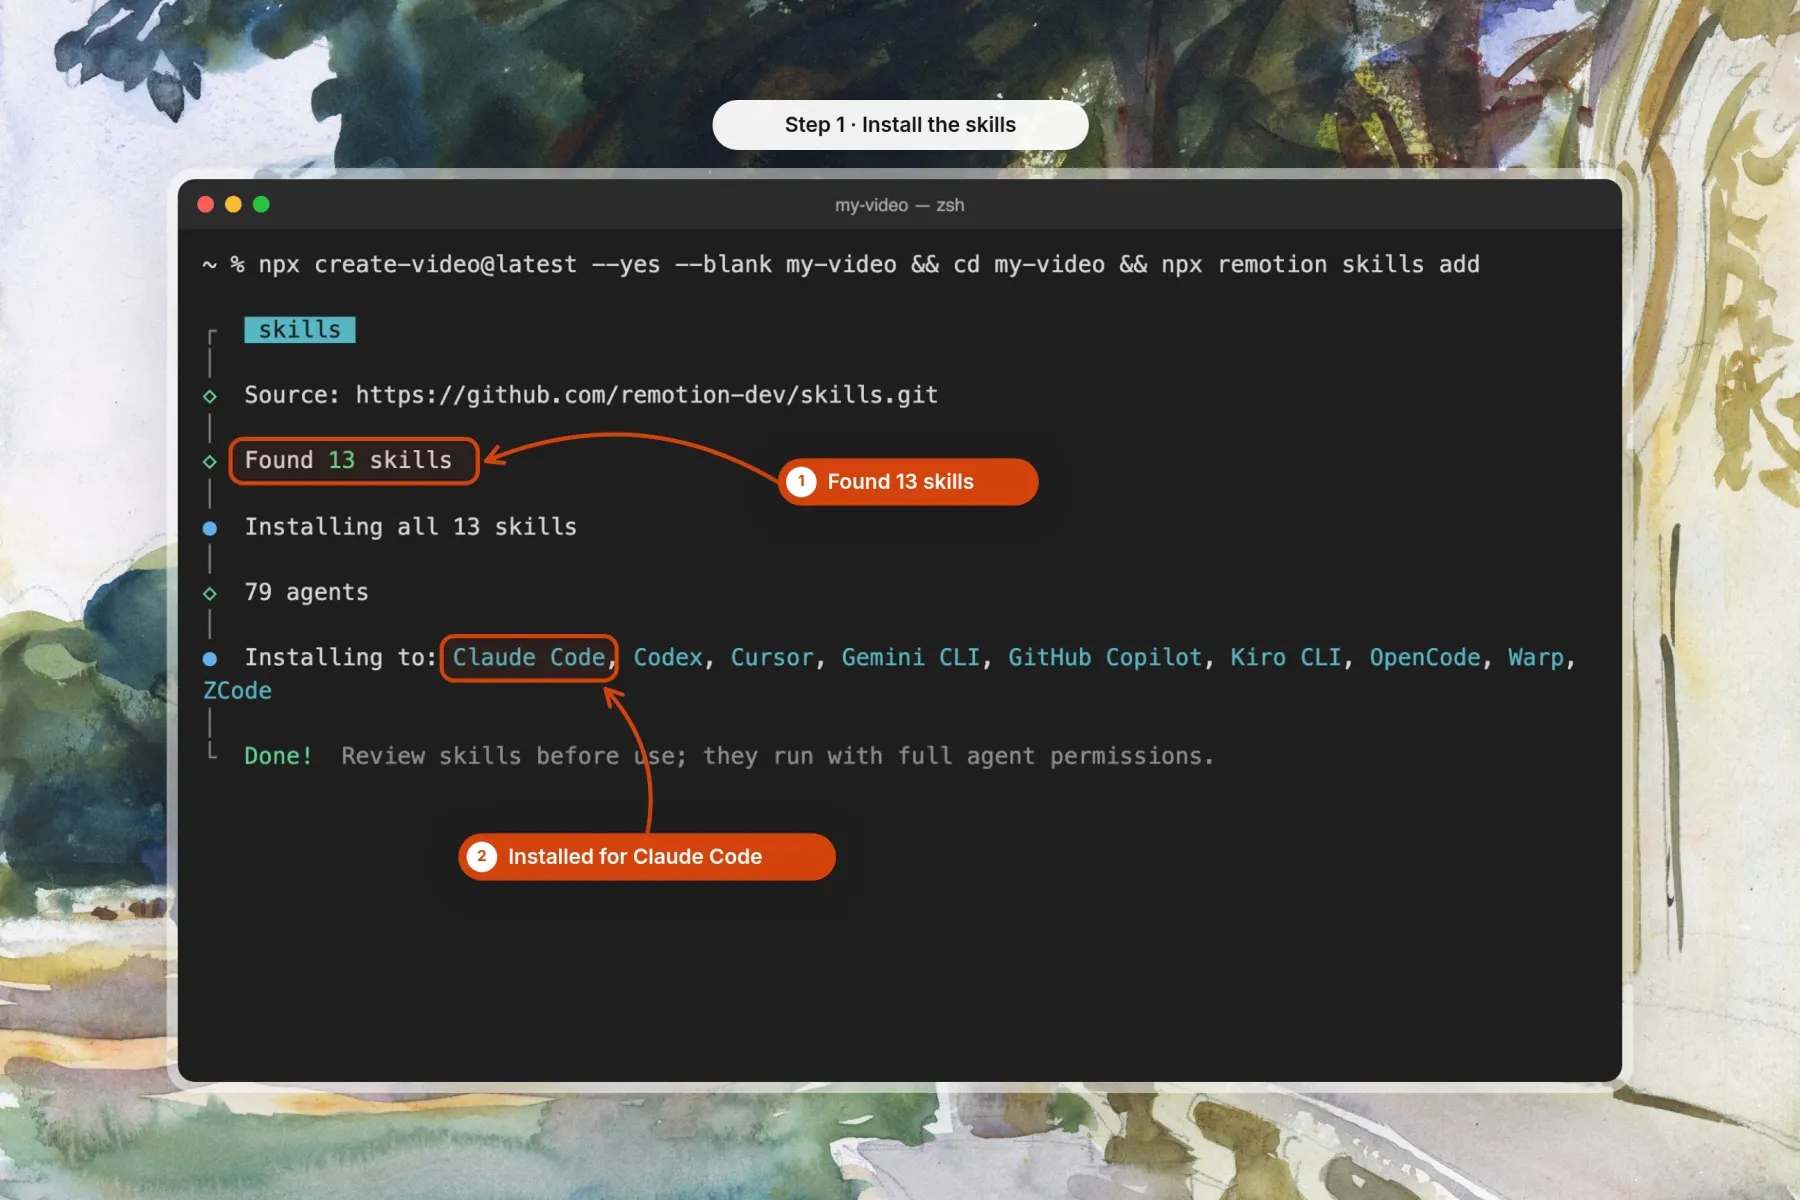
Step 2: Add the skills
Run the skills command inside the project:
npx remotion skills addIt found 13 skills, copied them to .agents/skills and linked them into .claude/skills, so Claude Code sees them with no extra setup. It ran without questions and finished in 4.7 seconds.
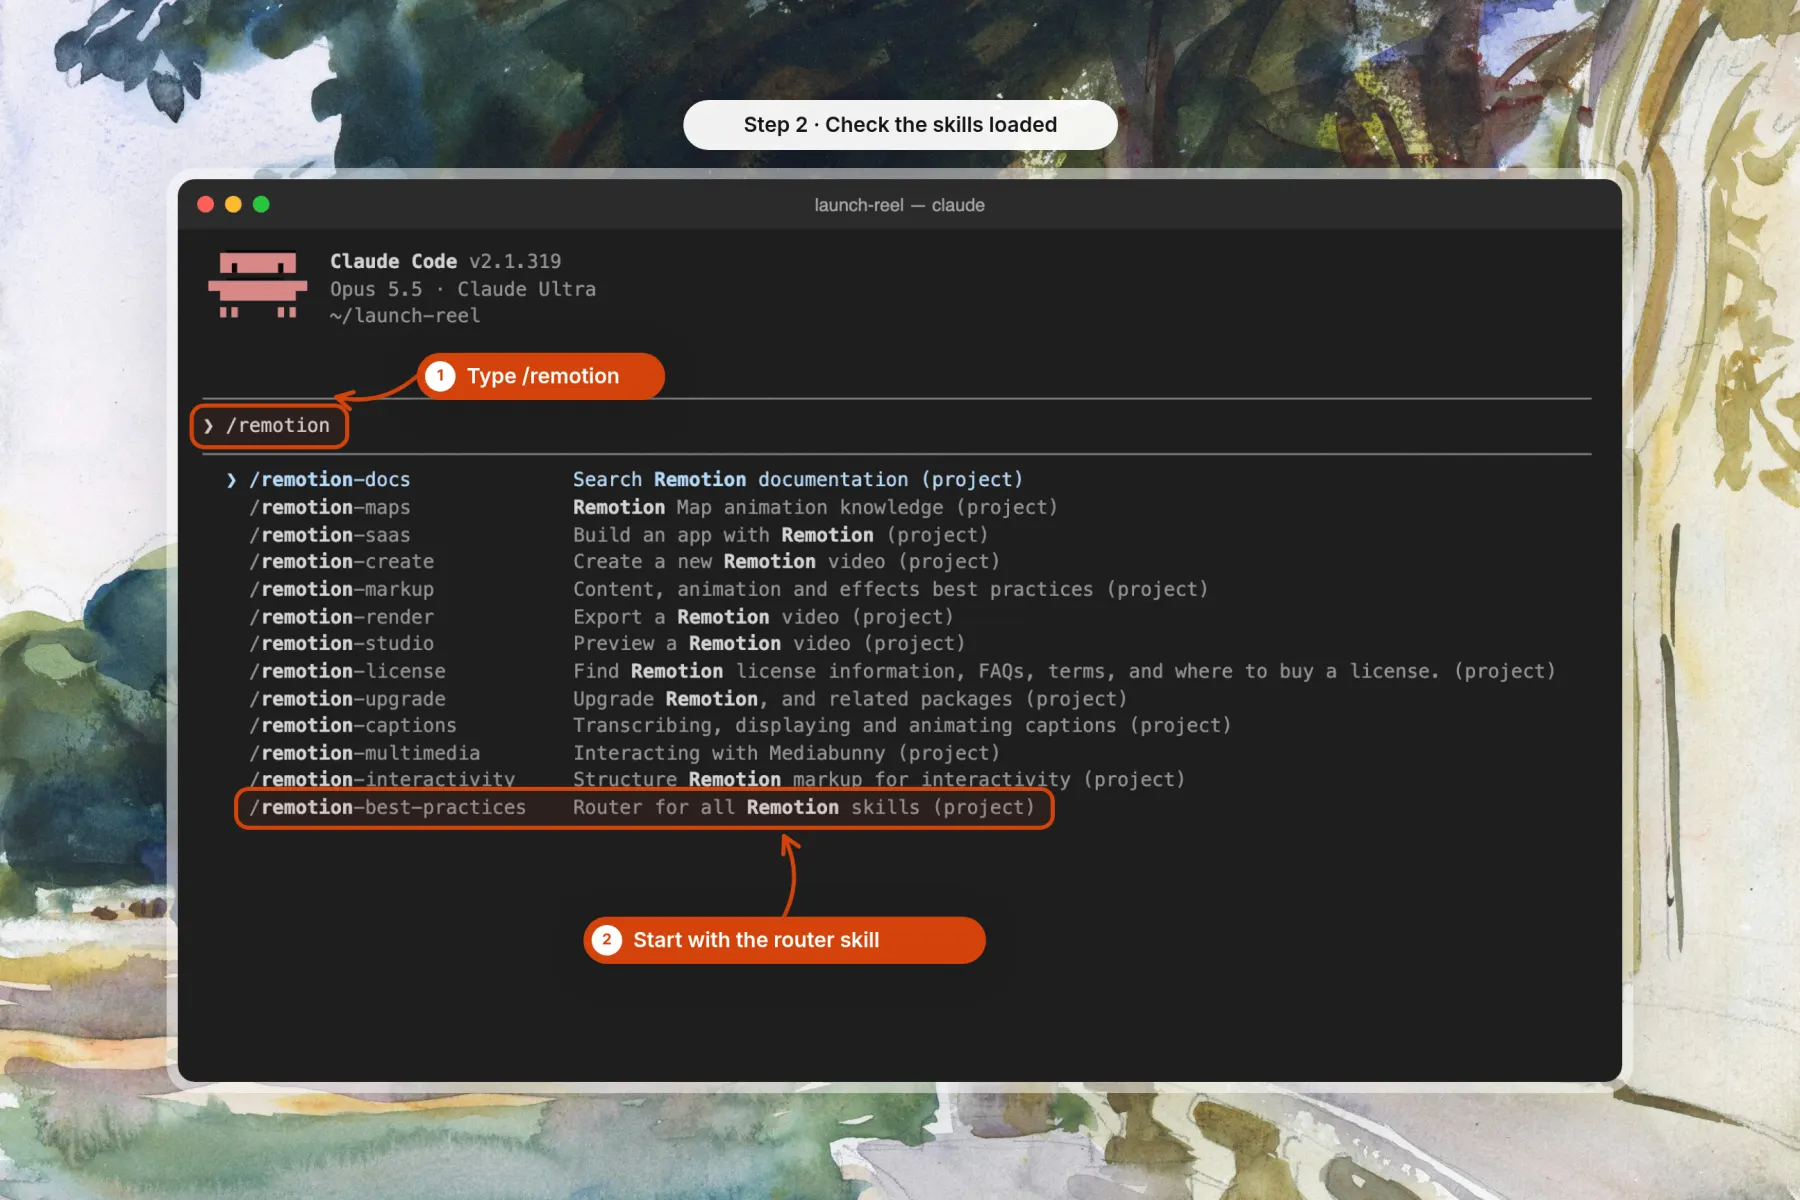
Step 3: Check that Claude Code loaded them
Start claude in the project folder and type /remotion. The menu lists every Remotion skill.
Start with /remotion-best-practices. It is the router skill: it reads your request and pulls in the right specialist skills, such as captions or rendering.
Or install the Claude Code plugin
The skills also ship as a Claude Code plugin, which loads them in every project instead of one:
claude plugin marketplace add remotion-dev/claude-code-plugin
claude plugin install remotion@remotion
Plugin skills are namespaced, so you type /remotion: before the skill name. I used the project install for this test.
2. Make Your First Remotion Video in Claude Code
The /remotion-best-practices skill turns a plain brief into a Remotion composition and renders it. Put the skill name first, then the size, length, each scene, your brand and the output file.
Pick this if you need one video and you'll check the code or the preview yourself.
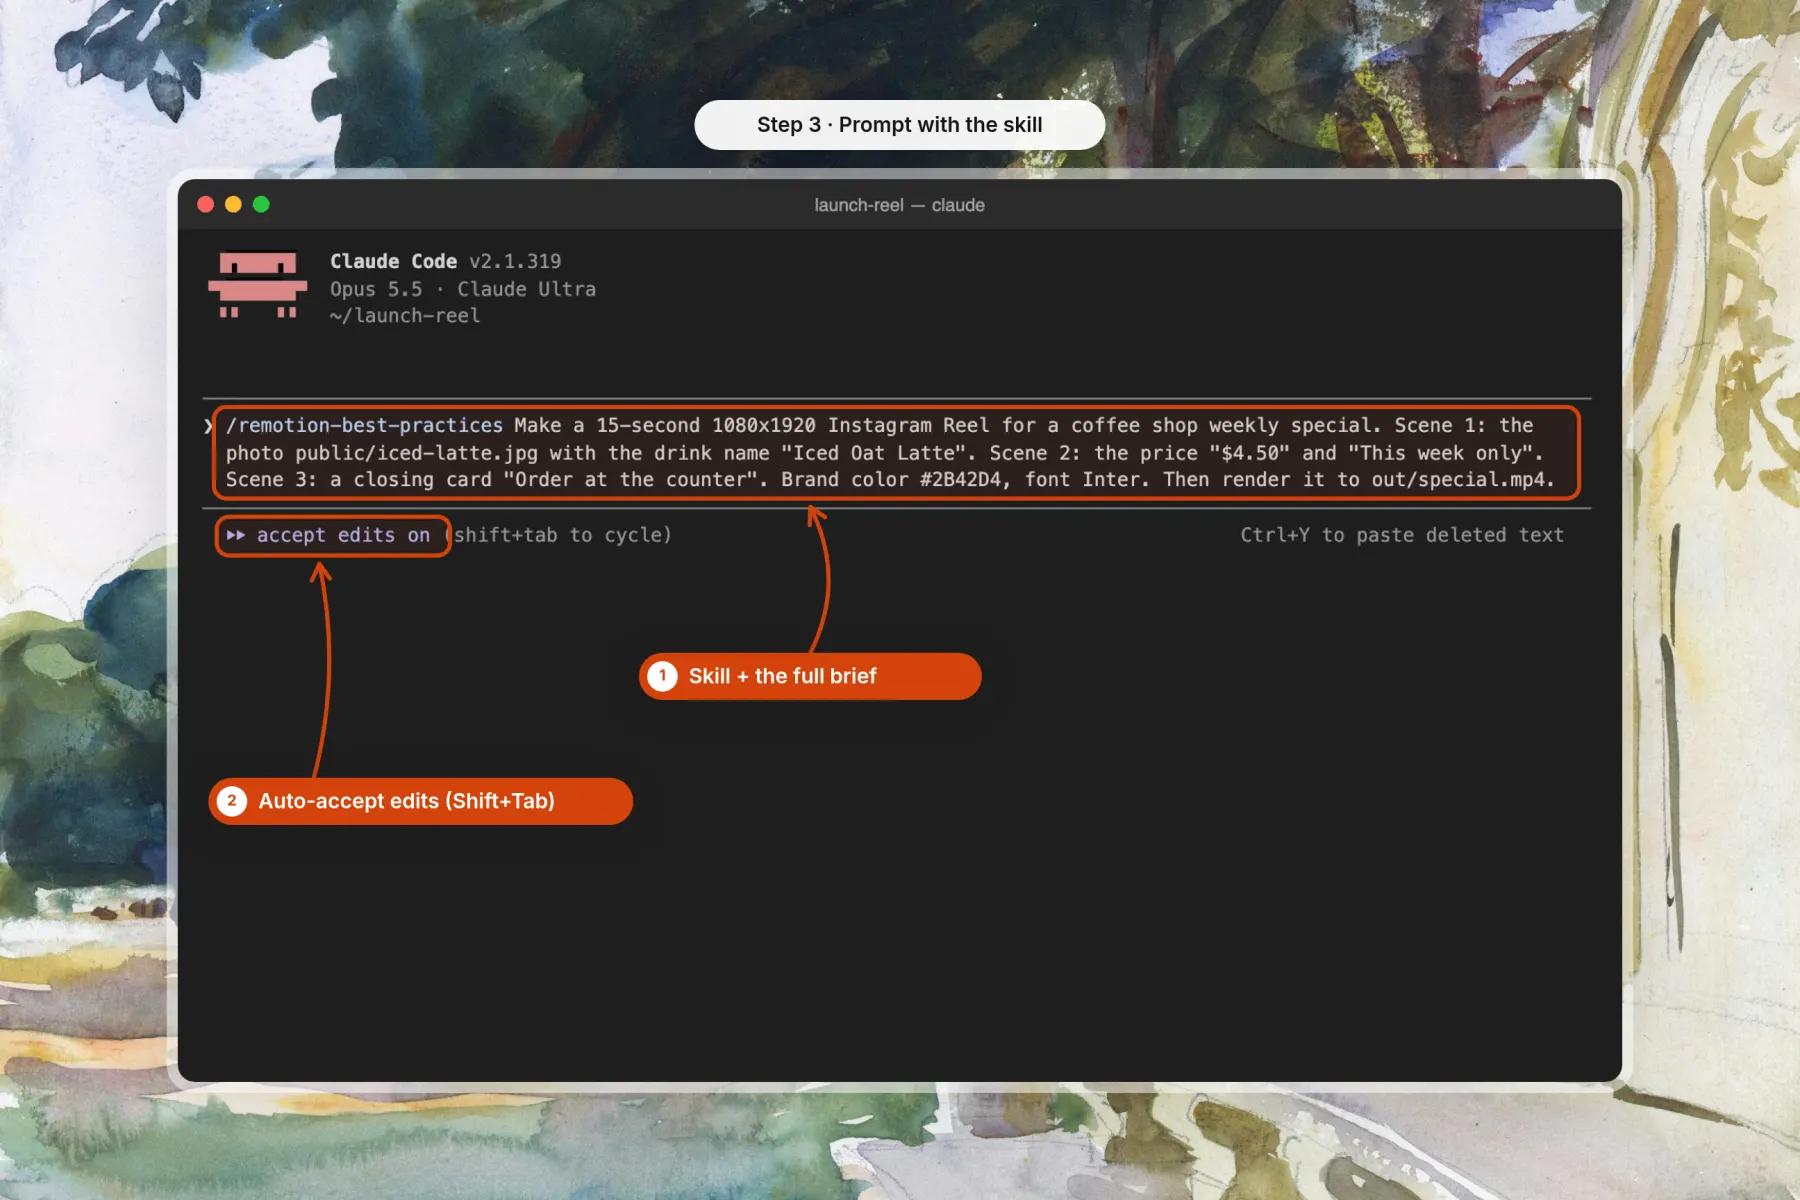
Step 1: Prompt with the skill and the full brief
This is the exact prompt I used, with a photo saved in public/:
/remotion-best-practices Make a 15-second 1080x1920 Instagram Reel for a coffee
shop weekly special. Scene 1: the photo public/iced-latte.jpg with the drink name
"Iced Oat Latte". Scene 2: the price "$4.50" and "This week only". Scene 3: a
closing card "Order at the counter". Brand color #2B42D4, font Inter. Then render
it to out/special.mp4.
Turn on auto-accept edits with Shift+Tab, or Claude Code stops to ask before each file it writes.
Step 2: Let Claude Code write and render the video
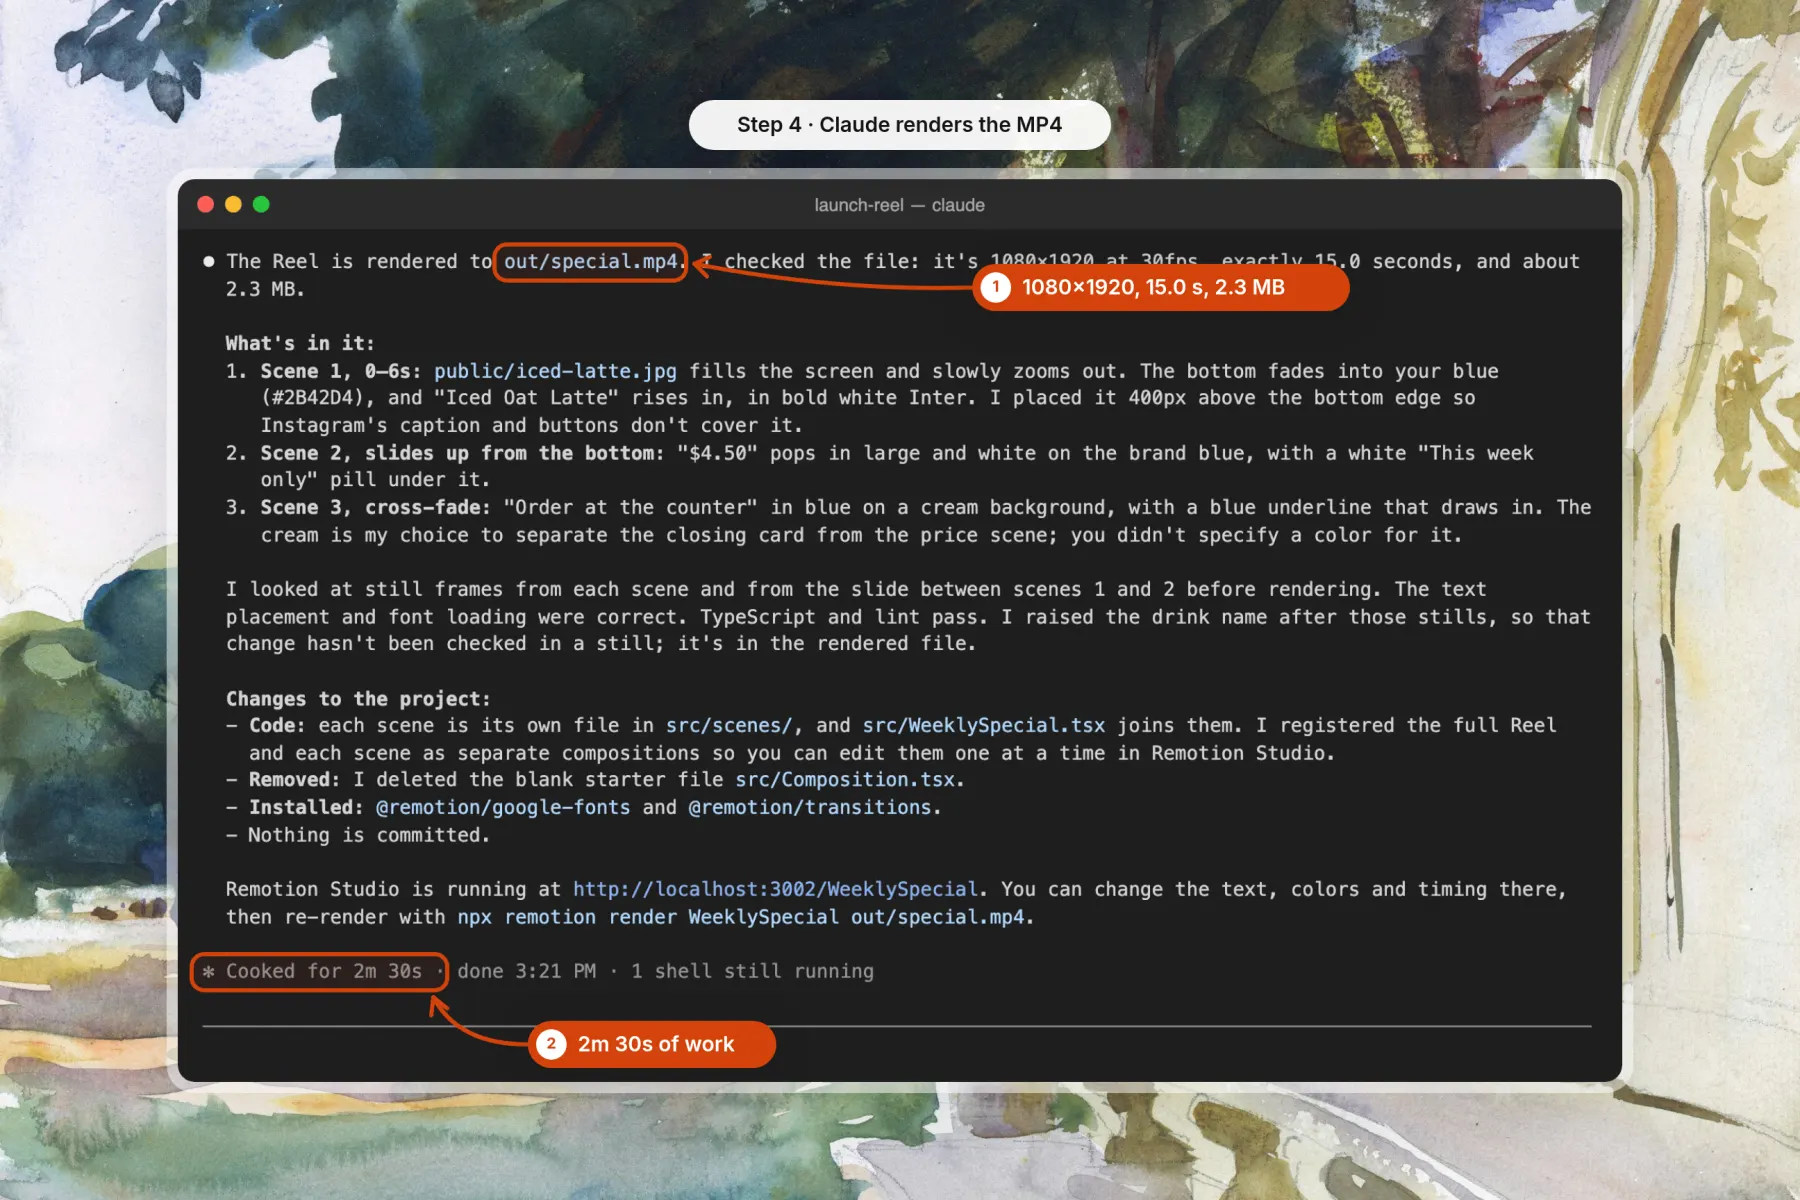
Claude Code wrote three scene files, checked a still of each scene and ran npx remotion render. The MP4 came out at 1080×1920, 15.0 seconds and 2.3 MB.
Claude Code reported 2 minutes 30 seconds of work, and 2 minutes 44 seconds passed from sending the prompt to the finished file.
Step 3: Preview and tweak in Remotion Studio
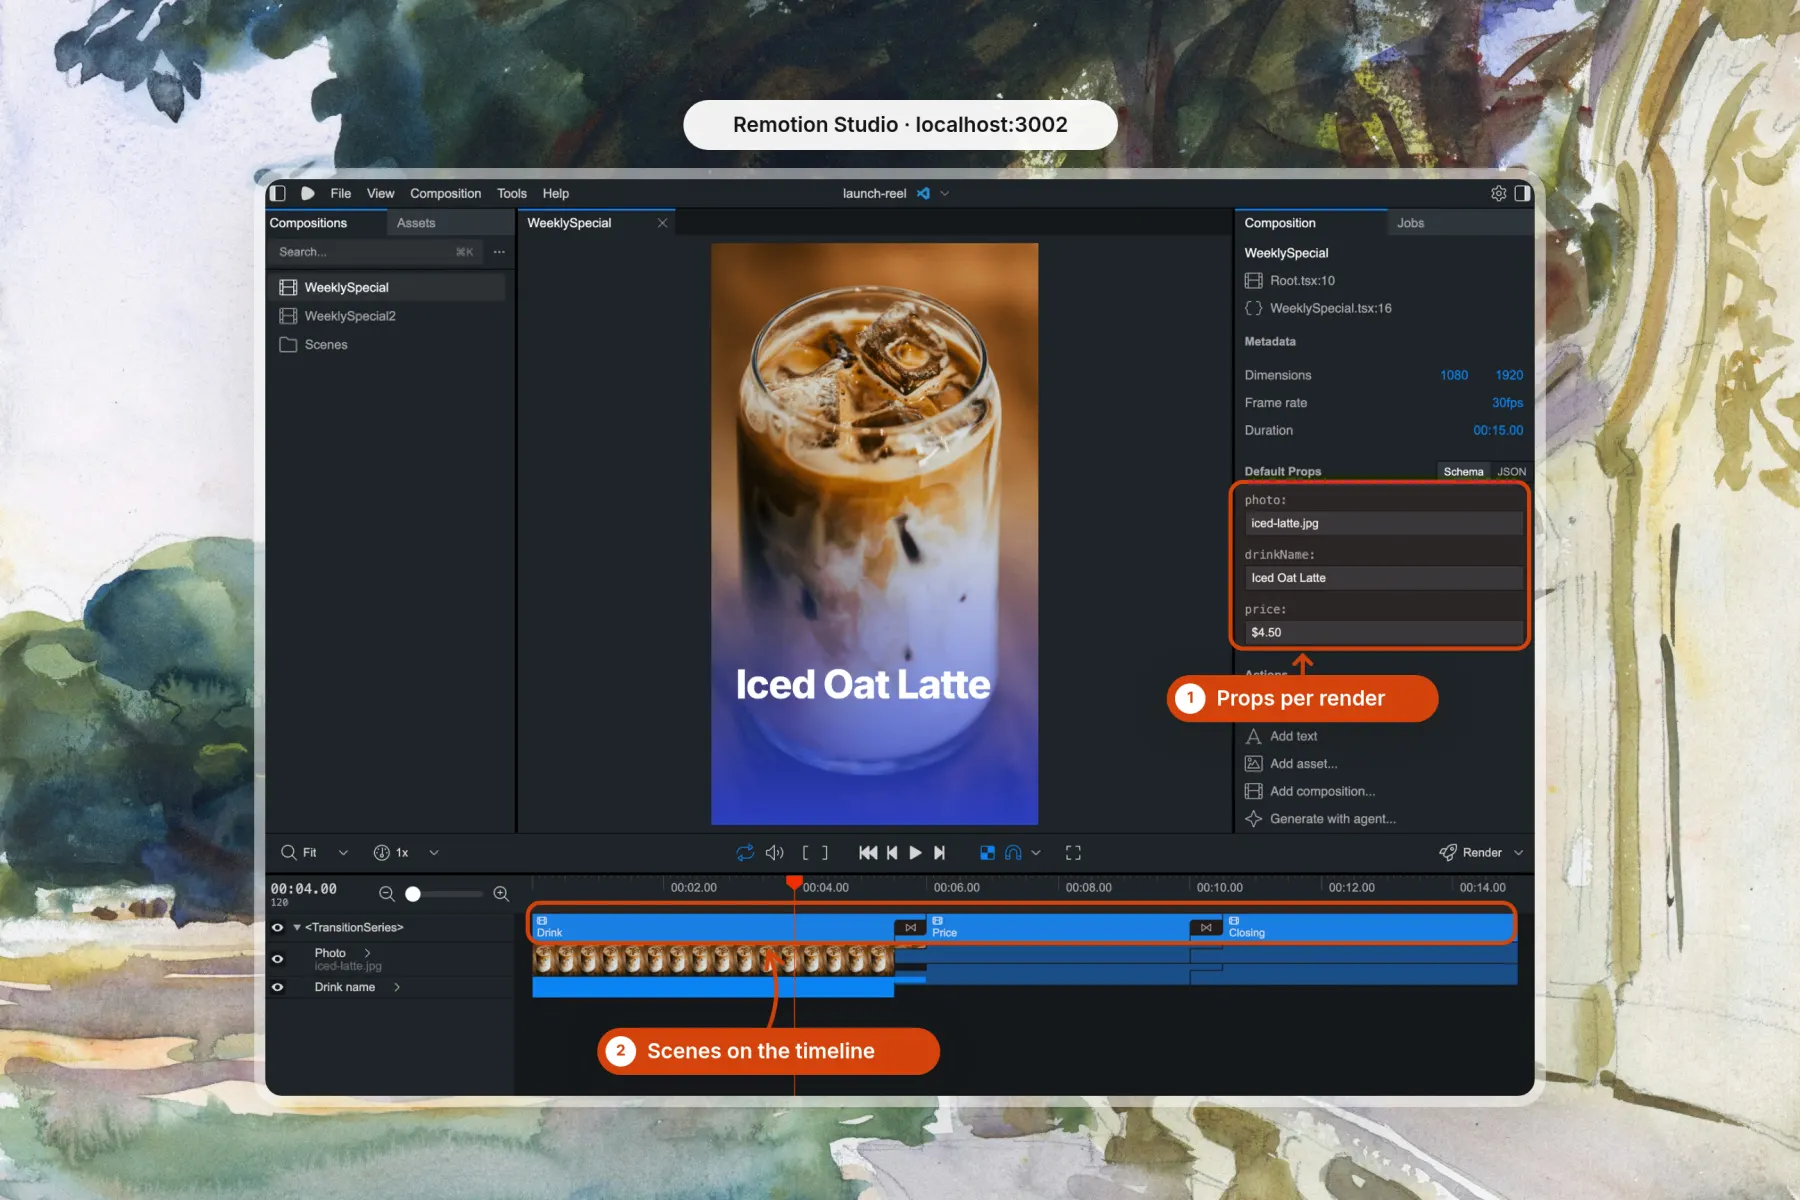
Run npx remotion studio to open the video in your browser. You can scrub the timeline, see each scene and change the props of a render without touching the code.
Things that bit me
- Plain slides by default. The first Reel had no music and simple fades. Ask for music, transitions and motion by name if you want them.
- Claude checked stills, not the video. Its own words: "I haven't watched the finished MP4, only checked its specs." Watch the file before you post it.
- The first render is the slow one. Remotion downloads a headless Chrome once. Warm re-renders of the same 15-second Reel took about 9 seconds.
Verdict: Remotion agent skills in Claude Code get you from a written brief to a local MP4 in under 3 minutes, with code you own.
3. Make Next Week's Video from the Same Project
Next week's video in Remotion is the same composition with new props. Ask Claude Code in the same session, and it reuses the code instead of starting over.
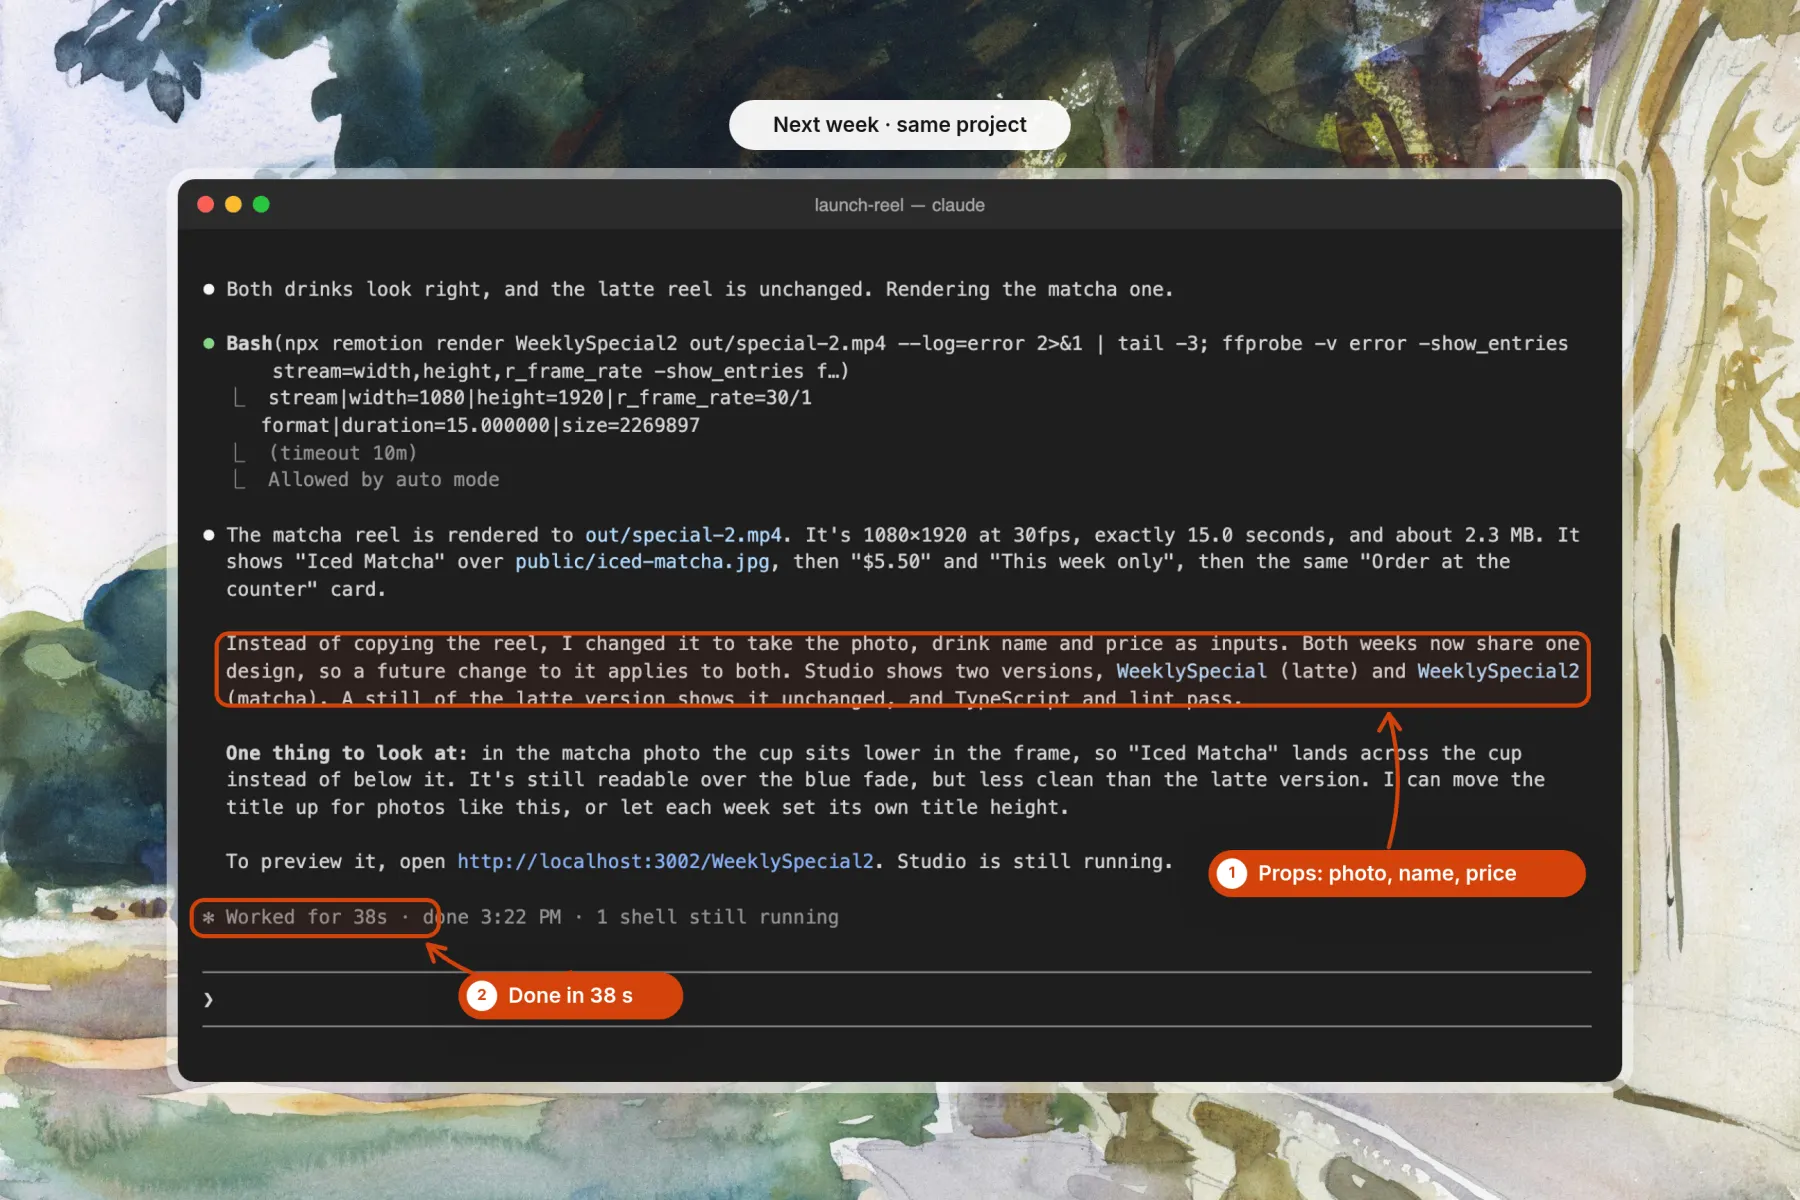
I asked for next week's special: "Iced Matcha", "$5.50" and the photo public/iced-matcha.jpg, rendered to out/special-2.mp4.
Claude Code changed the Reel to take the photo, drink name and price as props, then rendered the matcha version. It took 38 seconds.
From then on you don't need Claude at all. Render any week from the terminal:
npx remotion render WeeklySpecial out/week-3.mp4 \
  --props='{"photo":"iced-matcha.jpg","drinkName":"Iced Matcha","price":"$5.50"}'
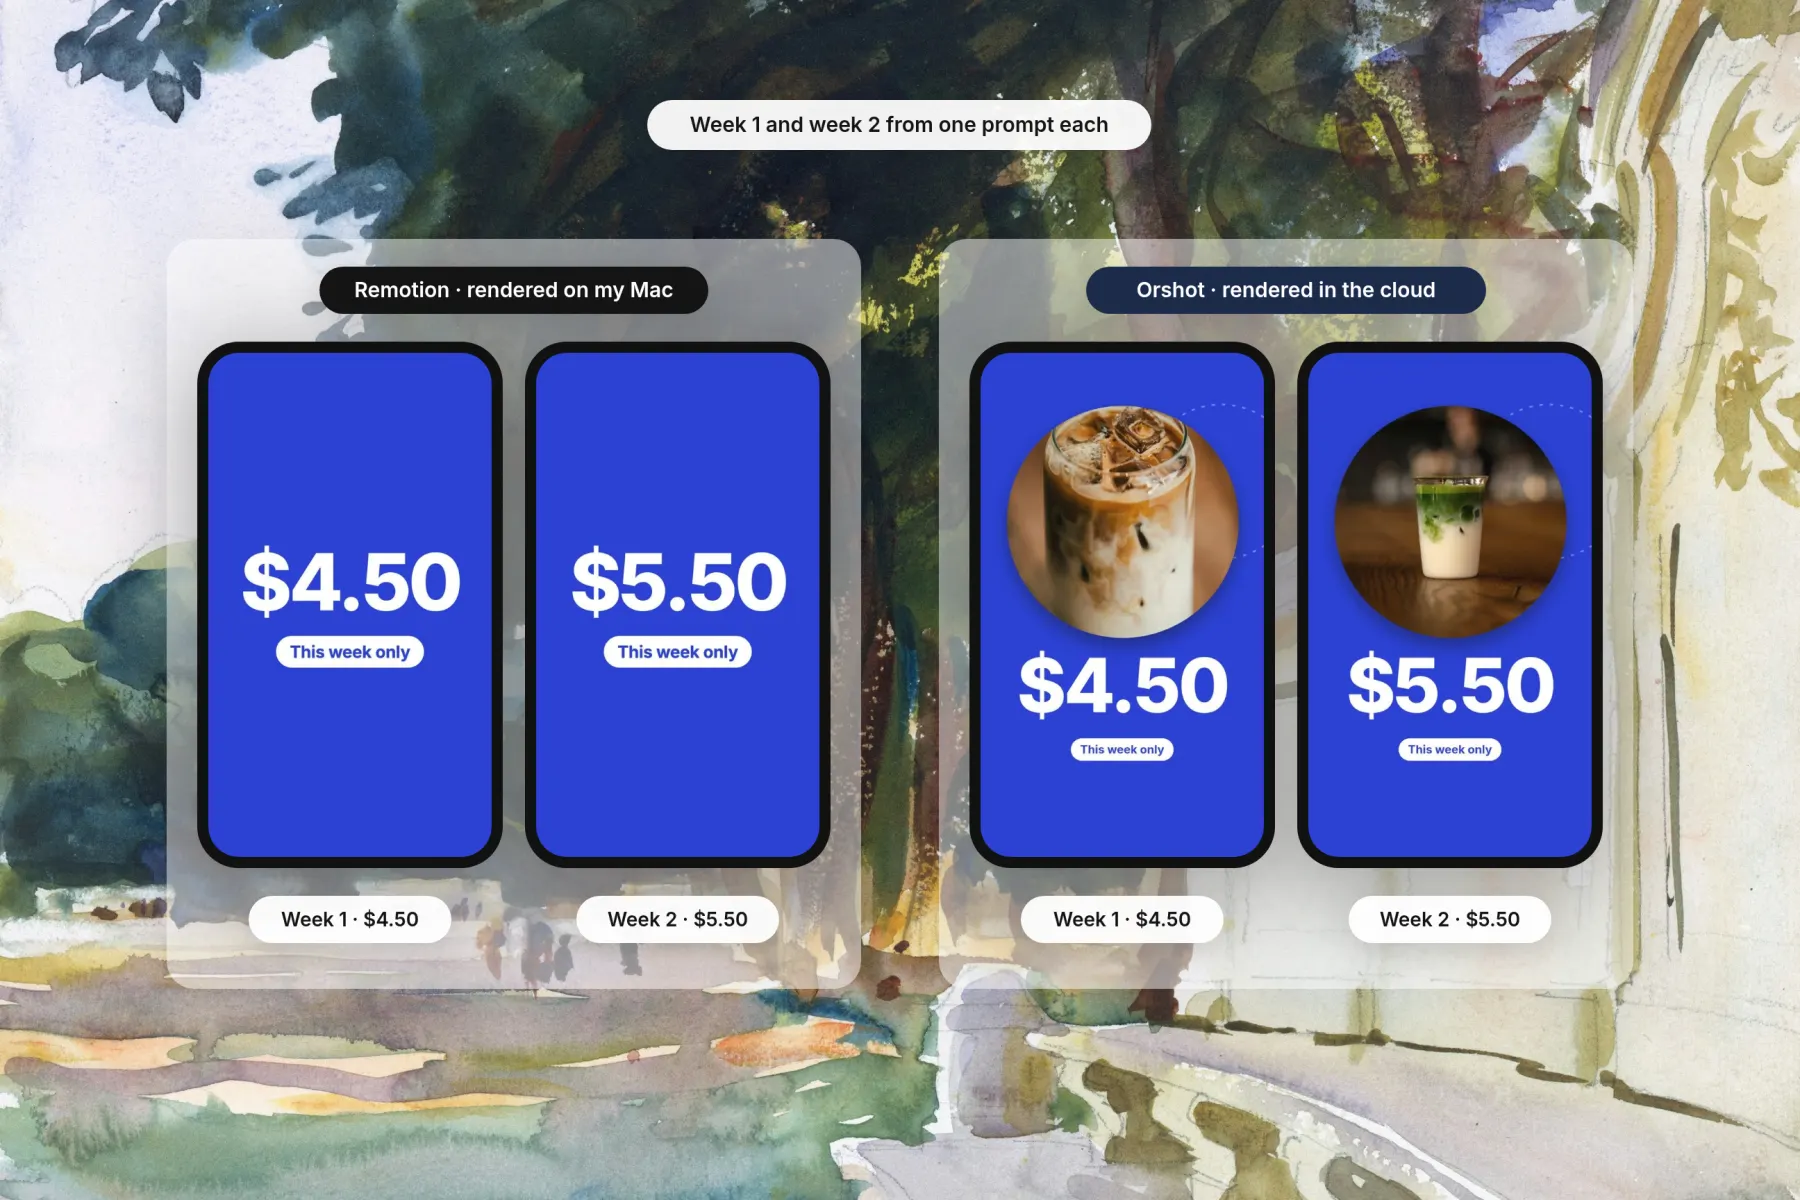
One catch: the cup in the matcha photo sat lower, so "Iced Matcha" landed across the cup. A new photo can break a layout that only one photo was tested with.
To run this on a schedule, you keep a machine on or set up Remotion Lambda in your own AWS account. You build, host and pay for that pipeline yourself.
Or skip the pipeline: Orshot renders next week's video in its cloud from a Claude message, an API call or n8n, and posts it for you.
Best for: a developer who renders the same video every week from a script and doesn't mind hosting the render.
4. What Each of the 13 Remotion Skills Does
Each Remotion skill covers one job, and /remotion-best-practices routes between them. These are the 13 skills npx remotion skills add installed on November 8, 2026, with each skill's own description.
| Skill | What it does |
|---|---|
remotion-best-practices | Router for all Remotion skills, start here |
remotion-create | Create a new Remotion video |
remotion-markup | Content, animation and effects best practices |
remotion-render | Export a Remotion video |
remotion-studio | Preview a Remotion video |
remotion-captions | Transcribe, display and animate captions |
remotion-multimedia | Work with Mediabunny, Remotion's media toolkit |
remotion-maps | Map animations |
remotion-interactivity | Structure markup for interactive players |
remotion-saas | Build an app with Remotion |
remotion-docs | Search the Remotion docs |
remotion-license | License terms, FAQ and where to buy one |
remotion-upgrade | Upgrade Remotion and related packages |
You rarely call the specialist skills by hand. Name the outcome ("add word-by-word captions") after /remotion-best-practices and it loads the one it needs.
5. Remotion Limits: Self-Hosted Cloud and License Costs
Remotion is free for individuals and companies of up to 3 people. Bigger companies need a paid license, checked on the Remotion license page on November 8, 2026.
| Remotion license | Price | For |
|---|---|---|
| Free | $0 | Individuals and companies of up to 3 people |
| Creators | $25 a month per seat | Teams of 4+ making videos by hand |
| Automators | $0.01 per render, $100 a month minimum | Apps and pipelines that render on their own |
| Enterprise | From $500 a month | Custom terms and support |
The other limits come from hosting the render yourself:
- Cloud means your own AWS. Remotion doesn't host renders. Remotion Lambda runs in your AWS account, where you set it up and pay AWS for each render.
- Otherwise your machine does the work. Close the laptop and the weekly render stops.
- No phone or claude.ai. The skills need Node.js and a terminal, so you can't run them from the Claude app.
- Edits go through code. A teammate who doesn't code can change props in Studio, but not the layout.
- Free for solo developers and teams of up to 3
- Full control of every frame in React code
- Warm re-renders took about 9 seconds on my laptop
- 13 skills install in under 5 seconds
- Cloud rendering means setting up your own AWS
- No music or motion unless you ask for it
- Needs a terminal, so no phone or claude.ai
- Paid license from 4 people up
The Remotion alternatives post compares the license and Lambda costs with other tools at real volumes.
Verdict: Remotion agent skills are the best way to make a coded video on your own machine. The limits start when you want videos from anywhere without hosting costs or setup. That's where Orshot comes in.
6. Make Videos Anywhere with Orshot, No Setup or Hosting
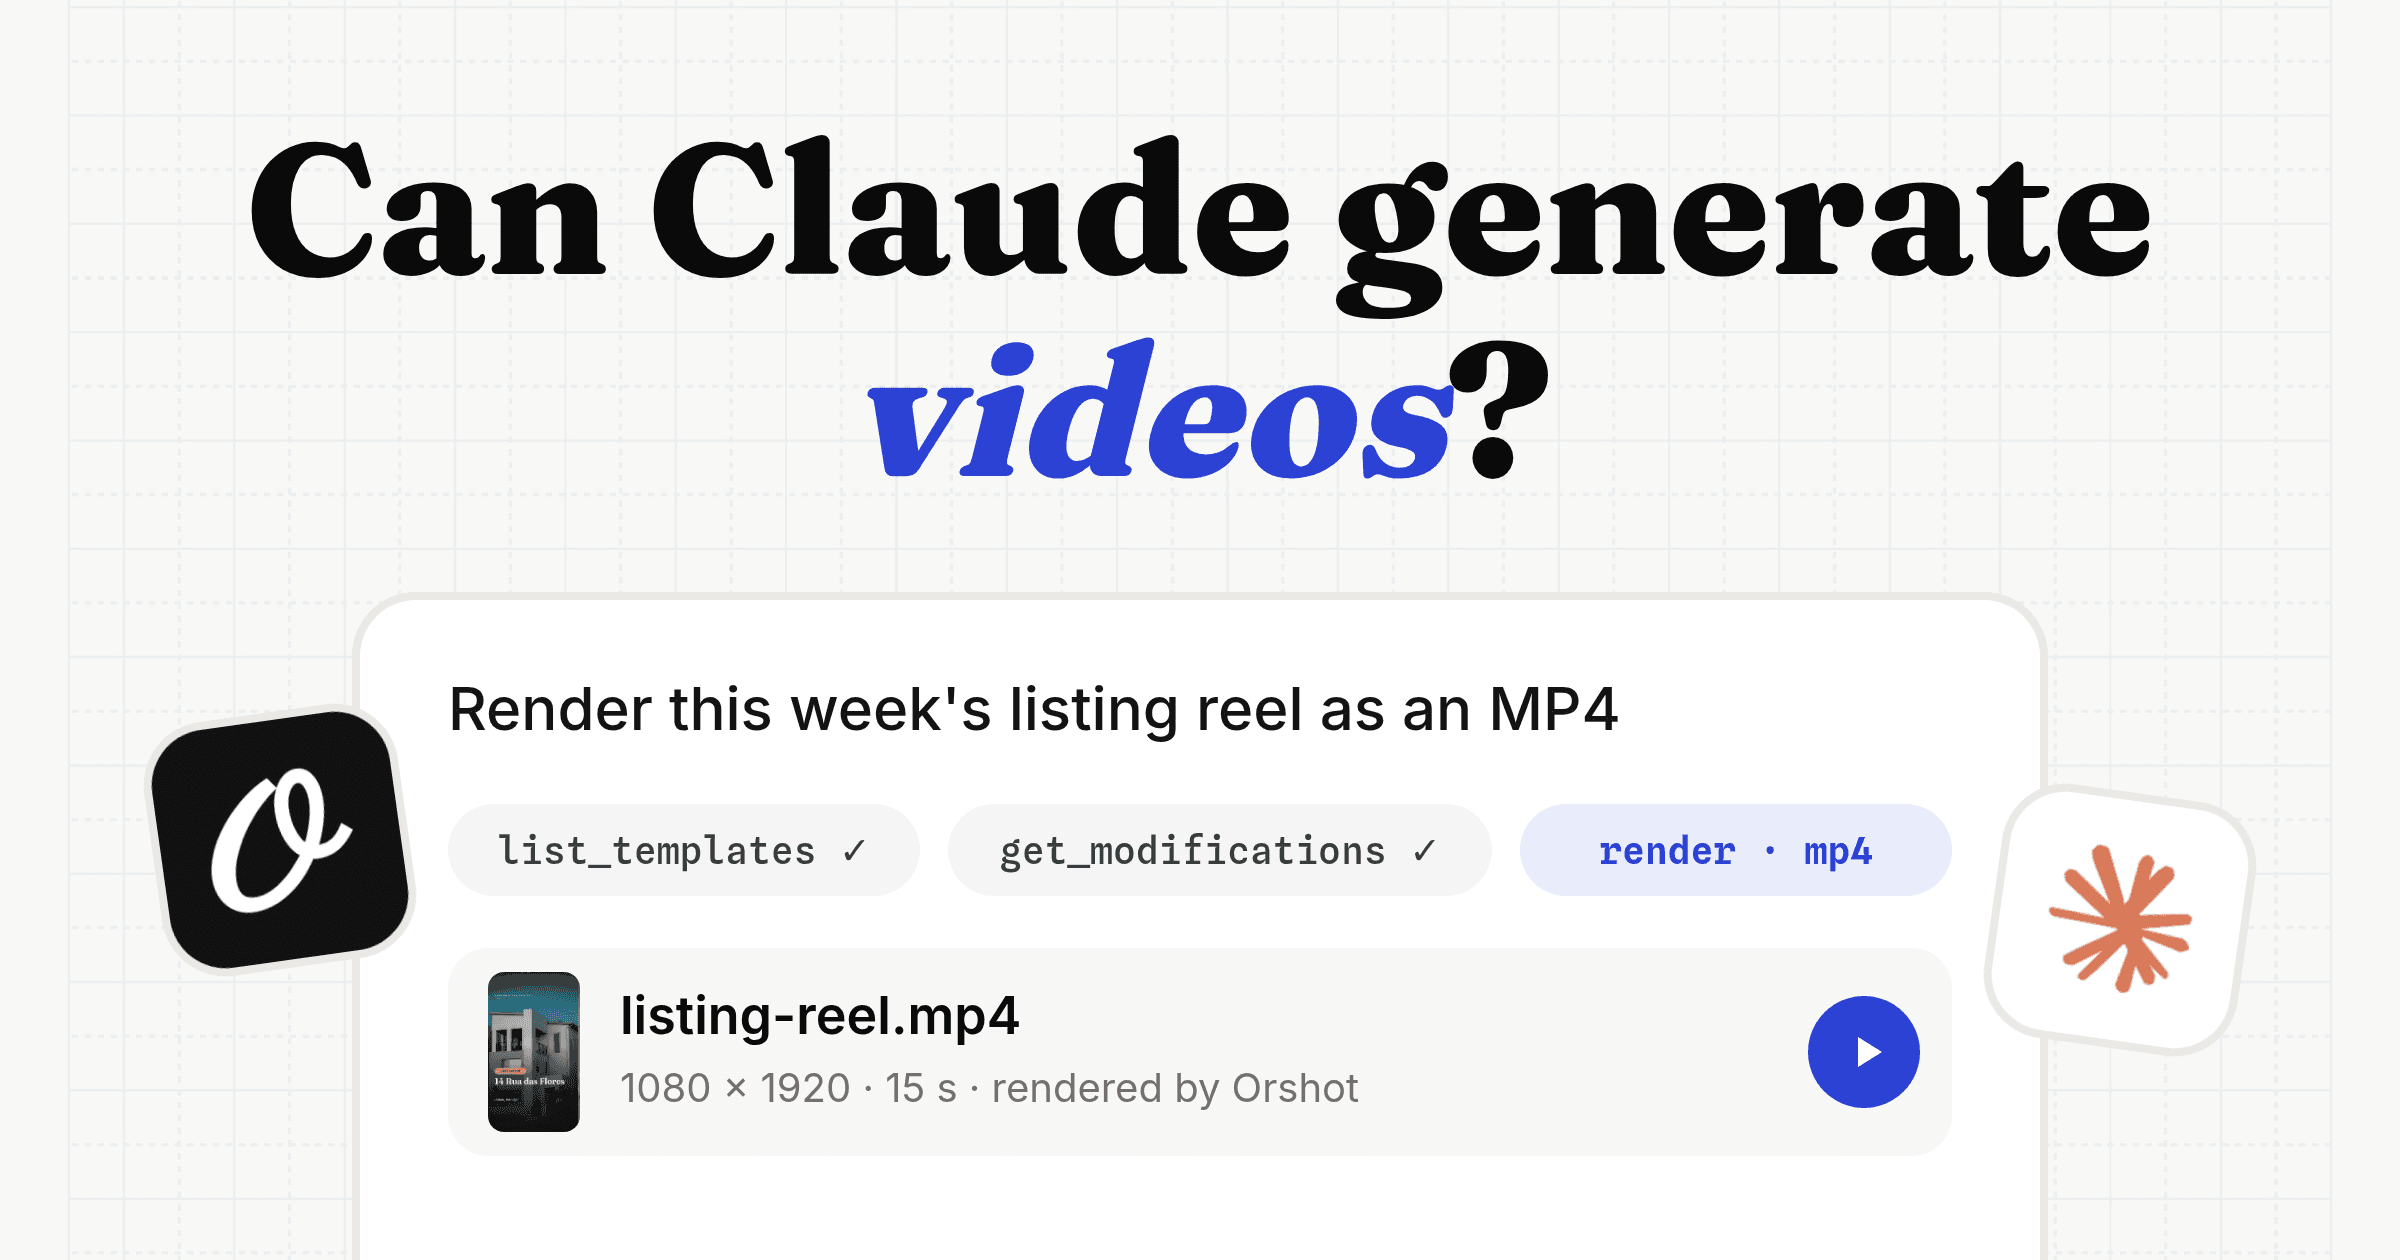
Orshot renders videos in its own cloud, so there is no setup and no hosting cost. You ask Claude from your phone, the desktop app, claude.ai or Claude Code, and the MP4 comes back as a link.
Orshot is an API that turns design templates into images, PDFs and videos. Its MCP server, a plug-in standard that lets Claude call other apps, connects it to every Claude app.
Pick this if you want Reels, carousels or UGC-style videos made from any device, without hosting anything, and posted on a schedule.
The Orshot MCP URL, https://mcp.orshot.com/full, gives Claude more than a renderer:
- Cloud rendering, so nothing runs on your laptop.
- A full editor: every video, carousel and image is a template you can change in Orshot Studio.
- Ready-made templates to start from, or Claude designs a new one from your brief.
- AI voiceover, AI images and AI video clips placed inside the template on paid plans.
- Social posting to 15 platforms, as a draft, now or scheduled, with every post in one calendar.
- A free account with 100 credits every month and videos of up to 30 seconds, with no card.
Set up Orshot so you can make and post social videos for me, then make my first one.
The whole flow, with screenshots: https://orshot.com/blog/remotion-claude-code.md

1. If the Orshot MCP server isn't connected yet, install it:
 claude mcp add orshot --transport http https://mcp.orshot.com/full
2. Ask me to type /mcp, pick orshot and choose Authenticate, so I can
 log in to Orshot (or sign up free) in my browser. Wait until I say done.
 If orshot isn't listed, tell me to restart Claude Code and paste this again.
3. Use Orshot to make a 15-second 1080x1920 Instagram Reel for a coffee shop
 weekly special: the drink "Iced Oat Latte", the price "$4.50",
 "This week only" and a closing card "Order at the counter". Add music.
4. Save it as an Instagram Reel draft. If no Instagram account is connected
 yet, give me the link to connect one.
Step 1: Add Orshot to Claude
In Claude Code, add the server and log in:
claude mcp add orshot --transport http https://mcp.orshot.com/fullStart claude, type /mcp, pick orshot and choose Authenticate. Orshot opens in your browser, where you log in or sign up free.
In claude.ai, open Customize, then Connectors. Click Add, then Add custom connector, name it Orshot, paste https://mcp.orshot.com/full and click Continue. Connectors you add in claude.ai also show up in the Claude desktop, iOS and Android apps.
Step 2: Name Orshot in the prompt
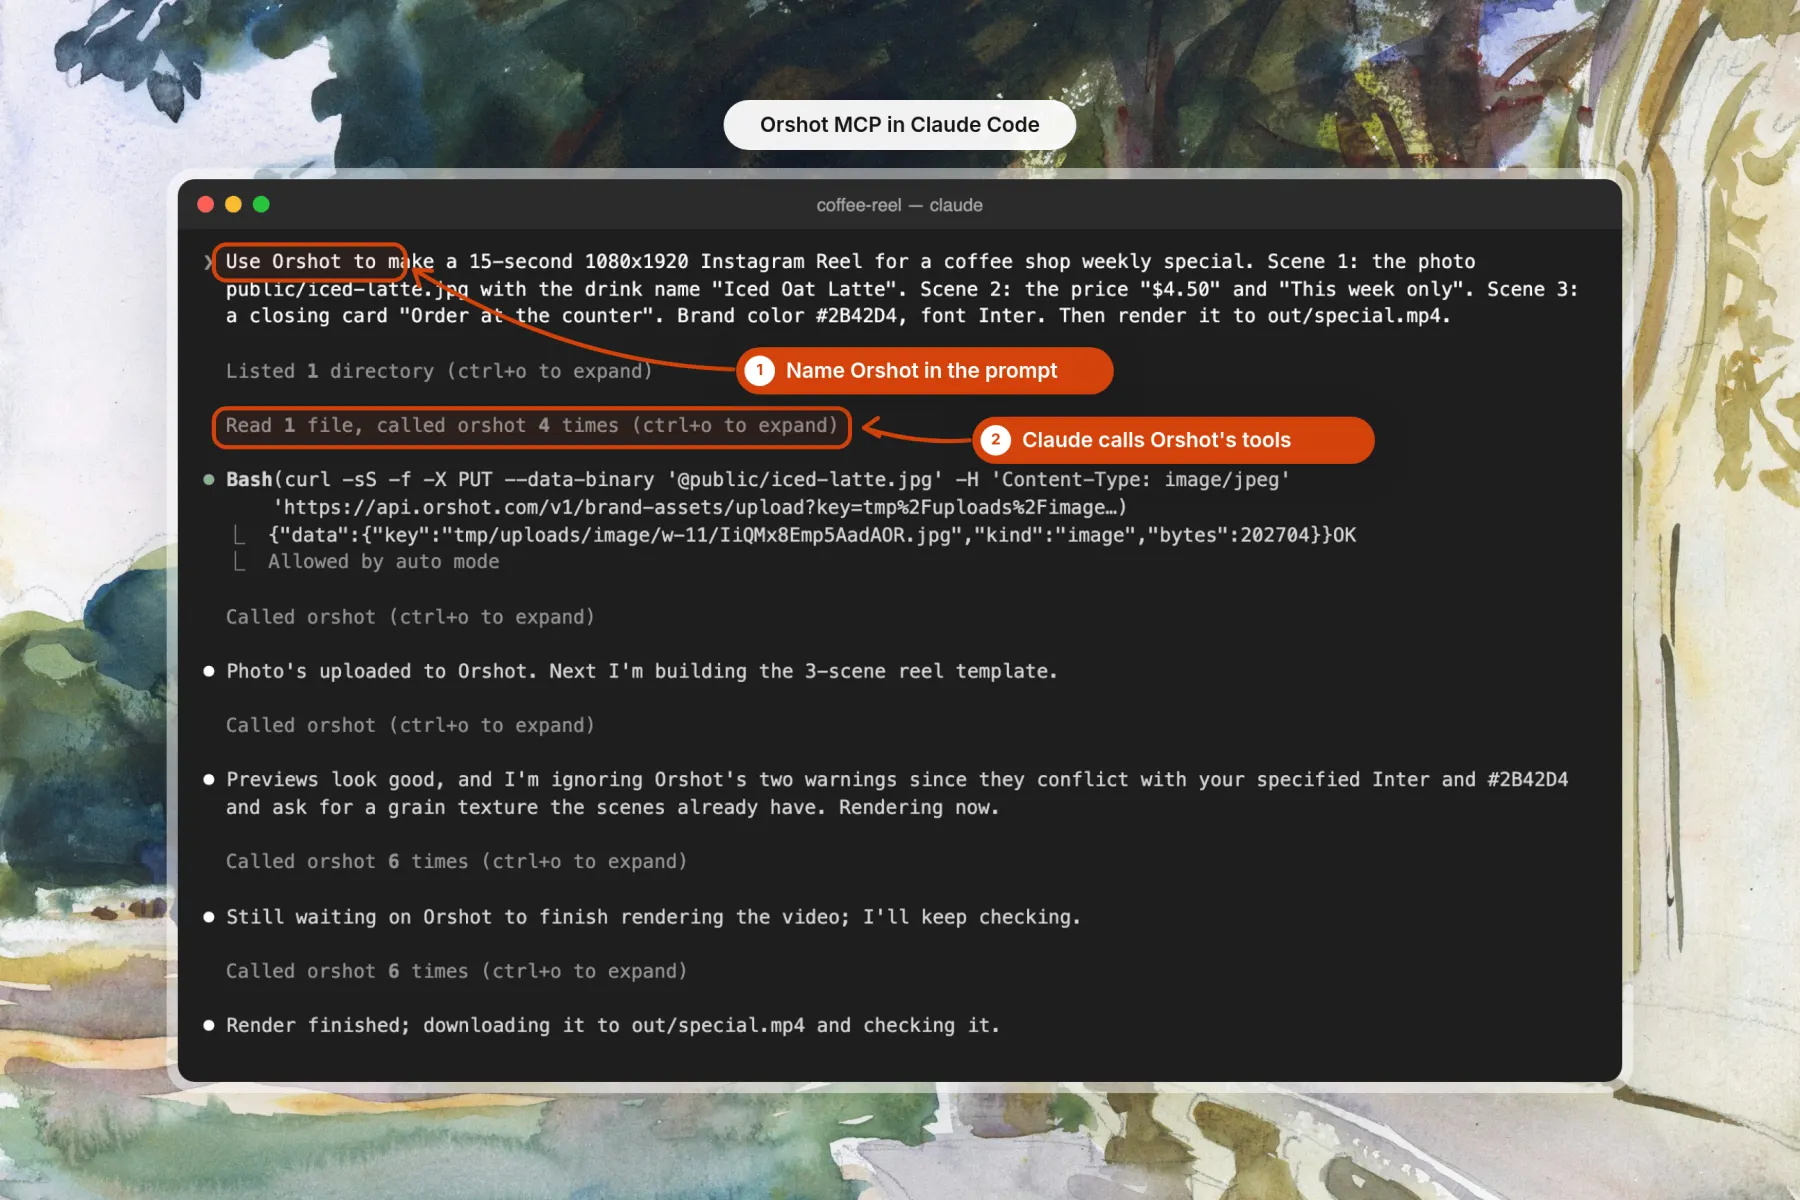
Start the prompt with "Use Orshot to" so Claude Code picks Orshot's tools instead of writing a Remotion project. The rest of the brief stays the same.
Step 3: Get the MP4 and the Studio link
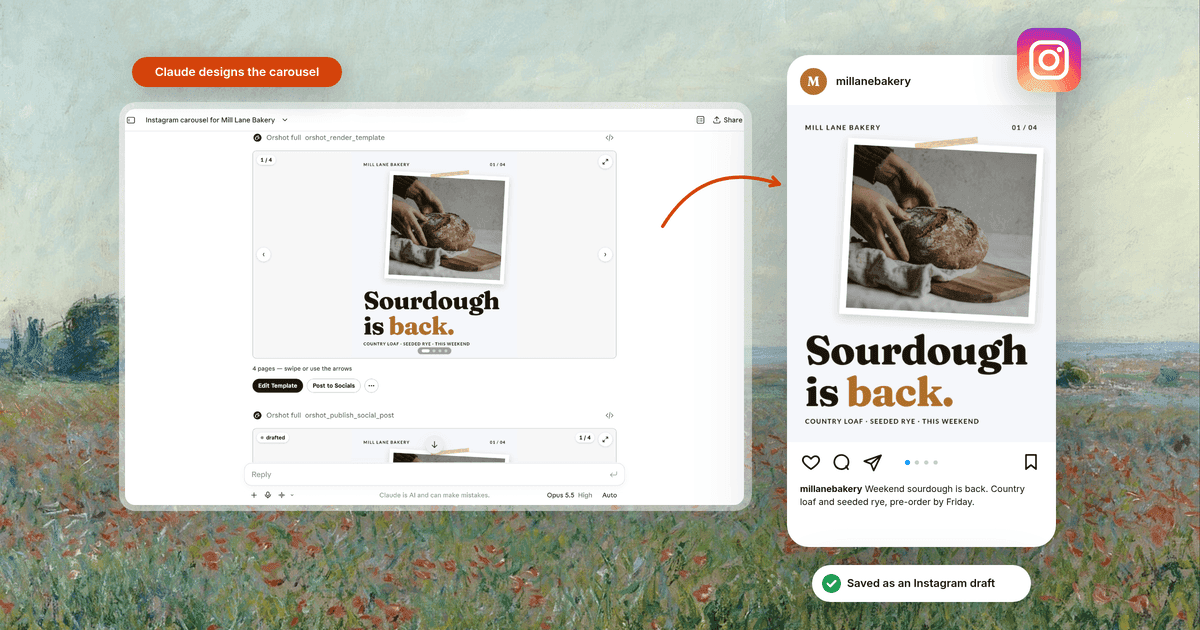
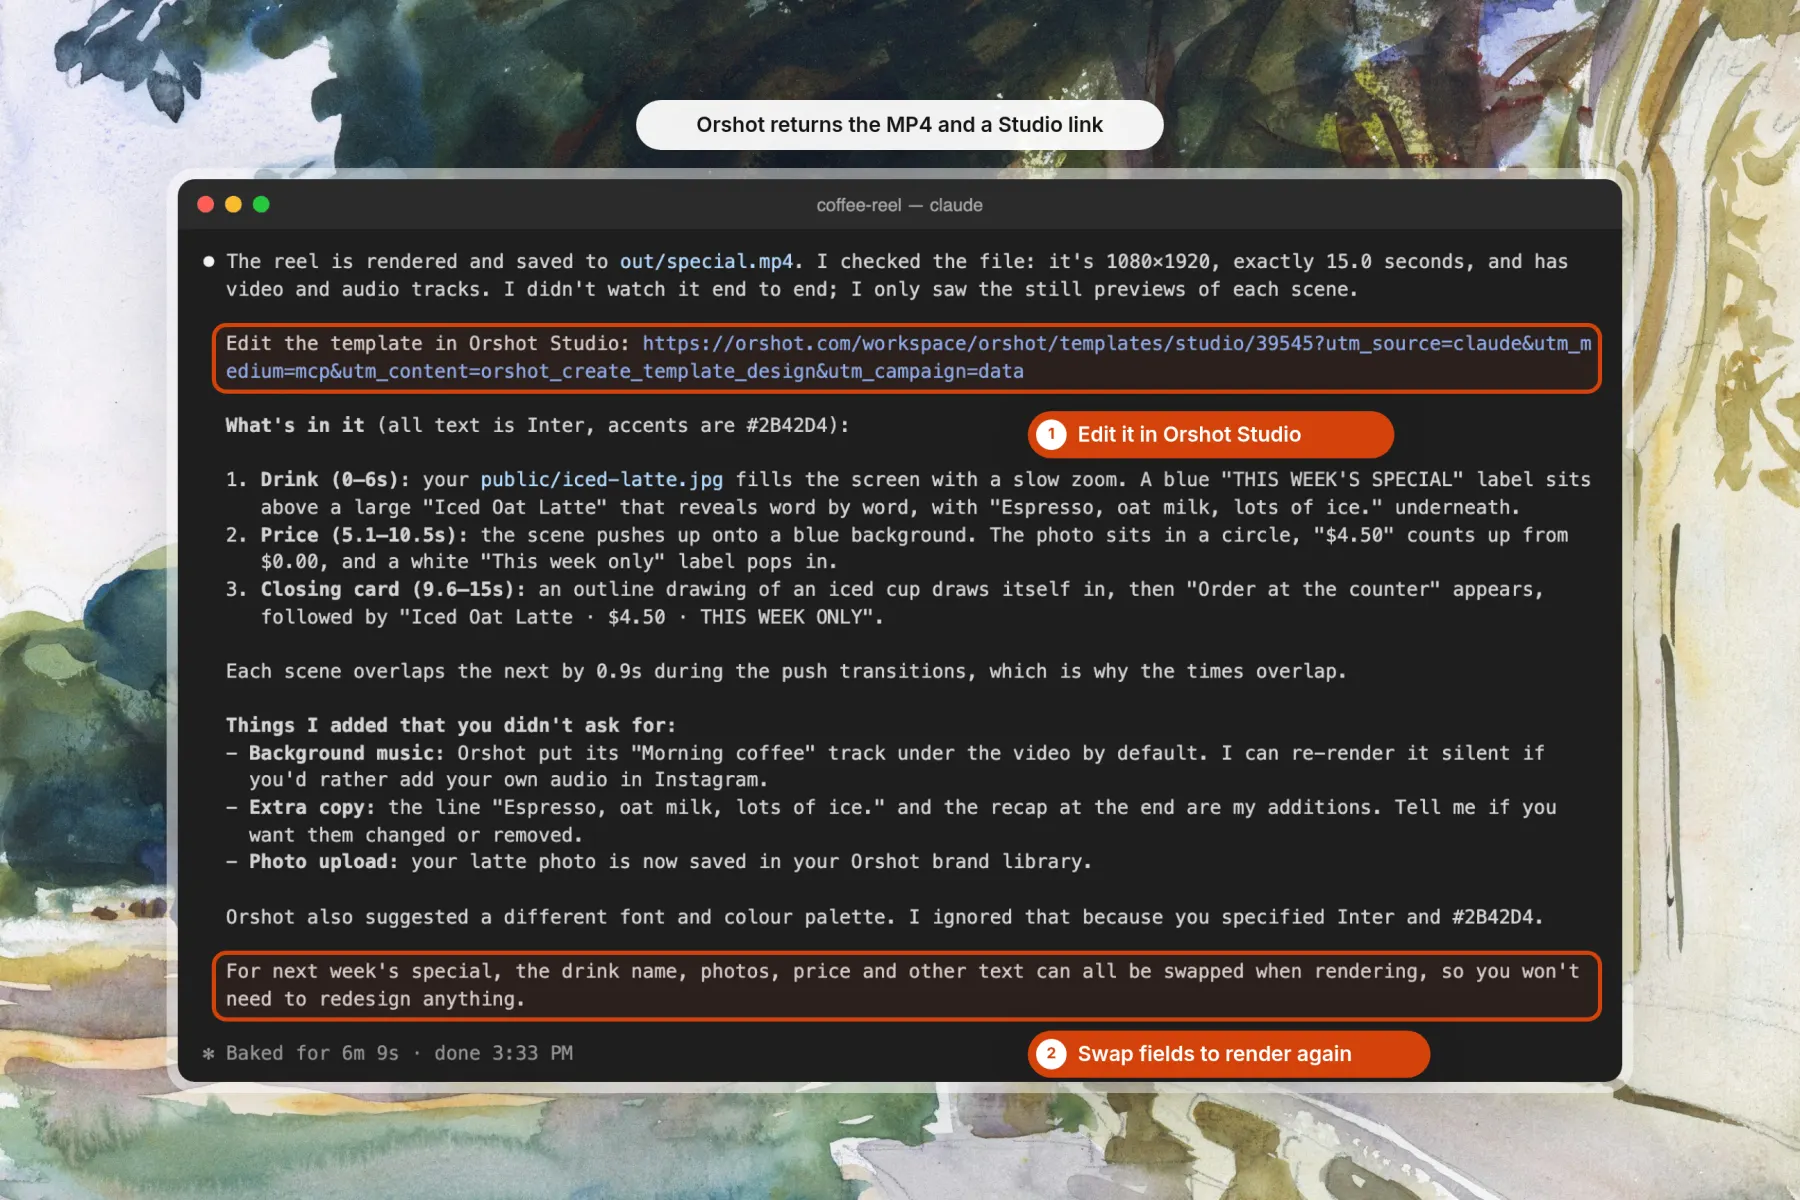
Claude designed the template, rendered it in Orshot's cloud and saved the MP4 to out/special.mp4. It also returned a link to edit the template in Orshot Studio.
From the same brief, the Orshot Reel came back with a music track, a price that counts up, push transitions and a cup icon that draws itself. Nothing ran on my laptop.
Step 4: Edit it in Orshot Studio and post it
Orshot Studio opens the same film with each scene on a timeline. Change a word or a photo in the browser, then post it, schedule it or render it again through the API.
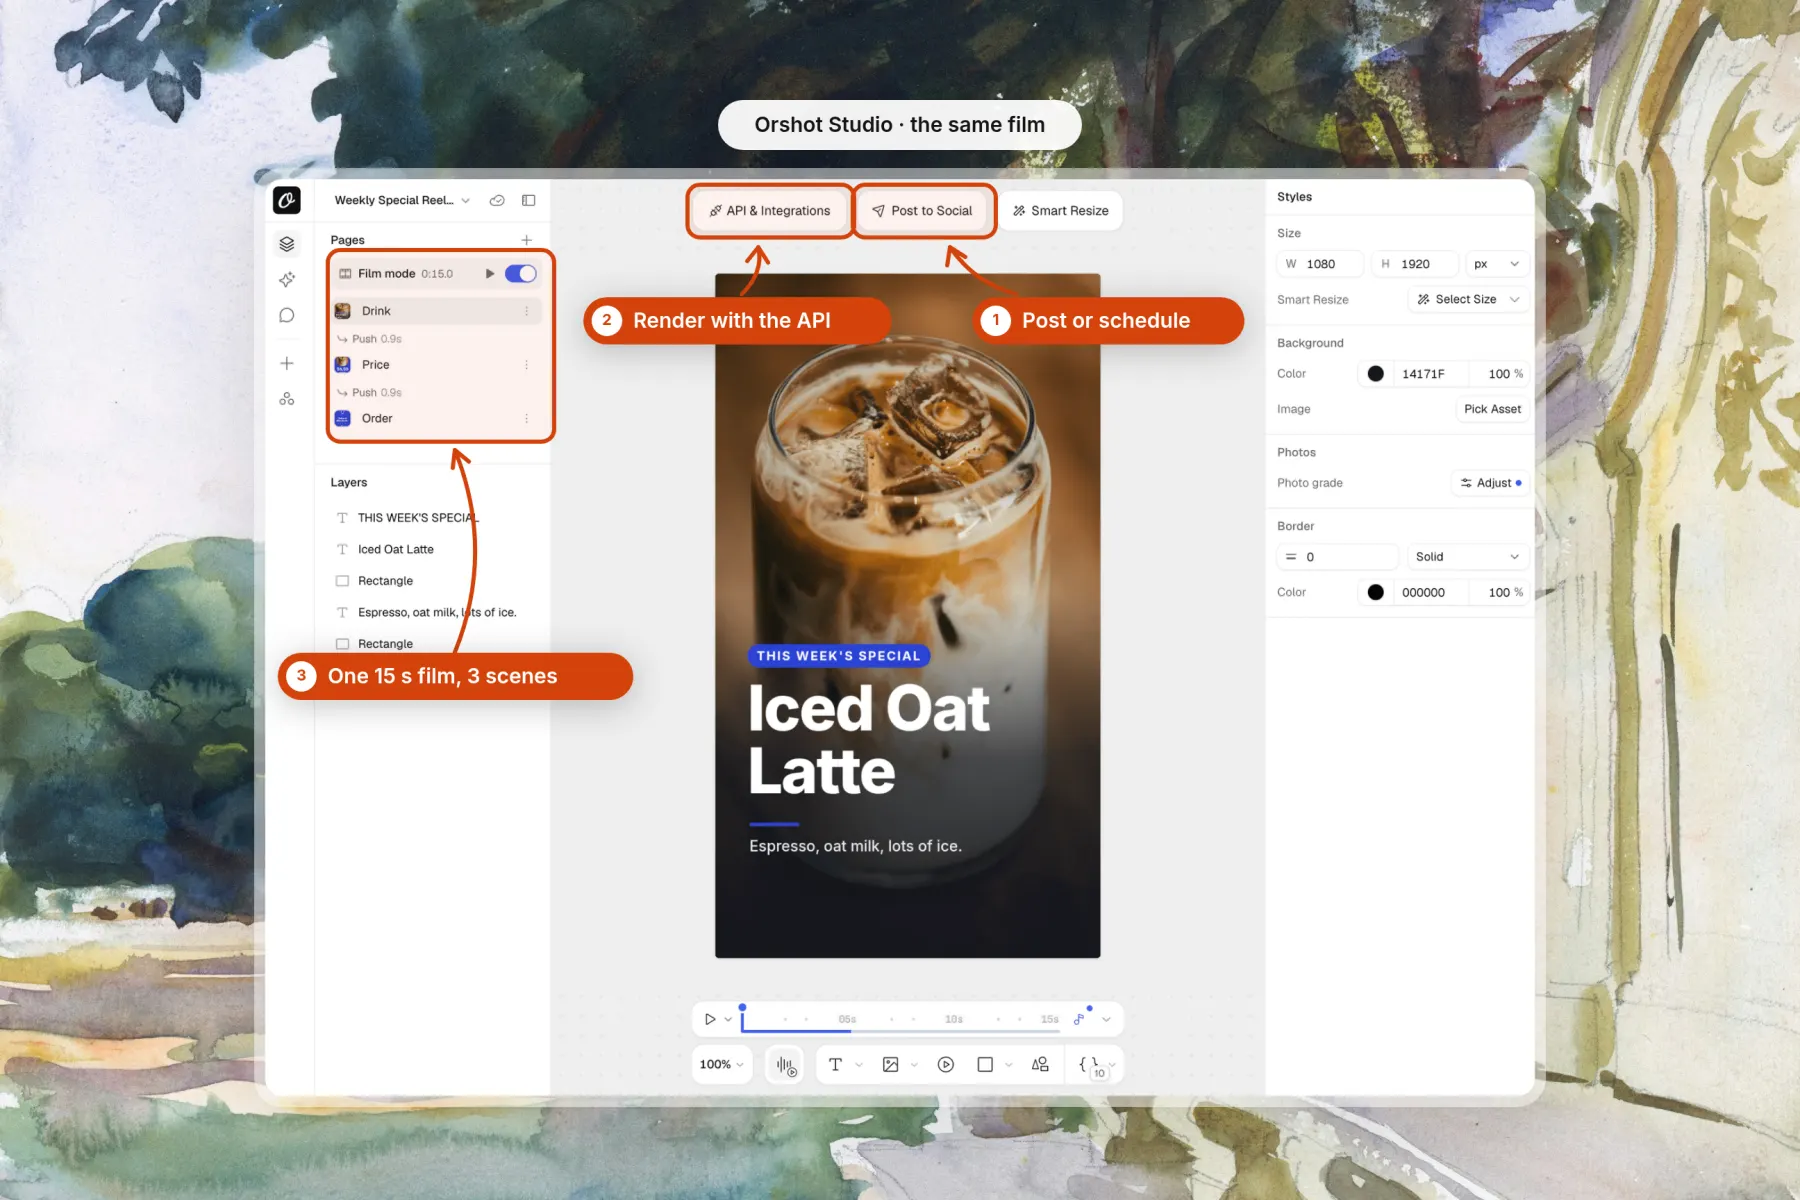
This is the Reel template from my run, live. Press play, then open it in Orshot to make it yours.
Carousels, UGC Videos and Voiceover from the Same Chat
The same chat makes other formats. Name Orshot and the format, for example:
Use Orshot to turn this week's special into a 5-slide Instagram carousel.
Use Orshot to make a 20-second UGC-style video with an AI voiceover about the matcha.
AI voiceover, AI images and AI video clips come with the paid plans.
Schedule a Week of Posts
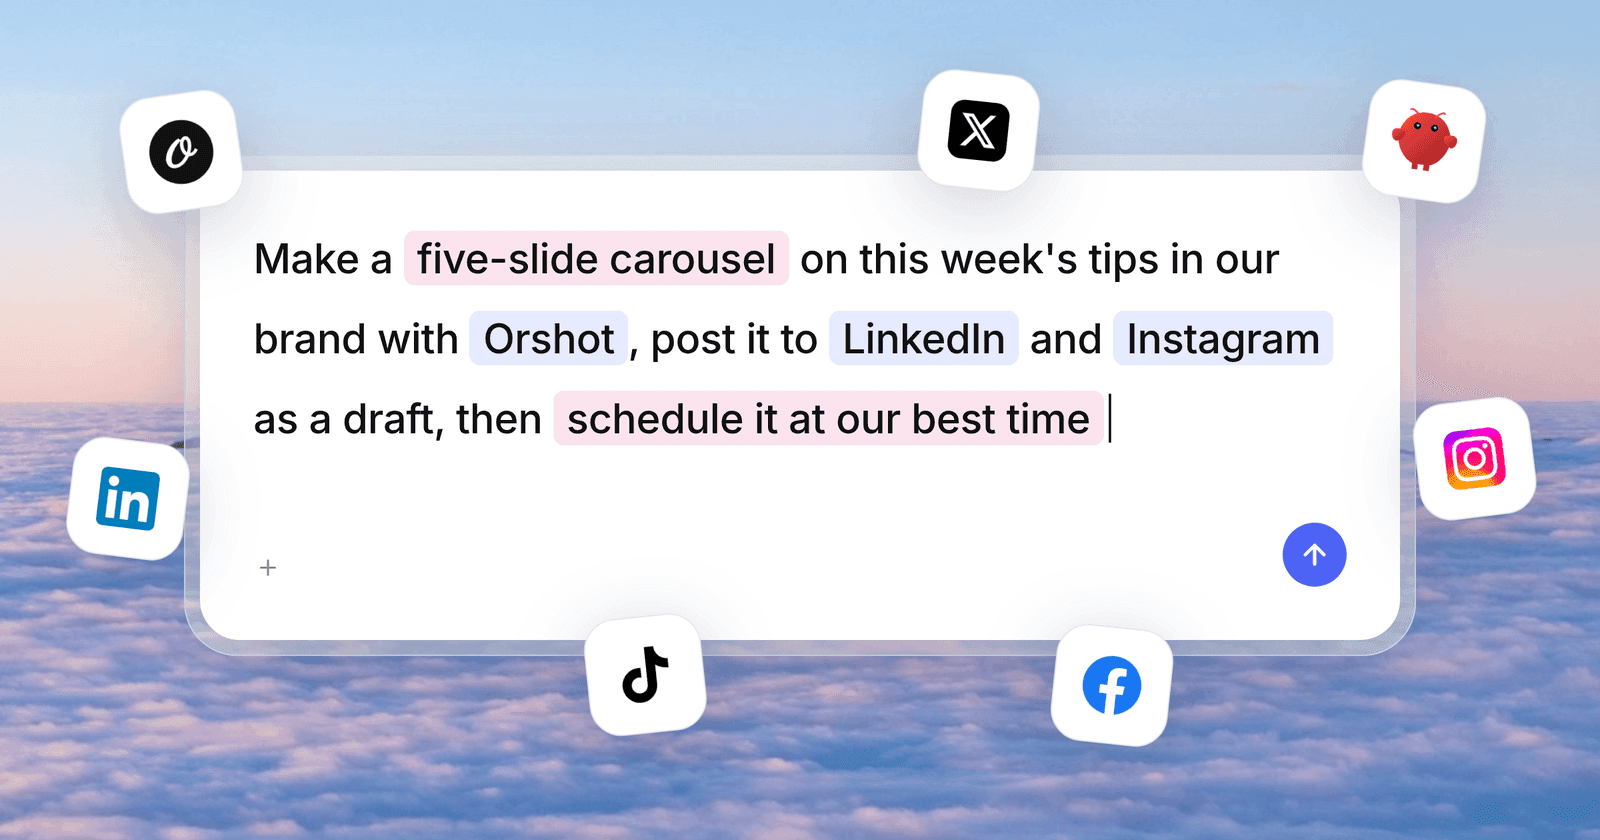
Ask Claude to save each video as a draft or schedule it for a time. Orshot posts it to Instagram, TikTok, YouTube, LinkedIn and more, and shows every post in its calendar.
Paid plans include connected social accounts. The Claude to Instagram guide shows every screen of the connect and schedule steps.

Render Next Week's Video by API
Orshot keeps the template, so next week can be a render with new fields from a cron job, n8n or your own code. The field names come from your template:
curl -X POST https://api.orshot.com/v1/studio/render \
  -H "Authorization: Bearer $ORSHOT_API_KEY" \
  -H "Content-Type: application/json" \
  -d '{
    "templateId": "<YOUR_TEMPLATE_ID>",
    "modifications": { "page1@drink_name": "Iced Matcha", "page2@price": "$5.50" },
    "response": { "type": "url", "format": "mp4" }
  }'
The Orshot MCP server docs list every tool that https://mcp.orshot.com/full adds.
Who Makes Social Posts This Way Already
Cashew.sg, a mortgage advisory in Singapore, runs its Instagram from Claude with Orshot. Claude asked for 871 of their 875 renders in their first seven weeks, as the Cashew carousel story shows.
Orshot turned content production from an hour-a-piece design exercise into something that runs off our existing workflow.
Consistent, on-brand, and fast enough that we actually ship daily.
 Roshni MahbubaniGrowth Marketer, Cashew.sg
Verdict: Orshot in Claude is the better pick for social videos you make from your phone, edit without code and post every week.
Remotion or Orshot for Social Videos? I Ran Both
I gave Claude Code the same brief and the same two photos for both tools. Remotion made plain slides on my laptop. Orshot made a Reel with music and motion, ready to post from any Claude app.
| Same brief, same photos | Remotion skills | Orshot (https://mcp.orshot.com/full) |
|---|---|---|
| What you set up | Node.js, a project and a terminal | One connector, nothing to host |
| Where it renders | Your laptop, or your own AWS with Lambda | Orshot's cloud |
| Music and motion | Only if you ask | Added by default |
| Works from your phone, desktop app or claude.ai | No | Yes |
| Edit without code | Props only | Full editor in Orshot Studio |
| AI voiceover, images and clips | Bring your own | Built in on paid plans |
| Posts to social | No | Yes, 15 platforms with a calendar |
| Next week's video | Your own script or Lambda | API, n8n or a Claude message |
Verdict: pick Remotion agent skills if you render on your own machine. Pick Orshot to make videos anywhere without hosting costs or setup, with AI voiceover and posting built in.
For the bigger picture, the Can Claude generate videos post covers AI footage, Remotion and template videos side by side.
What are Remotion agent skills?
How do I install Remotion skills in Claude Code?
Does Remotion work with Claude Code?
Is Remotion free to use with Claude Code?
Can Remotion render videos in the cloud?
Can Claude Code make videos without Remotion?
Can I make videos with Claude on my phone?
Where does Claude Code save the Remotion video?
What is Orshot?
Make Your First Reel from Claude Code
If you render on your own machine, install the skills with npx remotion skills add. To make Reels, carousels and UGC videos anywhere without hosting costs or setup, copy the Orshot prompt above.
Sign up free to render your first video, then connect a social account when you're ready to post.