How to align and arrange layers in Orshot Studio
Stack layers front to back and line them up neatly — with the layer-order controls and the alignment buttons in the Styles panel
Published Jun 8, 2026
Two separate things control how layers sit together: stacking order — which layer is in front — and alignment — how layers line up with the canvas or each other. Both are a click away once a layer is selected.
1. Change the stacking order#
Select a layer. A small toolbar floats above it — use ↓ to Send Backward and ↑ to Bring Forward one step at a time.
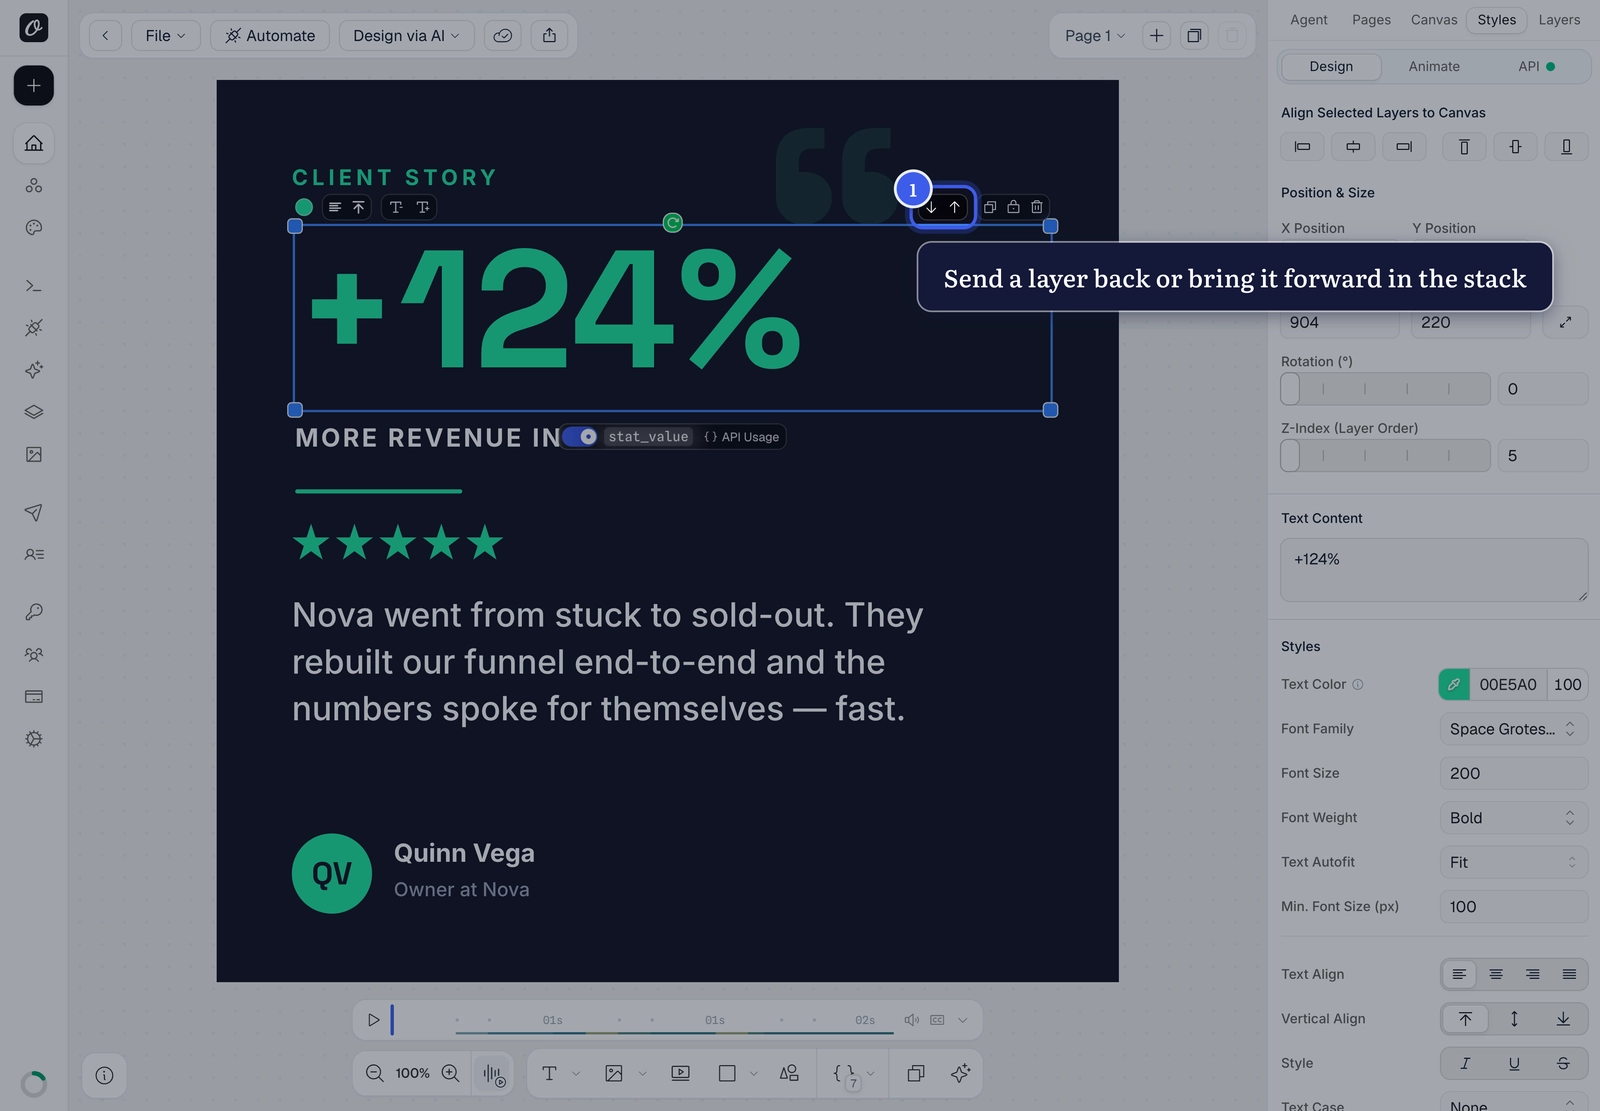
For a precise jump, set the Z-Index (Layer Order) value in the Position & Size section of the Styles panel — a higher number sits in front. You can also right-click any layer for Bring to Front and Send to Back, which skip straight to the top or bottom of the stack.
2. Align a layer to the canvas#
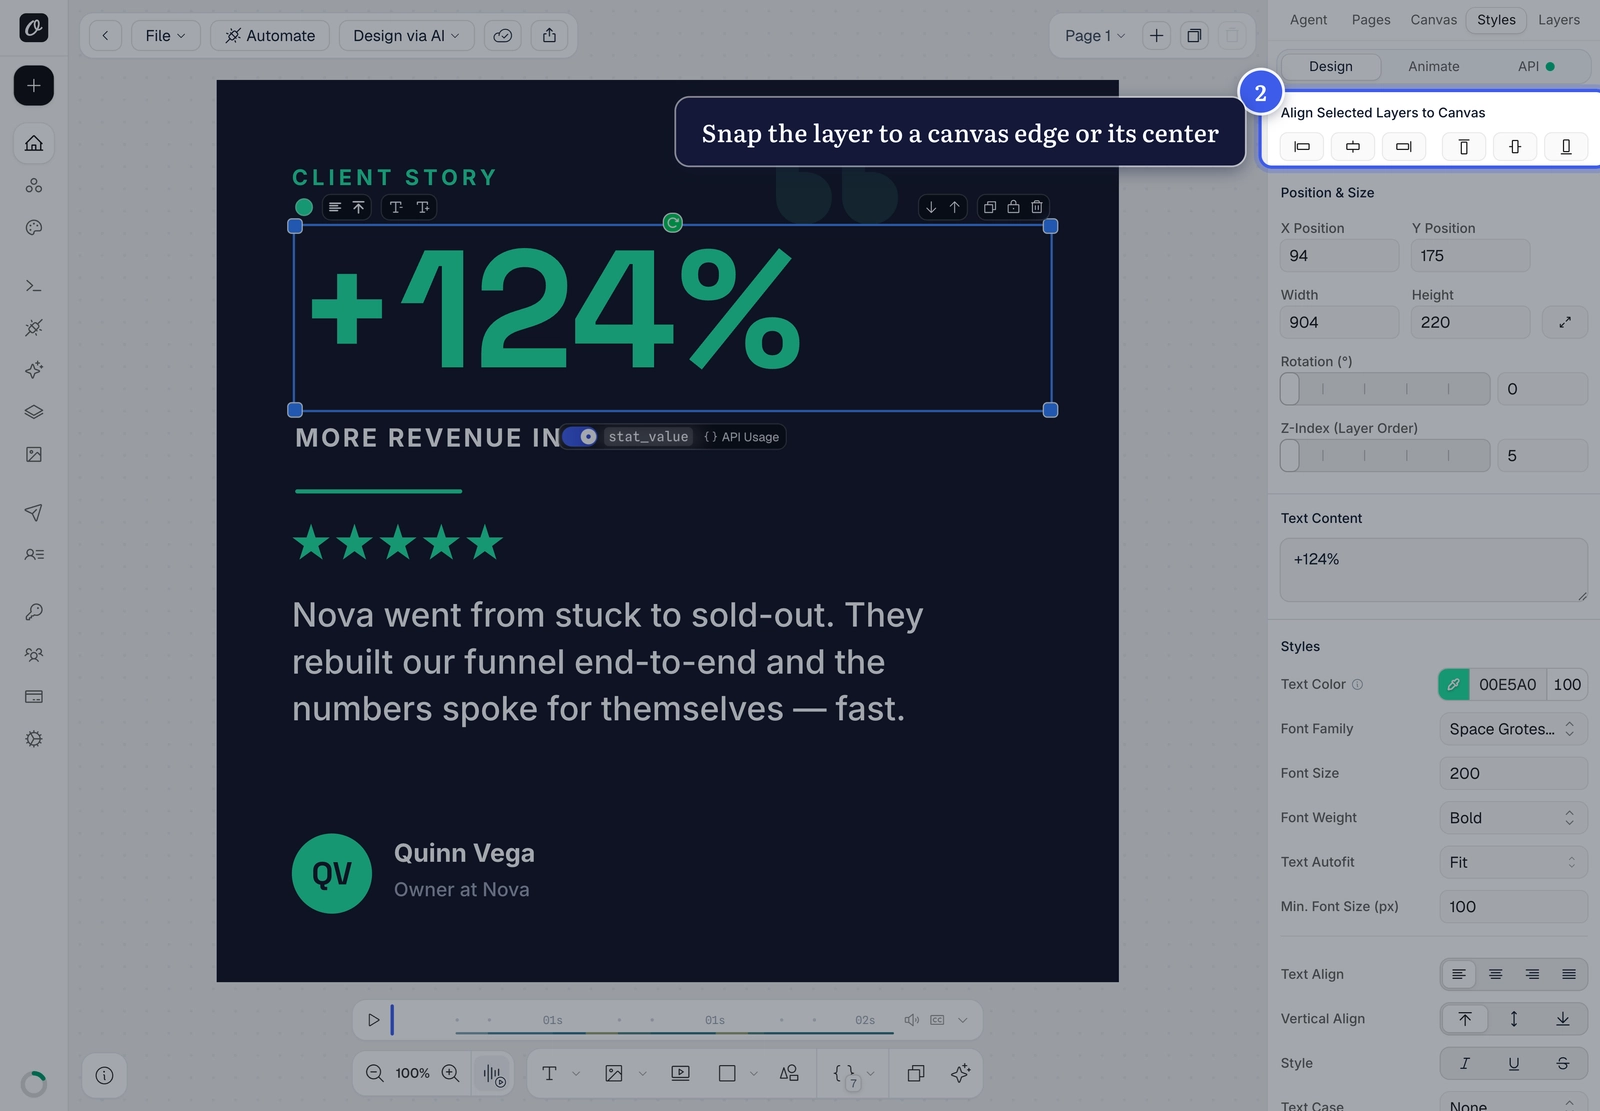
With a layer selected, the Align Selected Layers to Canvas row sits at the top of the Styles panel. The first three buttons snap the layer to the canvas's left edge, horizontal center, or right edge; the next three handle the top, middle, and bottom.
3. Align layers to each other#
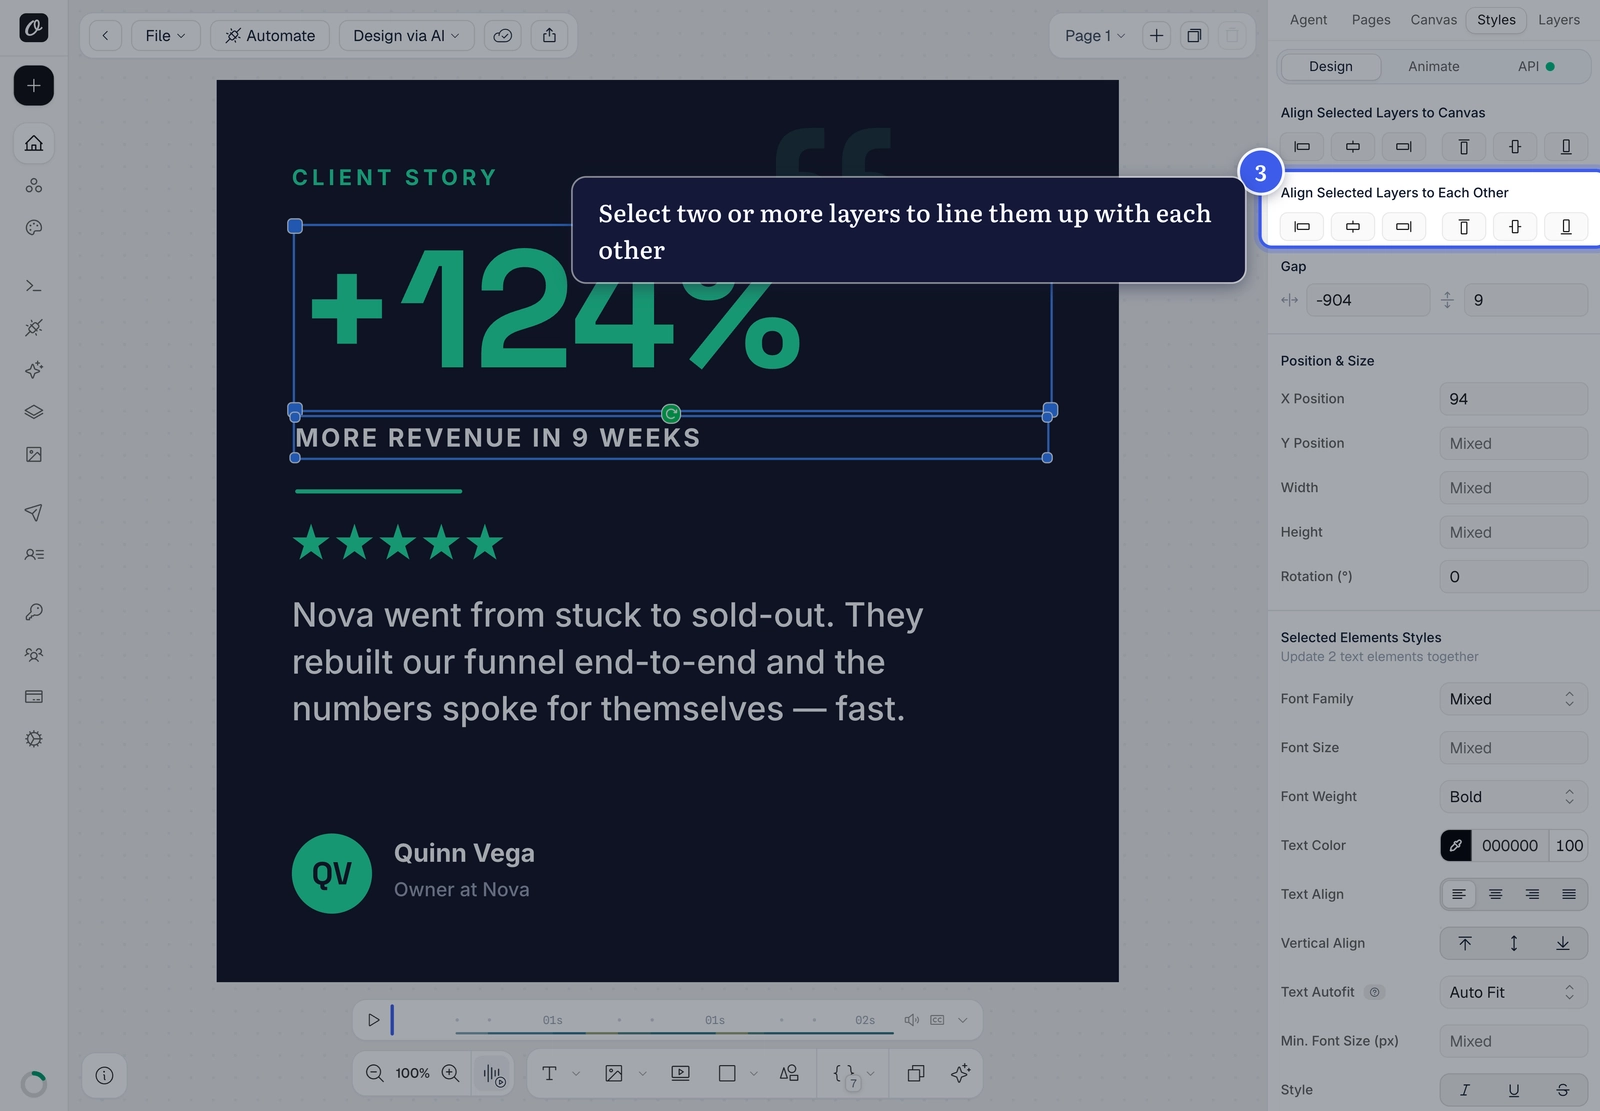
Select two or more layers — Shift-click (or ⌘/Ctrl-click) each one. A new Align Selected Layers to Each Other row appears with the same six controls, but now they line the layers up relative to the selection instead of the canvas.
4. Distribute layers evenly#
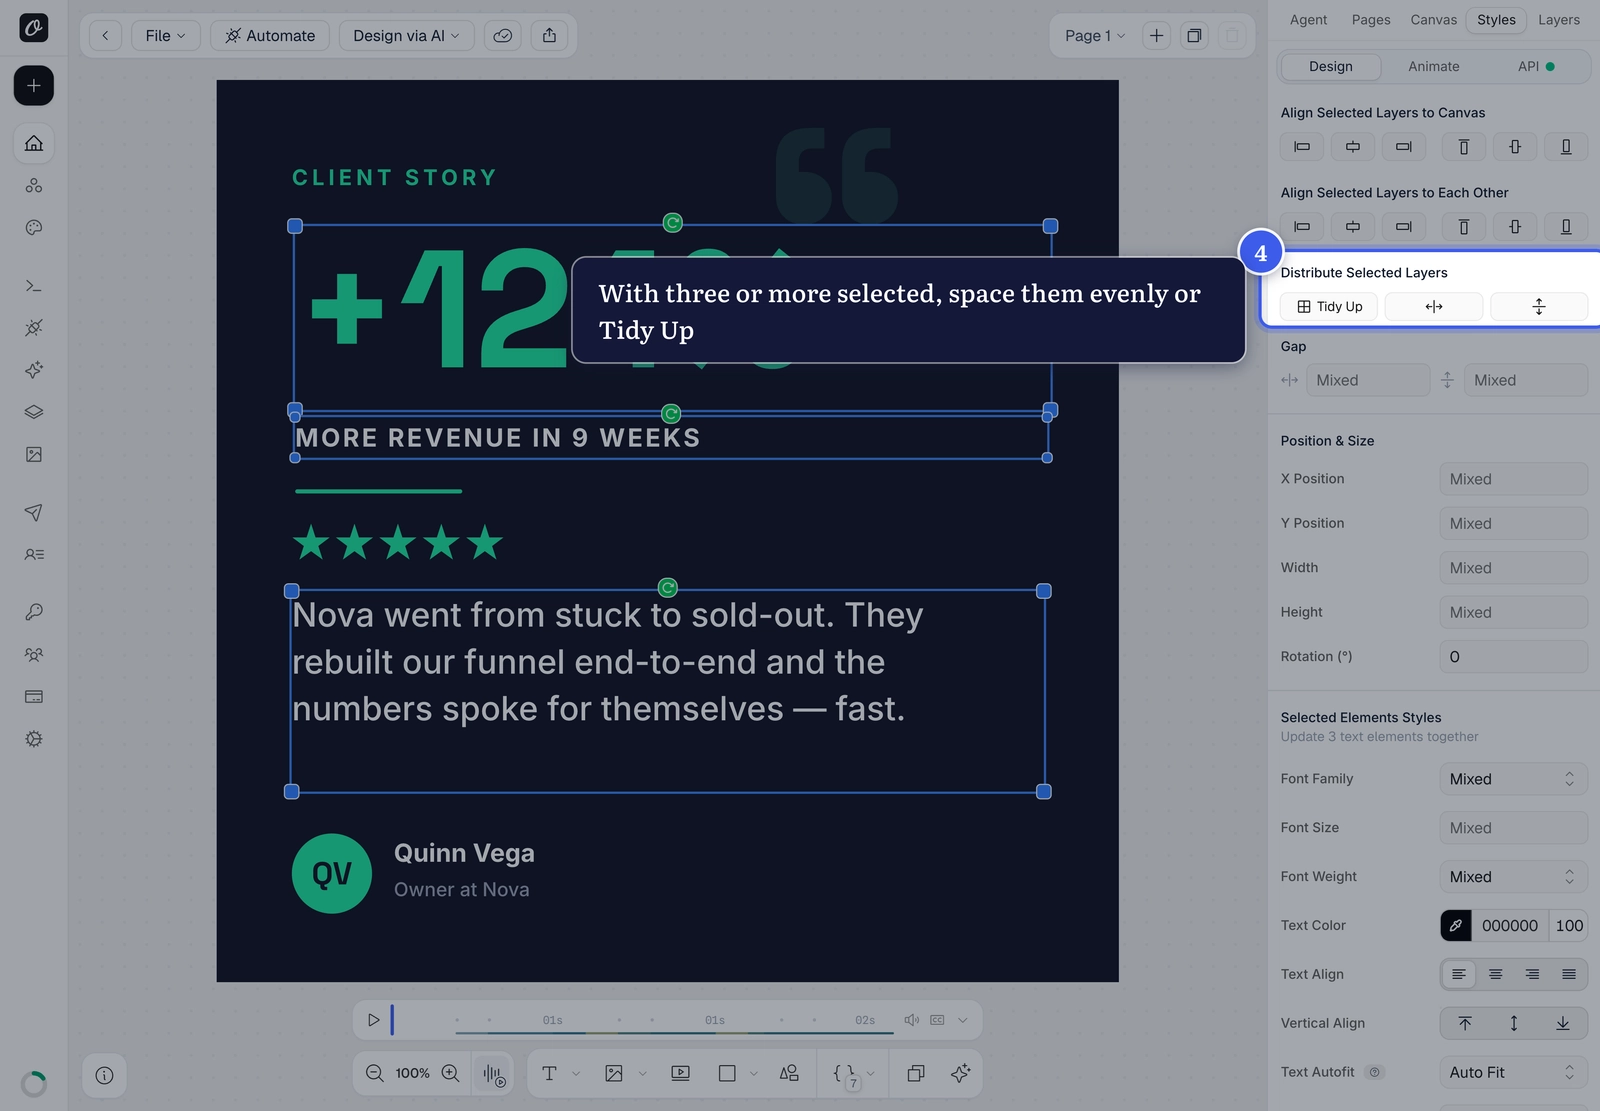
Select three or more layers and the Distribute Selected Layers row adds Tidy Up — even spacing in both directions — alongside buttons for even horizontal or vertical spacing. To set an exact distance instead, type a value into the Gap fields just below.
Nothing selected?
The alignment rows only appear once at least one layer is selected — click a layer on the canvas (or in the Layers panel) first.
Related#
More in Orshot Studio
Ready to automate?
Start rendering images, PDFs and videos from your templates in under 2 minutes. Free plan, no credit card.
Get your API key- Image, PDF and video generation via API
- Visual editor with AI and smart layouts
- Zapier, Make, MCP and 50+ integrations
- White-label embed for your own app
- 30 free credits — no credit card required